PKOS 4주차 - Harbor & Gitlab & ArgoCD
PKOS - Production Kubernetes Online Study 포스팅을 시작하며
PKOS 1주차 - AWS kOps 설치 및 기본 사용
PKOS 4주차 - Harbor & Gitlab & ArgoCD
PKOS 5주차 - Prometheus & Grafana
PKOS 6주차 - Alert Manager & Logging System
왜 그런지 모르겠는데 이미지 위아래로 여백이 생깁니다.
에디터에서는 안그러는데 왜 그런지 좀 찾아봐야겠습니다.
본 글은 초안이기에 다듬는 과정에서 내용이 수정될 수 있습니다.
PKOS 4주차
들어가기전에
본 내용은 CloudNet@ 팀에서 진행하는 쿠버네티스 실무 실습 스터디를 기반으로 작성된 내용입니다.
또한 개념 설명에서 사용된 이미지의 출처는 스터디 학습 자료에서 가져온 것을 밝힙니다.
4주차에는 쿠버네티스 환경에서 Application을 배포하는데 필요한 인프라, 파이프라인 도구인 Harbor, Gitlab, ArgoCD 실습을 진행했습니다.
과제 수행결과
- 과제 수행과정은 본문에 자세히 기술했습니다.
과제1
-
목표: Harbor 에 자신만의 아무 이미지나 태그해서 업로드하고 다운로드 해보고, 관련 스샷 올려주세요
-
수행결과
-
이미지 업로드
-
이미지 다운로드
-
과제2
-
목표: 자신만의 텍스트 파일을 kops-ec2 로컬에서 Gitlab 에 올려보고, 관련 스샷 올려주세요
-
수행결과
-
파일 업로드
-
파일 확인
-
과제3
- 목표: ArgoCD 챕터인, 책 273페이지의 ‘Gitops 실습: 클러스터 설정 내역 변경과 깃 저장소 자동 반영’을 직접 스스로 실습해보고, 관련 스샷 올려주세요
- 수행결과
-
깃랩 저장소에 httpd 업로드
-
httpd 파드 확인
-
오브젝트 삭제후 확인
-
Sync 후 재확인
-
Sync 후 변경된 이미지 버전 확인
-
1. 실습 환경 세팅
1.1 구성 환경
- 사전 준비
- AWS 계정, SSH 키 페어, IAM 계정 생성 후 키, S3 버킷
- 전체 구성도
- 기본 구성 환경은 1주차 내용과 동일
- 실습 환경 내용
- CloudFormation 스택 실행 시 파라미터를 기입하면, 해당 정보가 반영되어 배포됩니다.
- VPC는 kOps 배포를 위한 EC2가 위치할 MyVPC 1개와 실제 kOps 가 배포되어 구동되는 VPC 1개로 총 2개가 생성됩니다.
- CloudFormation 에 EC2의 UserData 부분(Script 실행)으로 AWS kOps 설치를 진행합니다.
- 마스터 노드 1대, 워커 노드는 기본은 2대로 구성됩니다.
- 실습 환경은 지난 주차와 다르게 노드 사양은 c5.2xlarge(vCPU 8, Memory 16GiB) 으로 진행 됩니다.
1.2 실습 환경
- 본 실습은 미국 동부(버지니아 북부)
us-east-1에서 진행됩니다.
1.2.1 S3 버킷 생성
- S3 URL 접속
- 버킷 만들기 버튼 클릭
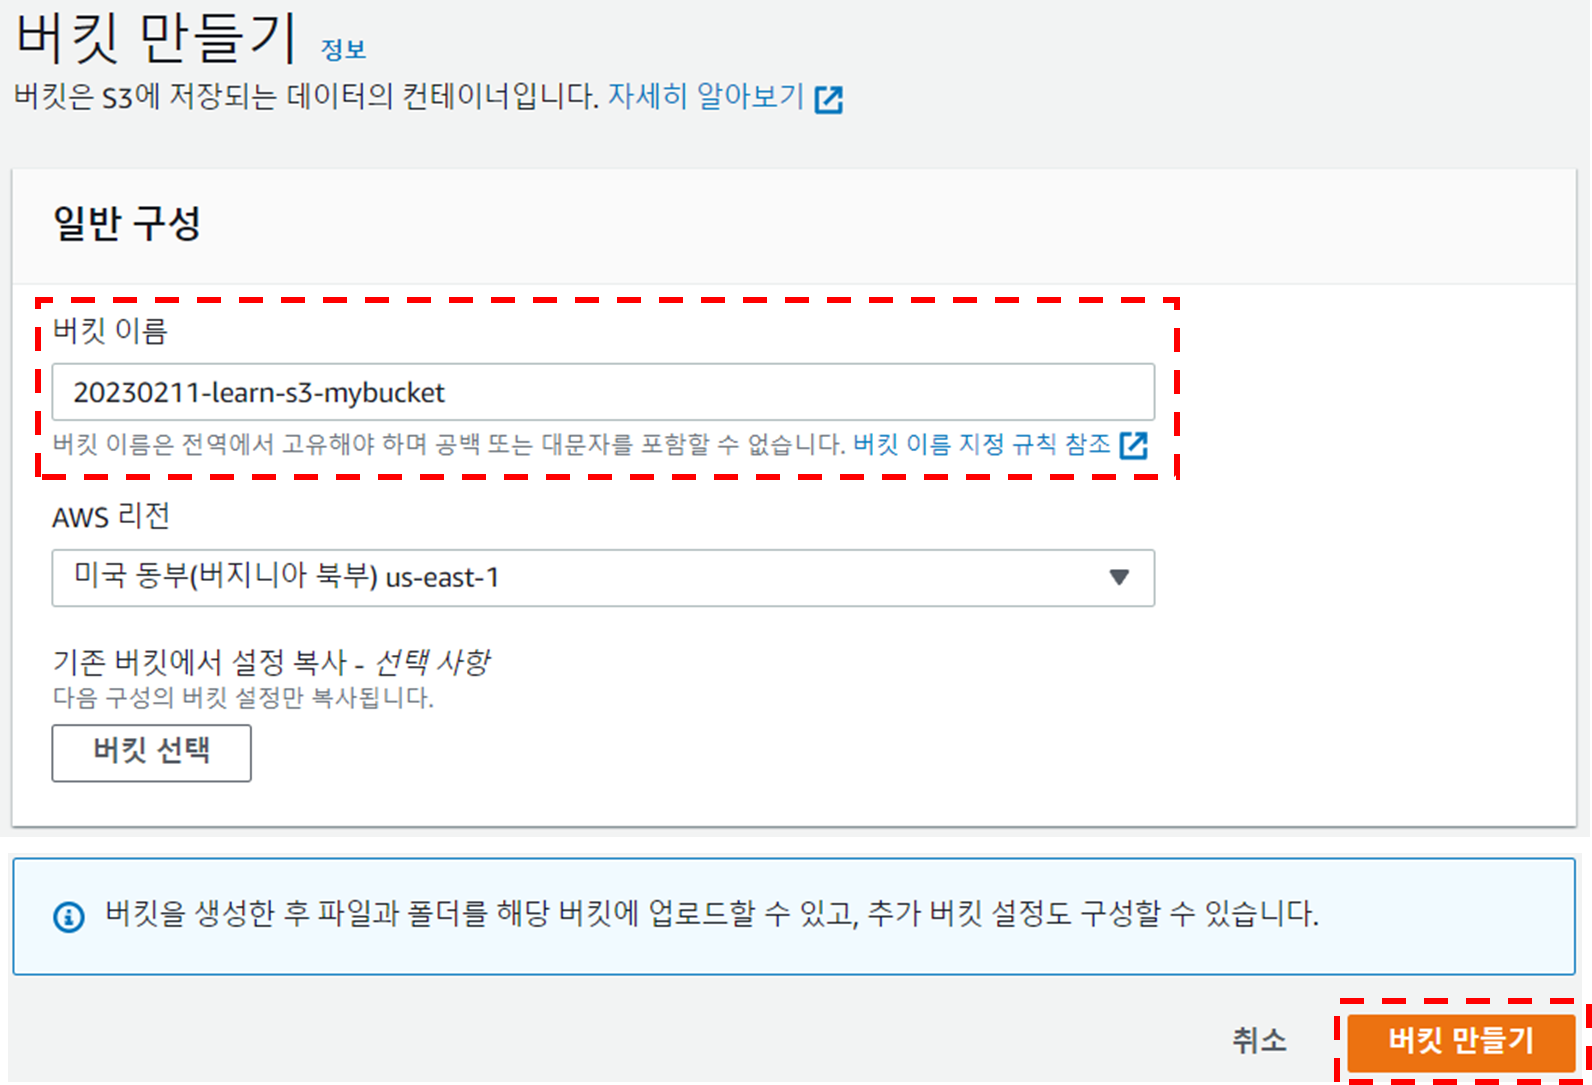
- 버킷 만들기
- 버킷 이름 설정 후 기본 설정 그대로 버킷 만들기 버튼 클릭
- 버킷 이름 : 20230211-learn-s3-mybucket

- 버킷 이름 설정 후 기본 설정 그대로 버킷 만들기 버튼 클릭
1.2.2 Cloud Formation을 이용한 kOps 생성(이하 배포)
-
Cloud Formation URL 접속 및 스택 생성 버튼 클릭
-
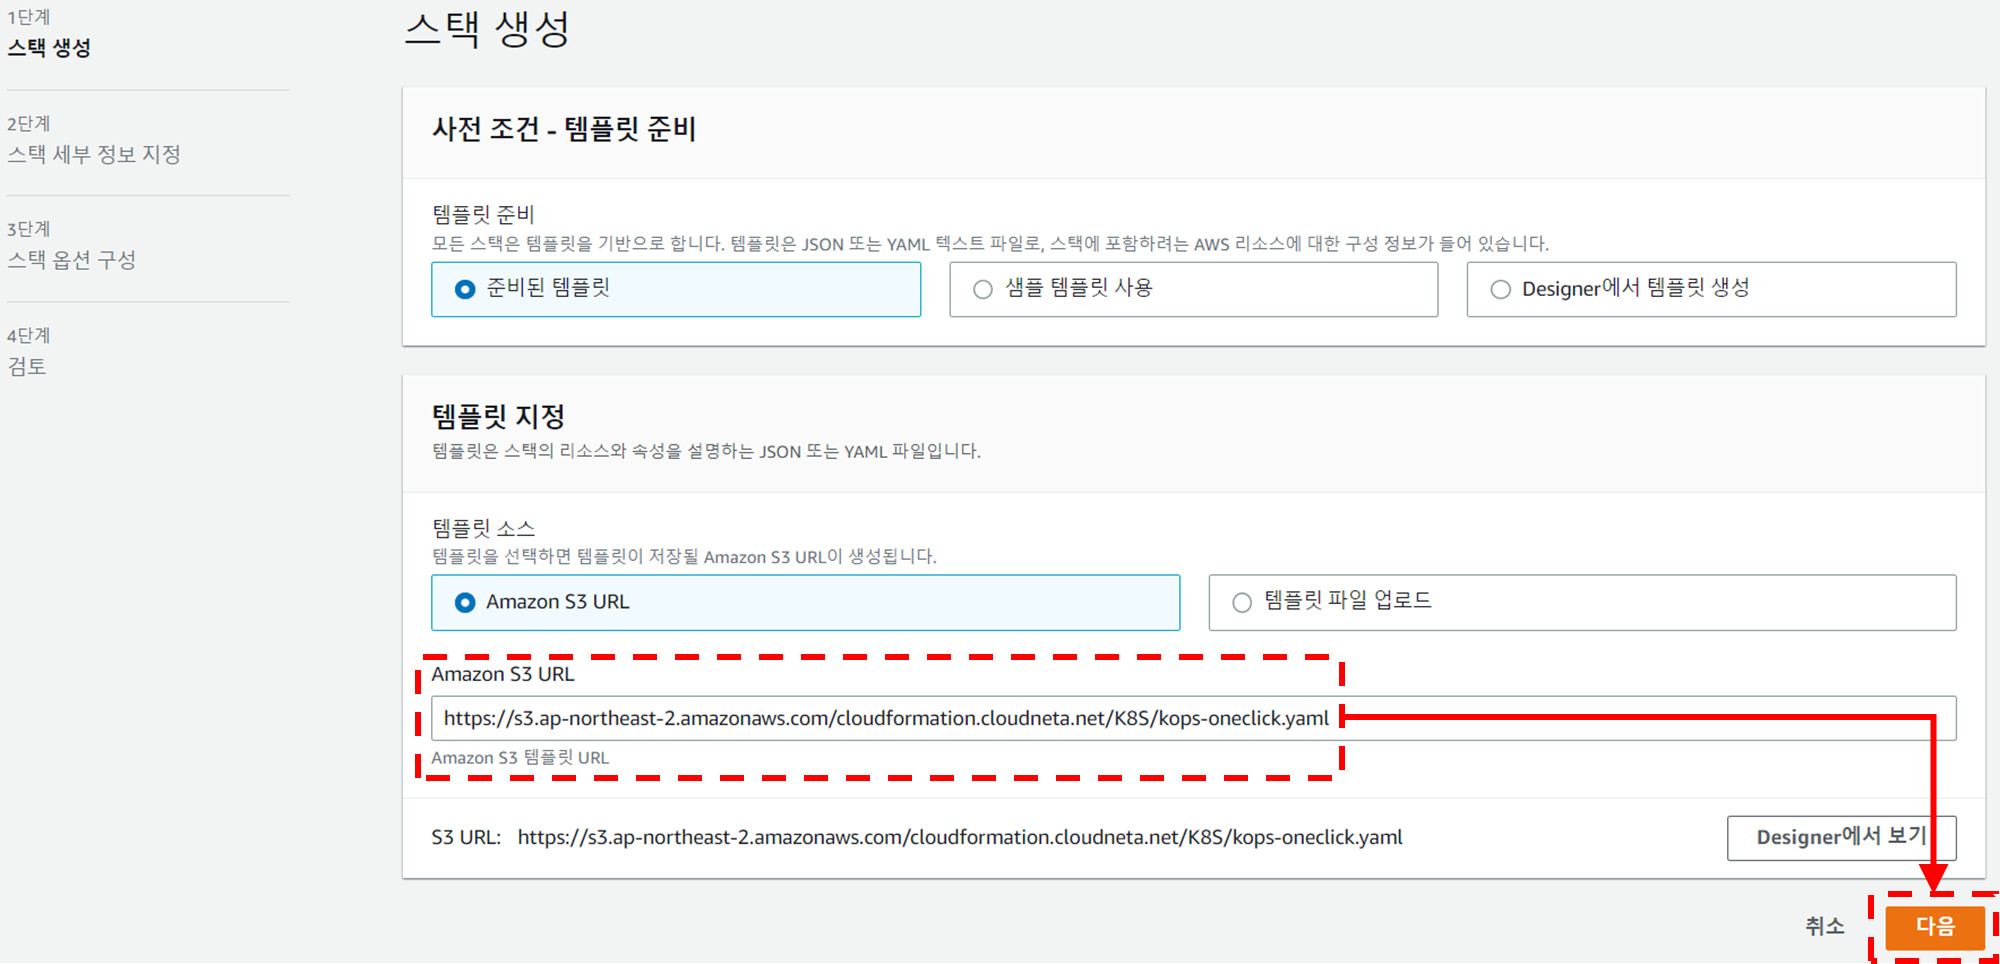
스택 생성 - 1단계 스택 생성
- 템플릿 소스 URL 입력 - Amazon S3 URL

-
스택 생성 - 2단계 스택 세부 정보 지정
-
스택 이름
- 스택 이름 : mkops

-
파라미터
-
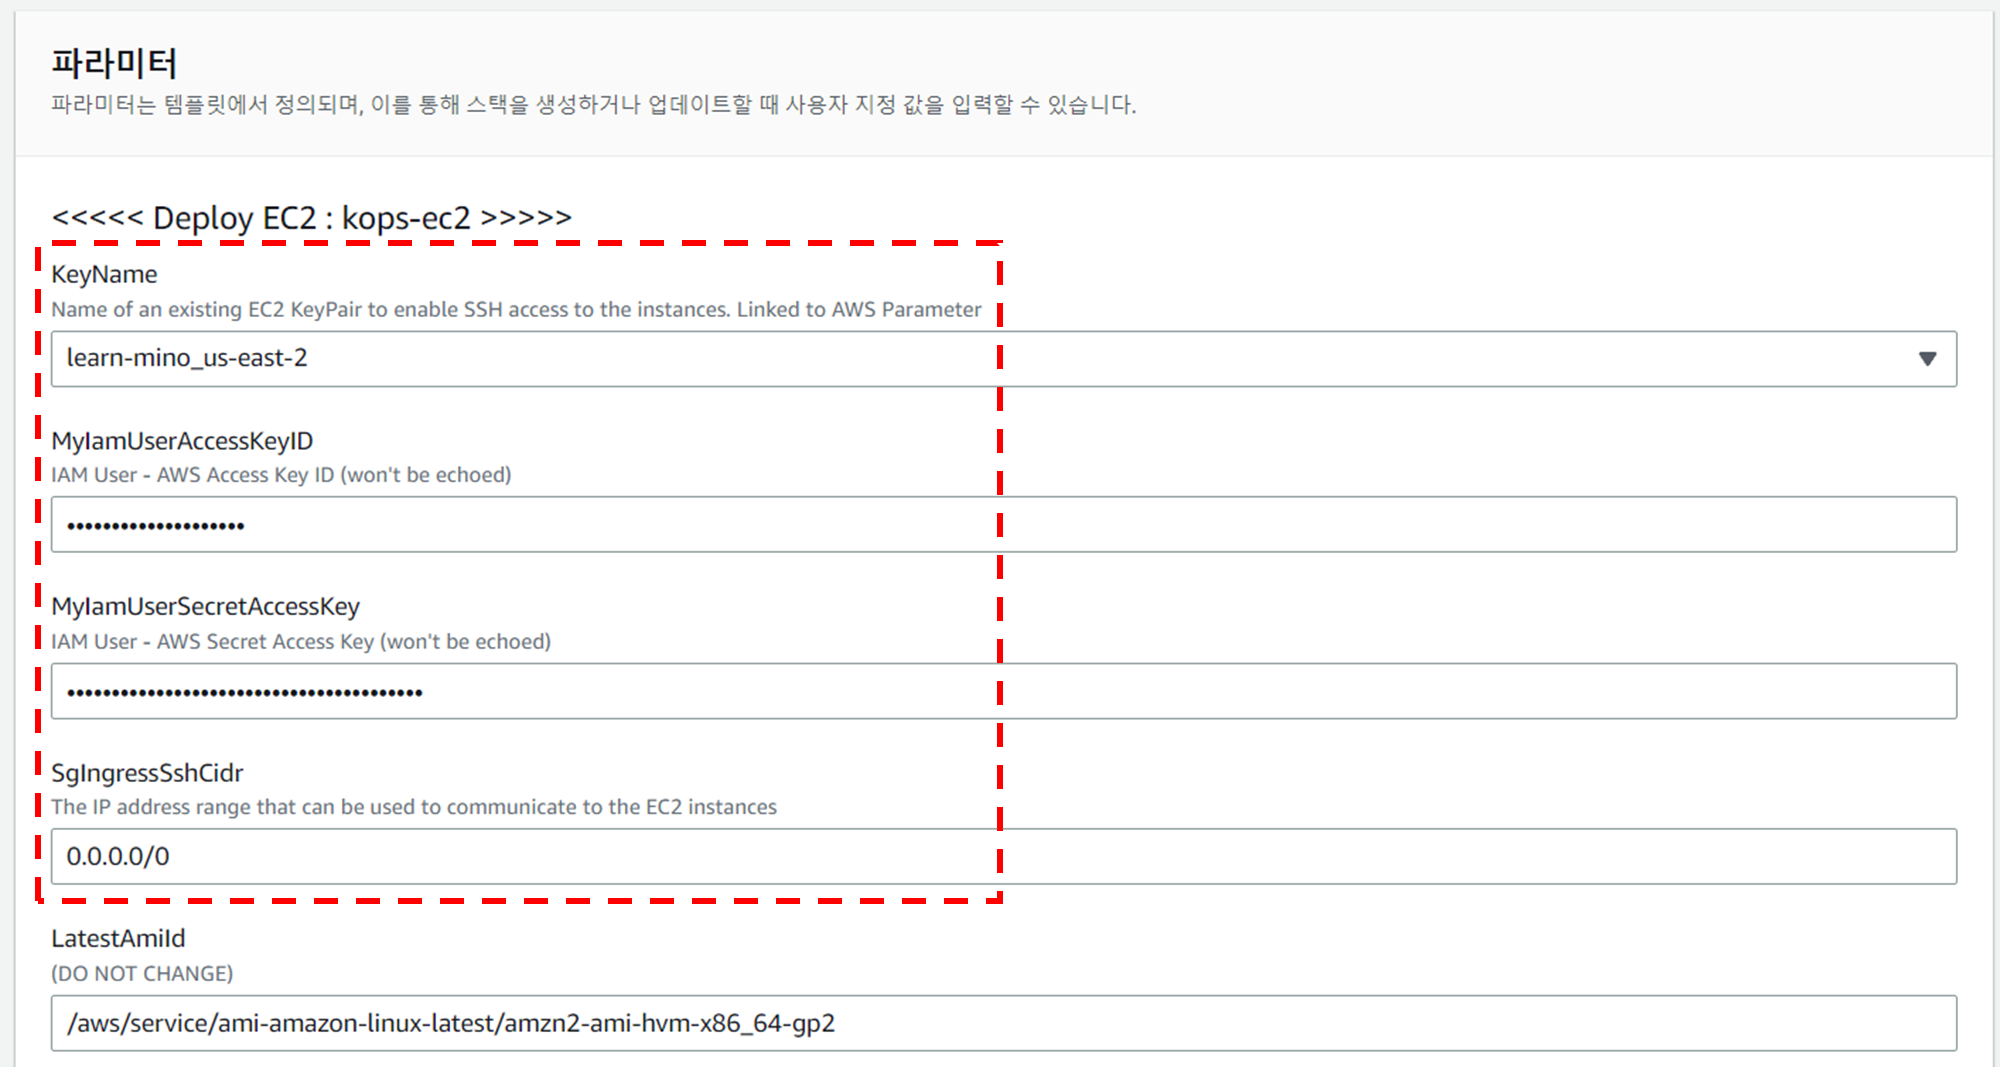
««< Deploy EC2 : kops-ec2 »»>
- 설정 설명
- KeyName : kops-ec2에 SSH 접속을 위한 SSH 키페어 선택 <- 미리 SSH 키 생성 해두자!
- MyIamUserAccessKeyID : 관리자 수준의 권한을 가진 IAM User의 액세스 키ID 입력
- MyIamUserSecretAccessKey : 관리자 수준의 권한을 가진 IAM User의 시크릿 키ID 입력 <- 노출되지 않게 보안 주의
- SgIngressSshCidr : kops-ec2에 SSH 접속 가능한 IP 입력 (집 공인IP/32 입력), 보안그룹 인바운드 규칙에 반영됨
- LatestAmiId : kops-ec2에 사용할 AMI는 아마존리눅스2 최신 버전 사용, 기본값 그대로 사용
- 설정 내용
- 사용자 설정 입력

- 설정 설명
-
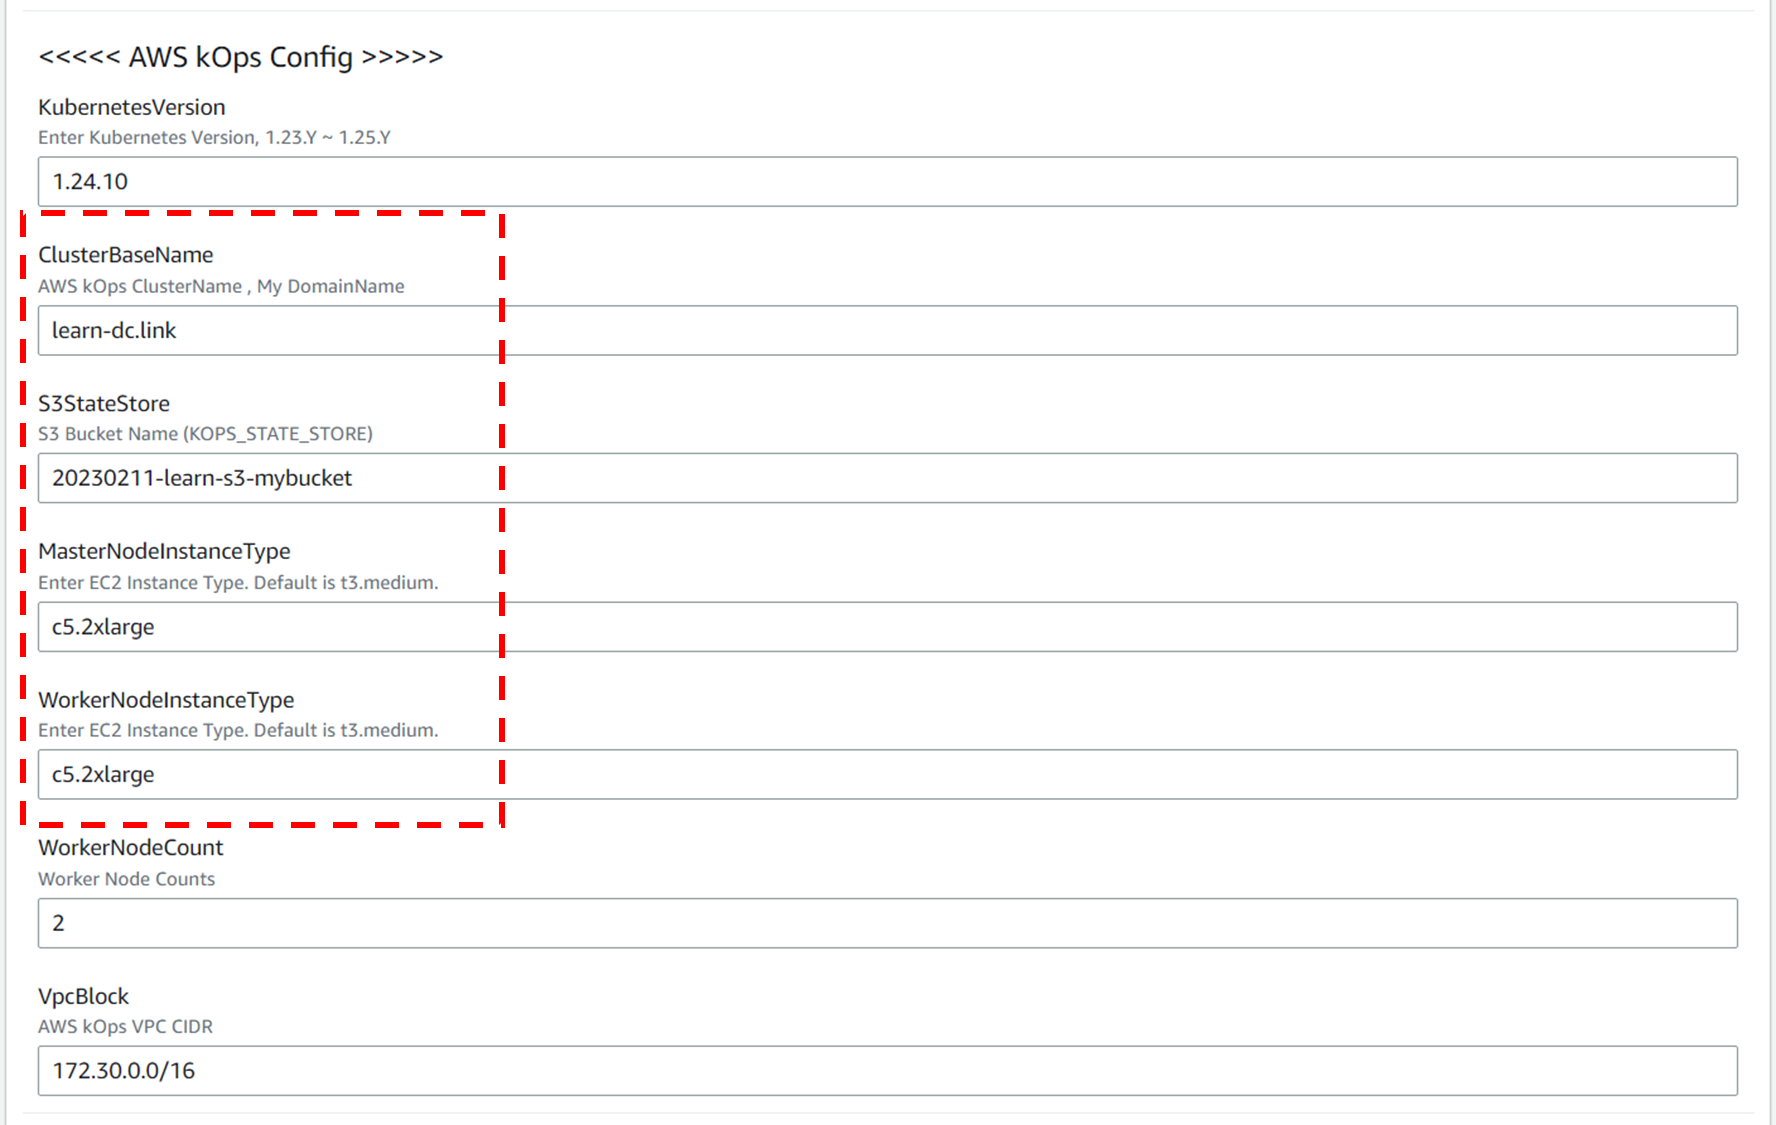
««< AWS kOps Config »»>
-
설정 설명
-
KubernetesVersion : 쿠버네티스 설치 버전 (기본 v1.24.9) ⇒ 변경 가능
-
ClusterBaseName : kOps 클러스터 이름이며, 사용하게될 도메인 이름이다. ‘퍼블릭 도메인’ or ‘프라이빗 도메인’ or ‘Gossip DNS’ 가능
-
S3StateStore : kOps 클러스터의 설정/상태 정보가 저장될 S3 버킷의 이름을 지정 ← 미리 S3 버킷을 생성 해두자!
-
MasterNodeInstanceType & WorkerNodeInstanceType: 마스터(기본 t3.medium) & 워커 노드 EC2 인스턴스의 타입 (기본 t3.medium) ⇒ 변경 가능
-
WorkerNodeCount : 워커노드의 갯수를 입력 ⇒ 변경 가능
-
VpcBlock : kOps 배포되고 동작할 VPC 네트워크 대역, 기본값 그대로 사용
-
-
설정 내용
- 다음 설정 외 기본 설정 사용
- ClusterBaseName
- learn-dc.link
- S3StateStore : 위에 생성한 버킷 명칭 입력
- 20230211-learn-s3-mybucket
- MasterNodeInstanceType & WorkerNodeInstanceType
- c5.2xlarge
- ClusterBaseName
- 다음 설정 외 기본 설정 사용
-

-
-
««< Region AZ »»>
- 설정 설명
- TargetRegion : kOps를 배포할 리전
- AvailabliltyZone1 : kOps를 배포할 리전의 가용 영역
- AvailabliltyZone2 : kOps를 배포할 리전의 가용 영역
- 설정 내용
- TargetRegion : us-east-1
- AvailabliltyZone1 : us-east-1a
- AvailabliltyZone2 : us-east-1c

- 설정 설명
-
-
다음 버튼 클릭
-
-
스택 생성 - 3단계 스택 옵션
- 기본 설정 그대로 다음 버튼 클릭
- 기본 설정 그대로 다음 버튼 클릭
-
스택 생성 - 4단계 mkops 검토
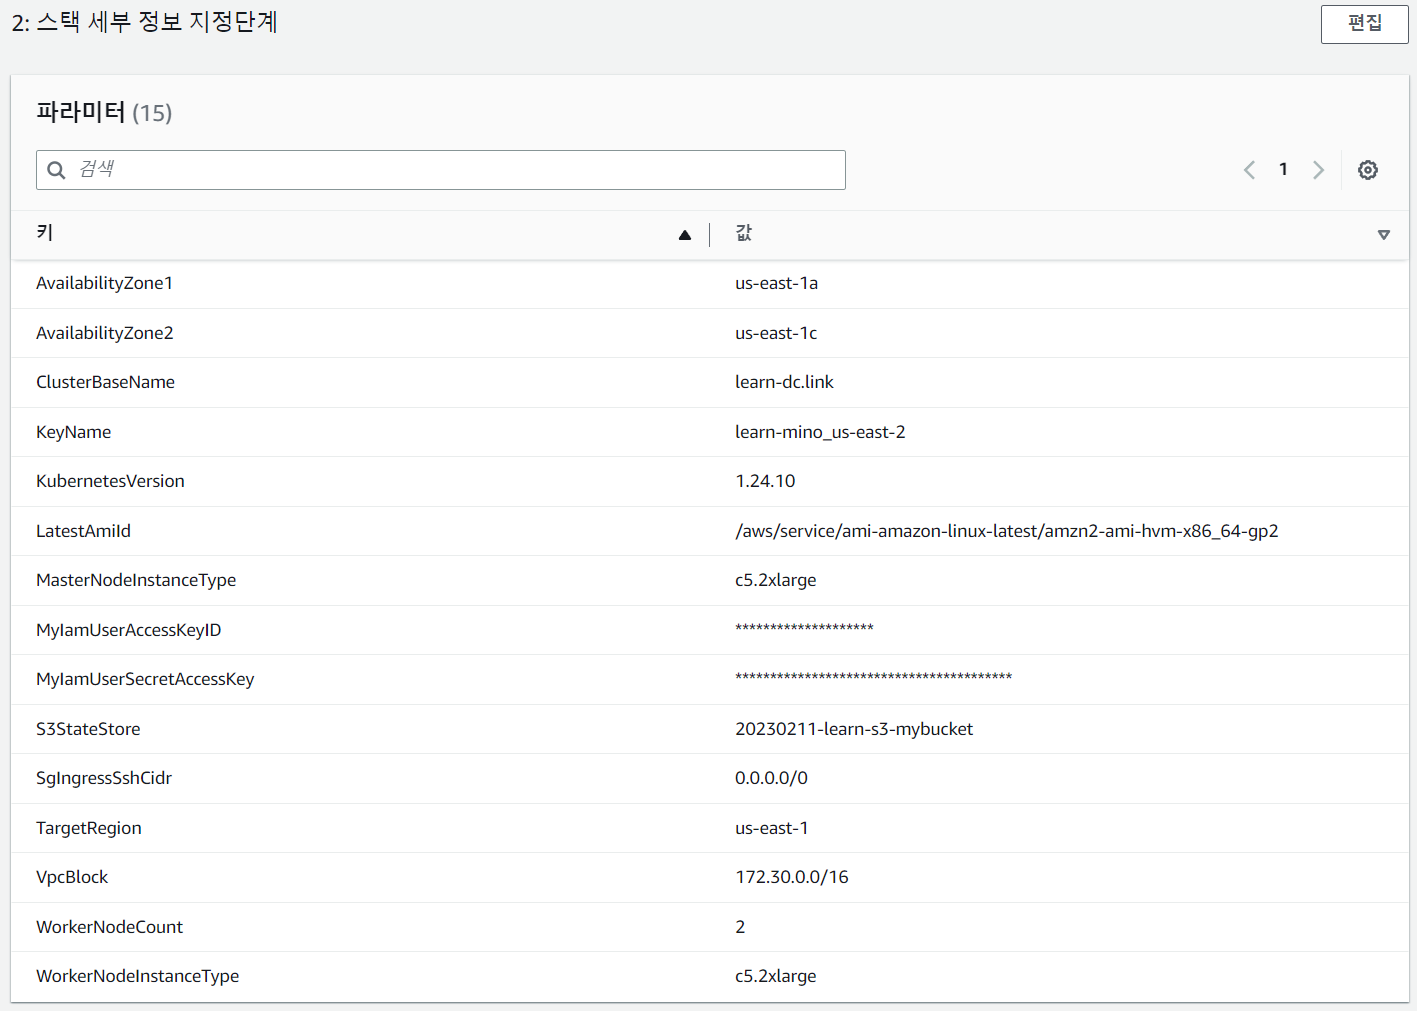
- 스택 파라미터 설정 확인
- 기본 설정 그대로 전송 버튼 클릭
- 스택 파라미터 설정 확인
-
스택 생성 확인 및 접속 IP 확인
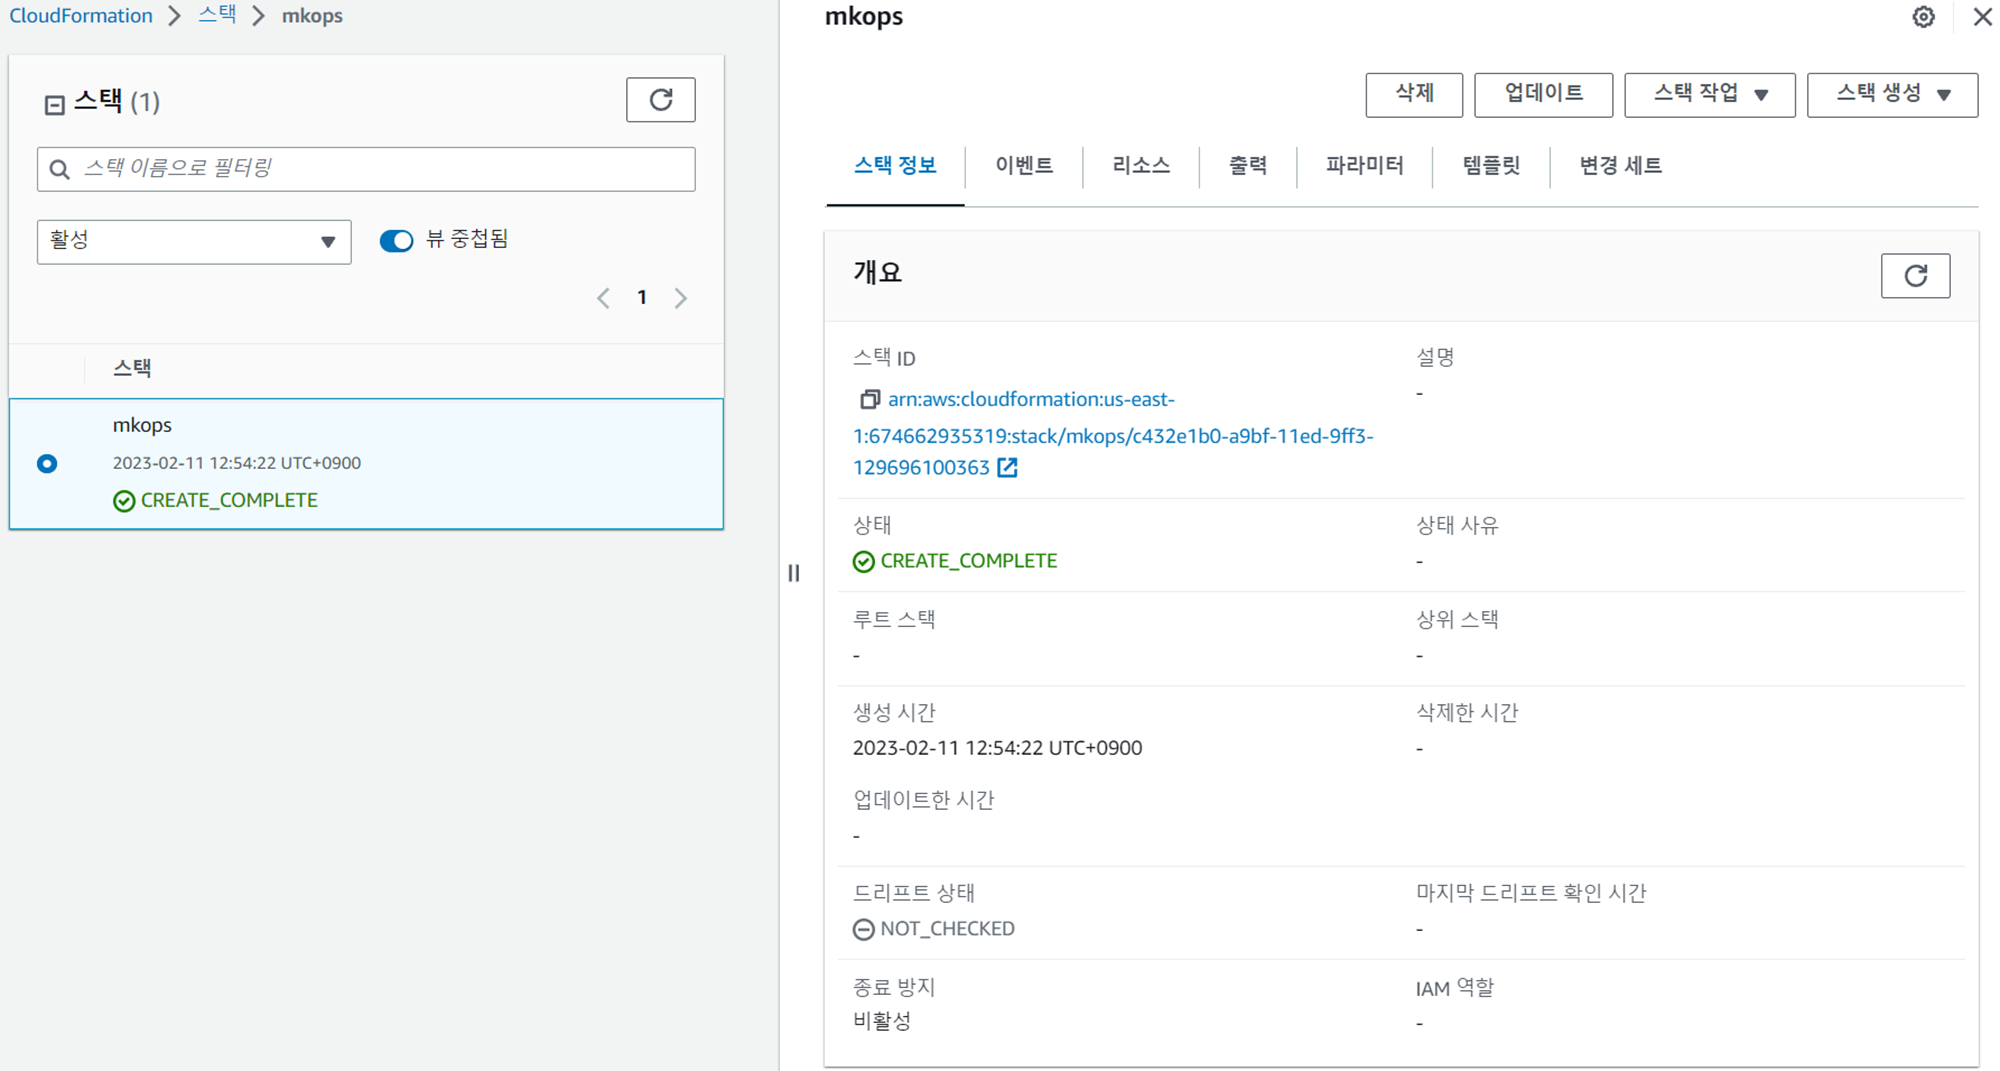
- 스택 생성 확인
- 접속 IP 확인
- KOPSEC2IP : 54.162.44.187

- 스택 생성 확인
1.2.3 kOps 배포 확인
1. 접속 후 기본 설정
-
마스터노드 SSH 접속 - Putty
-
default NS 진입
-
1kubectl ns default
-
2. 도커 엔진 확인 : kops 인스턴스 t3.small
-
도커 설치 : 이미 되어 있음
-
1
2
# amazon-linux-extras install docker -y # systemctl start docker && systemctl enable docker
-
-
설치된 패키지 확인 : 도커 엔진 확인
-
1yum list installed
-
-
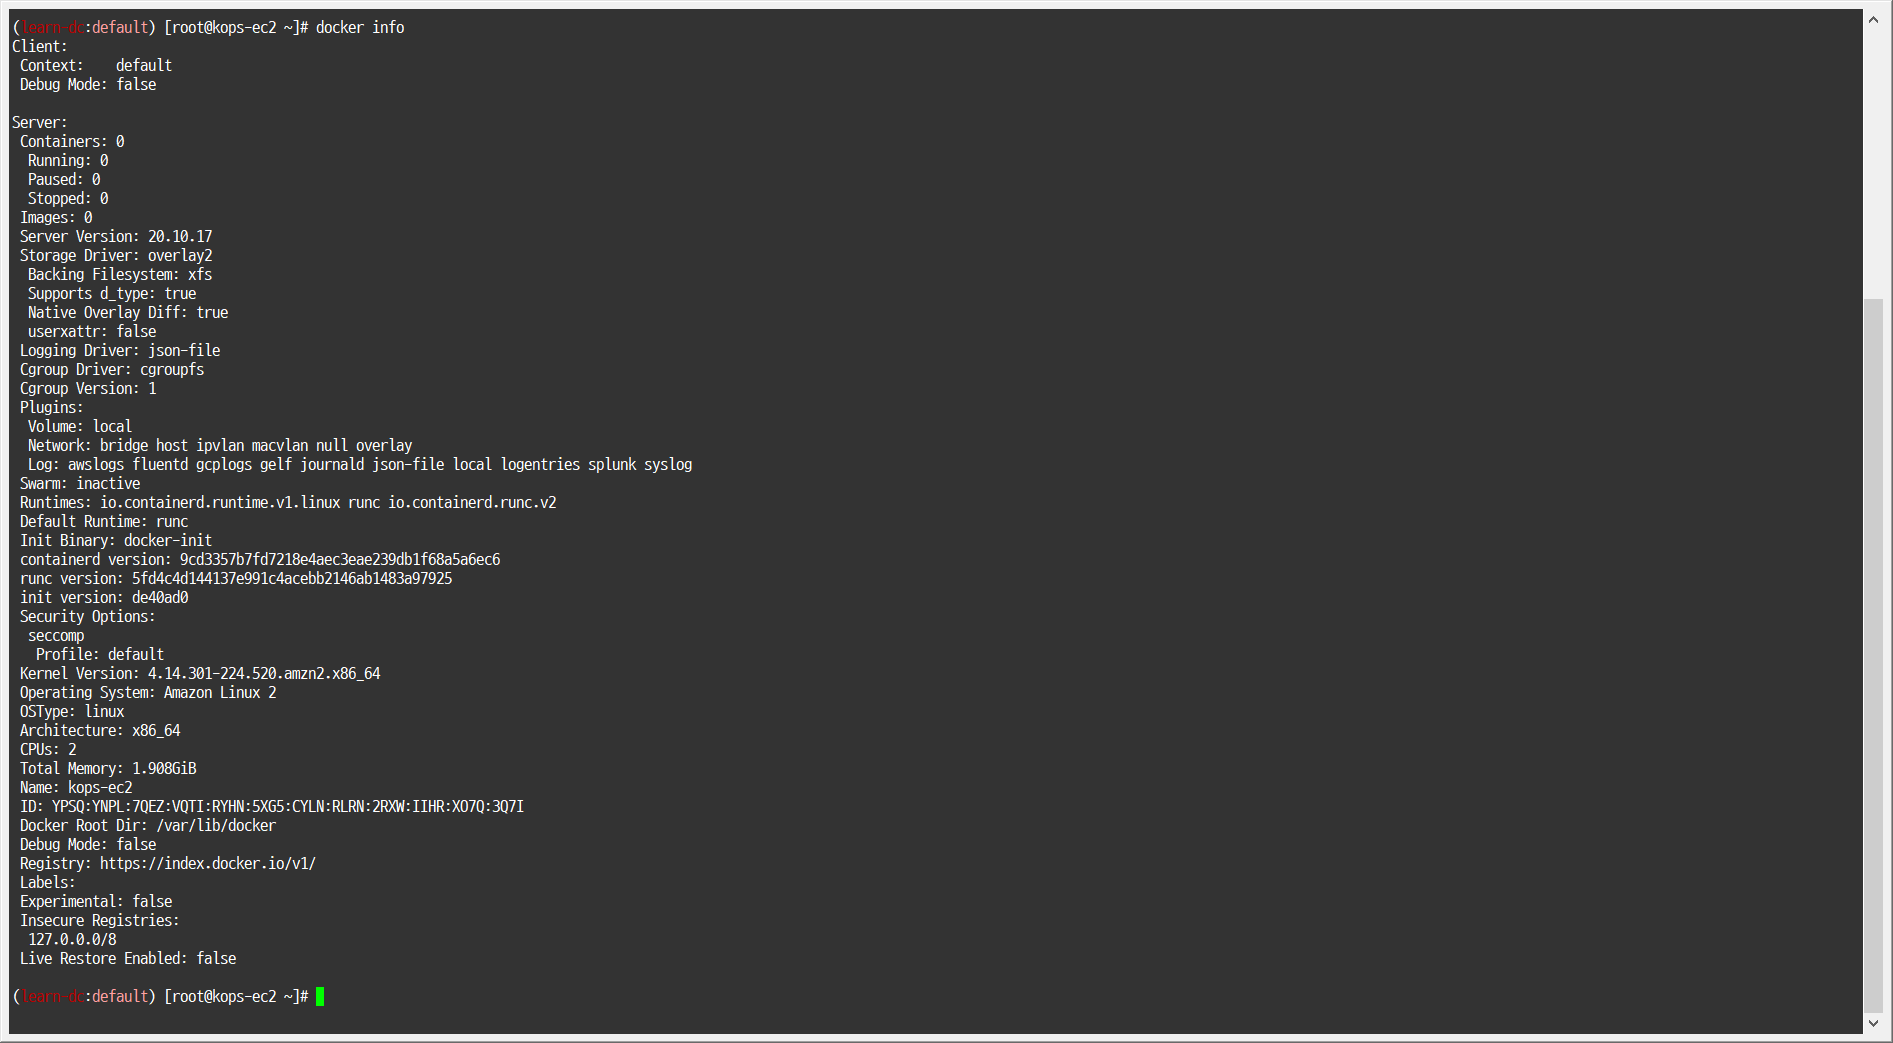
도커 정보 확인 : client - server, Docker Root Dir, Registry
-
1docker info
-
-
도커 정보 확인 : Docker Engine - Community
-
1docker version
-
-
도커 서비스 상태 확인
-
1systemctl status docker
-
-
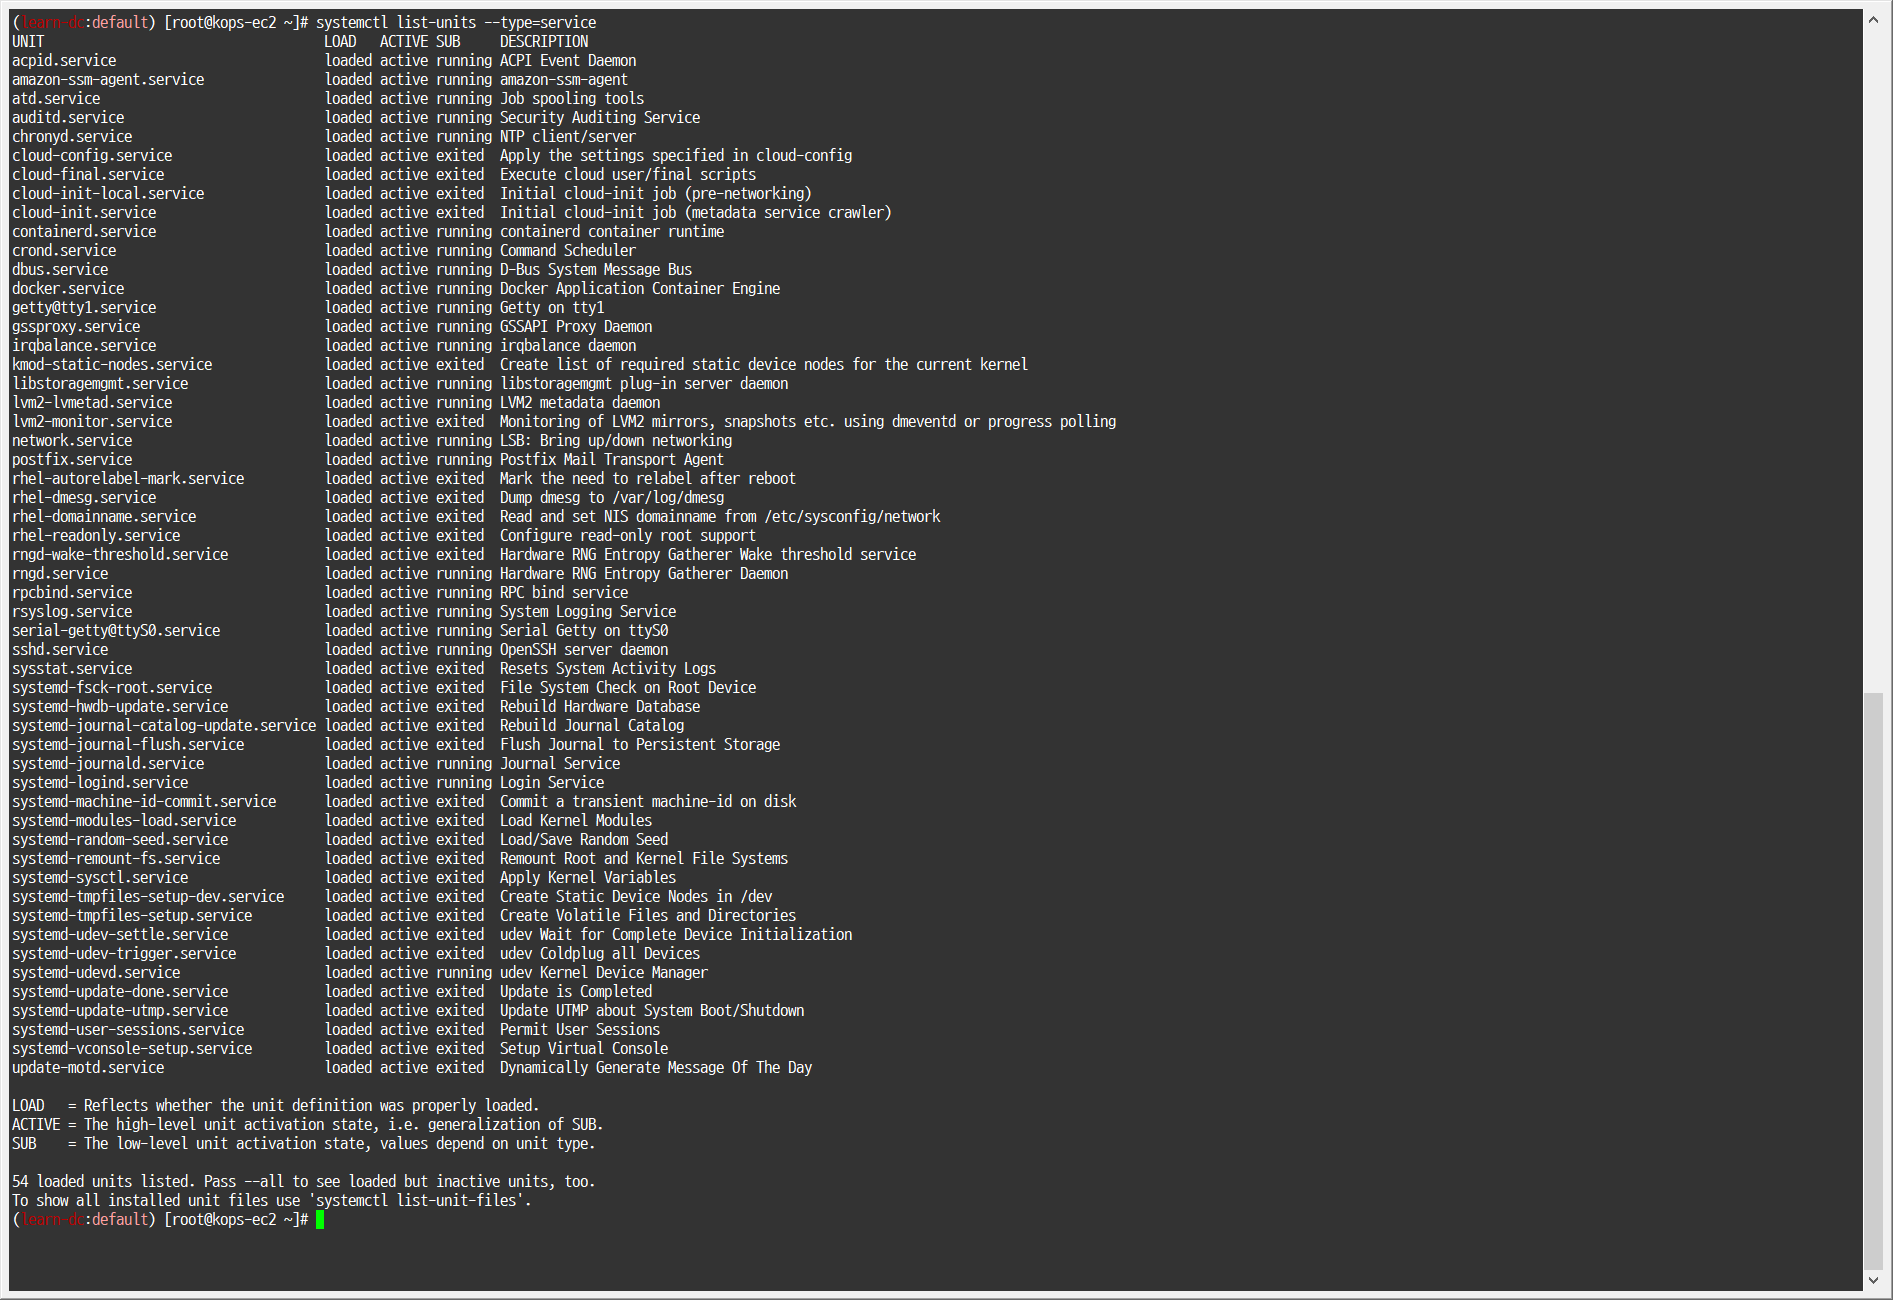
모든 서비스의 상태 표시 - 링크
-
1systemctl list-units --type=service
-
-
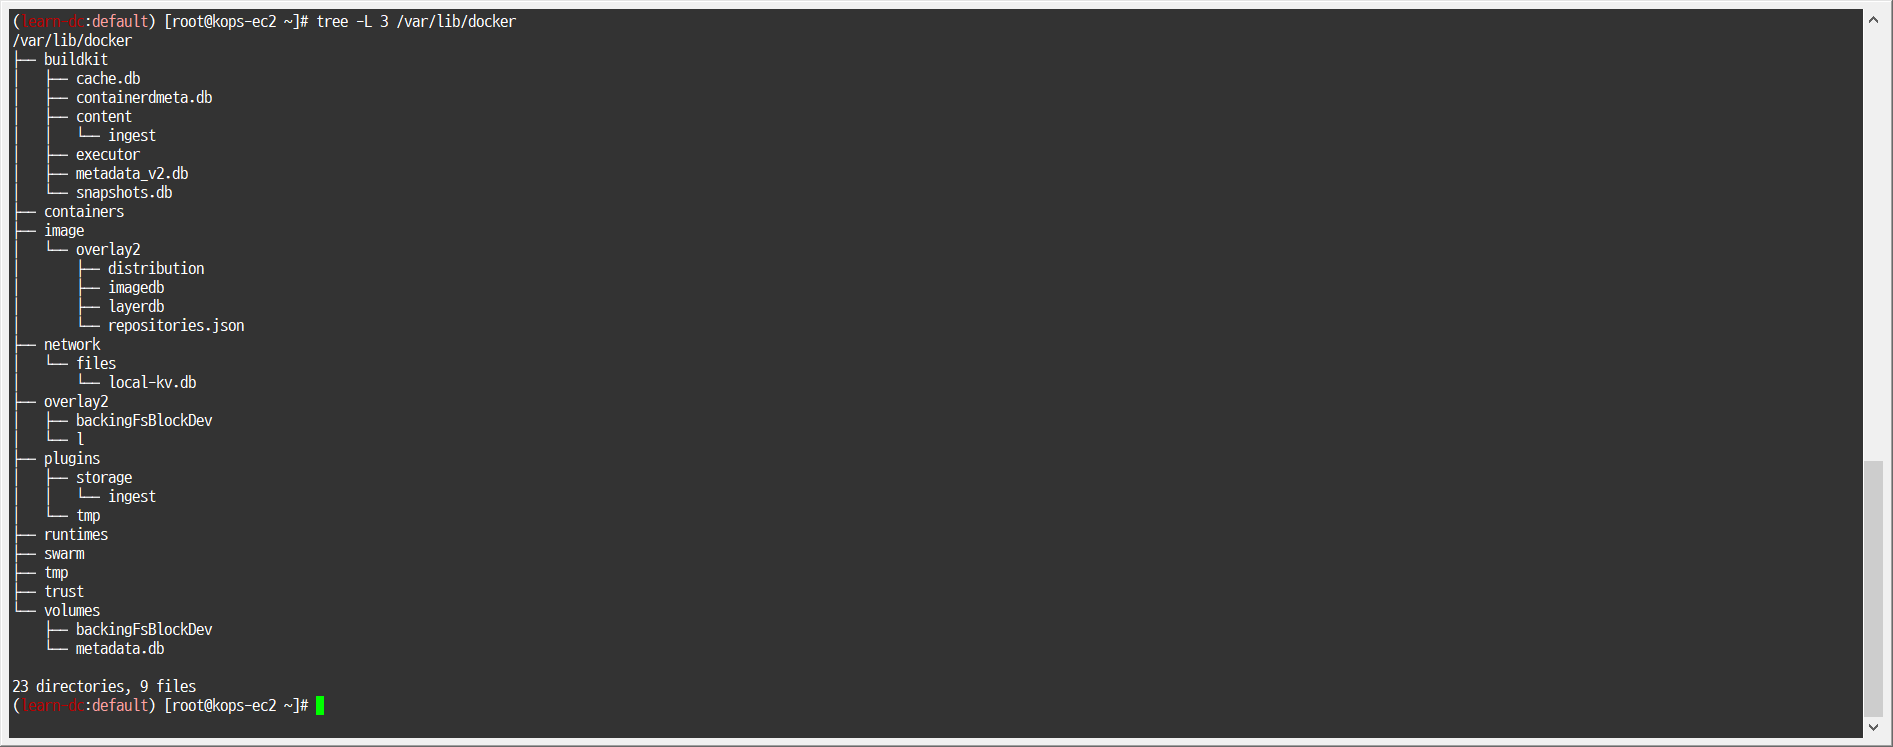
도커 루트 디렉터리 확인
-
1tree -L 3 /var/lib/docker
-
3. EC2 instance profiles 설정 및 AWS LoadBalancer 배포 & ExternalDNS 설치 및 배포
-
EC2 instance profiles 에 IAM Policy 추가(attach)
-
1
2
3
4
aws iam attach-role-policy --policy-arn arn:aws:iam::$ACCOUNT_ID:policy/AWSLoadBalancerControllerIAMPolicy --role-name masters.$KOPS_CLUSTER_NAME aws iam attach-role-policy --policy-arn arn:aws:iam::$ACCOUNT_ID:policy/AWSLoadBalancerControllerIAMPolicy --role-name nodes.$KOPS_CLUSTER_NAME aws iam attach-role-policy --policy-arn arn:aws:iam::$ACCOUNT_ID:policy/AllowExternalDNSUpdates --role-name masters.$KOPS_CLUSTER_NAME aws iam attach-role-policy --policy-arn arn:aws:iam::$ACCOUNT_ID:policy/AllowExternalDNSUpdates --role-name nodes.$KOPS_CLUSTER_NAME
-
-
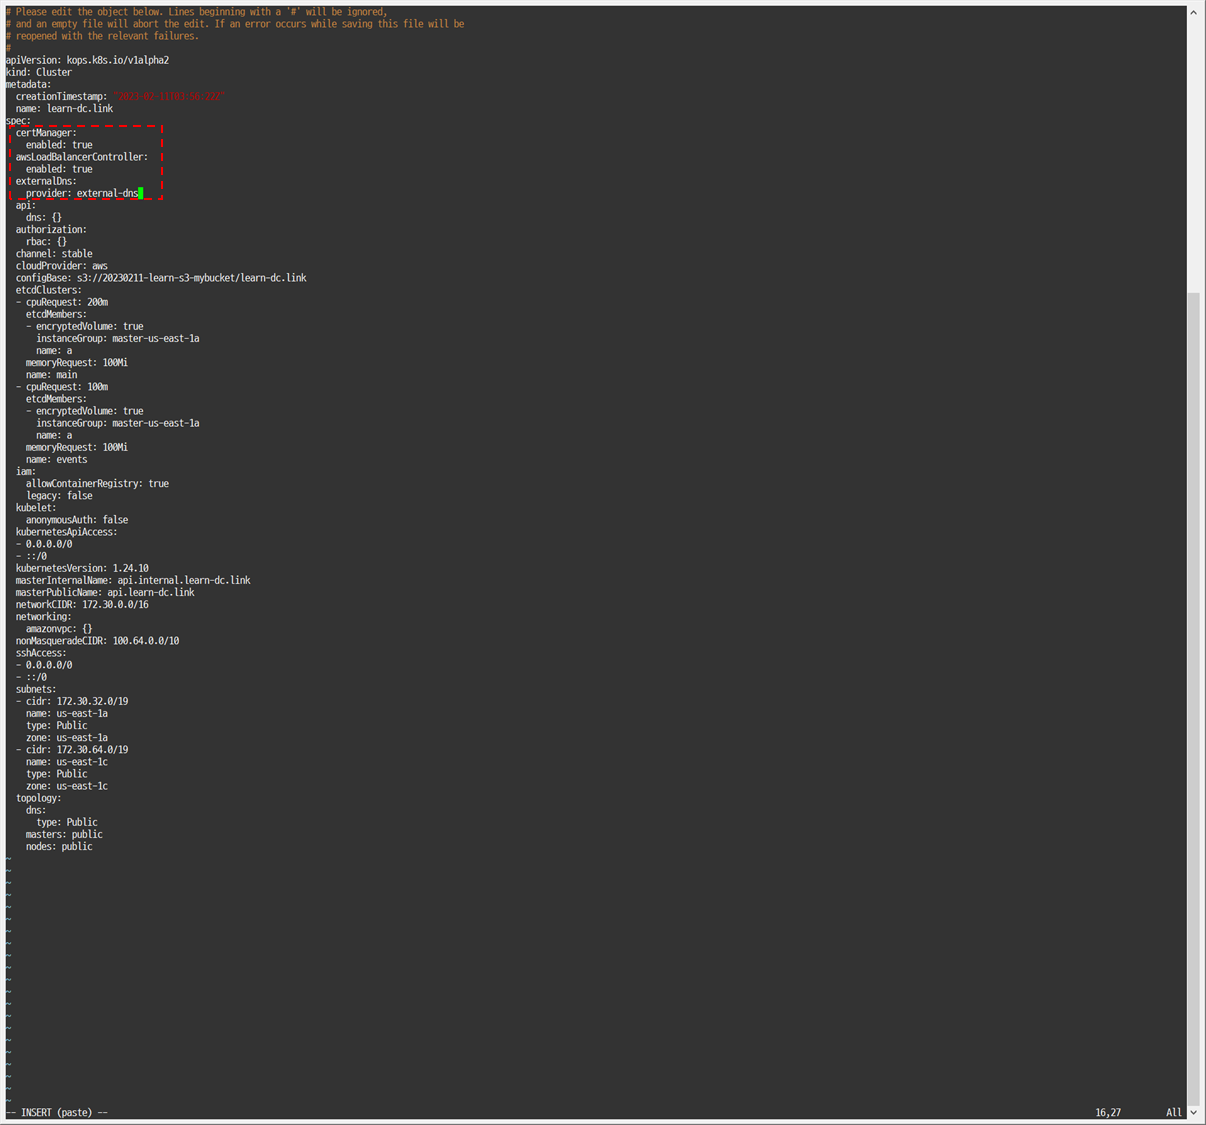
kOps 클러스터 편집 : 아래 내용 추가
-
 1
 2
 3
 4
 5
 6
 7
 8
 9
10
11
kops edit cluster # ... # spec: # certManager: # enabled: true # awsLoadBalancerController: # enabled: true # externalDns: # provider: external-dns # ...
-
-
업데이트 적용
-
1kops update cluster --yes && echo && sleep 3 && kops rolling-update cluster
-
2. 하버(Harbor)를 이용하여 로컬 컨테이너 이미지 저장소 구축하기
소개: 온프레미스 환경에서 컨테이너 이미지 저장소, 최소 Spec(2CPU, 4Mem, Disk 40GB)- Harbor is an open source registry that secures artifacts with policies and role-based access control, ensures images are scanned and free from vulnerabilities, and signs images as trusted
2.1 헬름 차트로 하버 설치 - HelmChart Docs
-
사용 리전의 인증서 ARN 확인
-
1
2
3
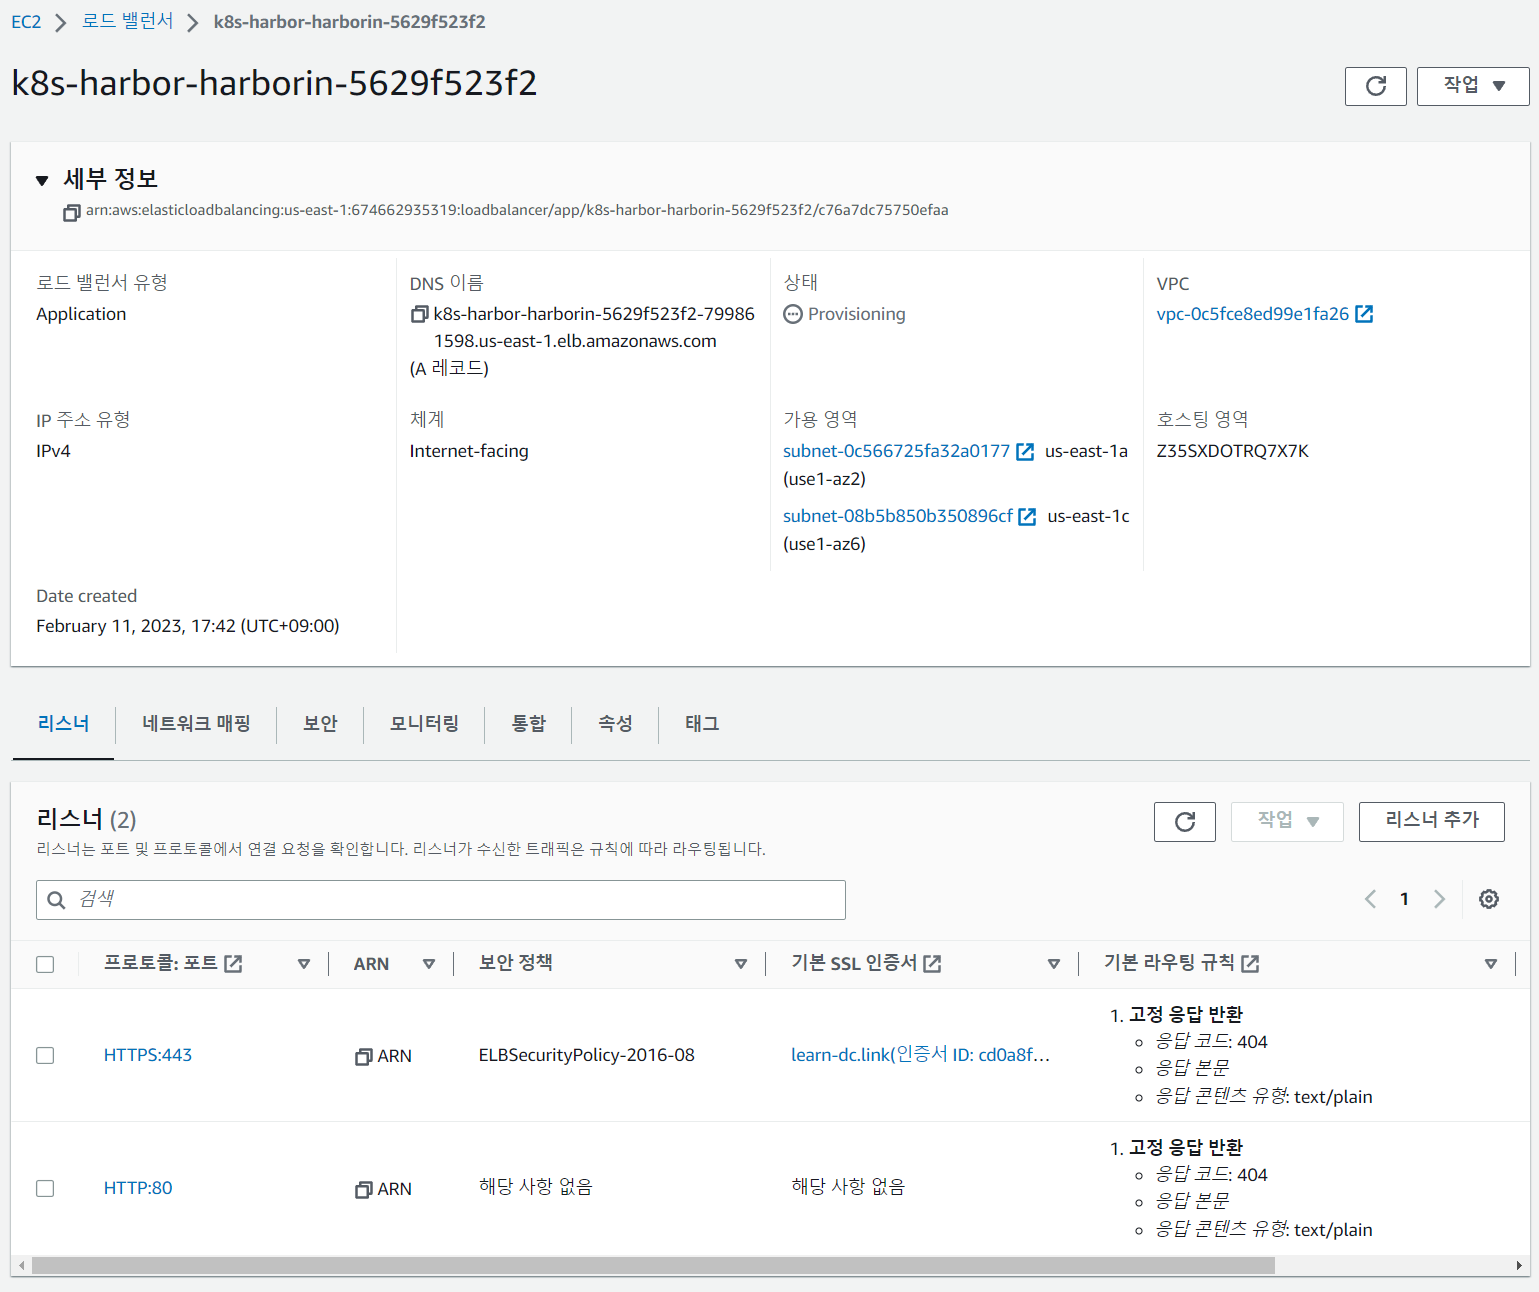
aws acm list-certificates --query 'CertificateSummaryList[].CertificateArn[]' --output text CERT_ARN=`aws acm list-certificates --query 'CertificateSummaryList[].CertificateArn[]' --output text` echo "alb.ingress.kubernetes.io/certificate-arn: $CERT_ARN"
-
-
하버 설치
-
 1
 2
 3
 4
 5
 6
 7
 8
 9
10
11
12
13
14
15
16
17
18
19
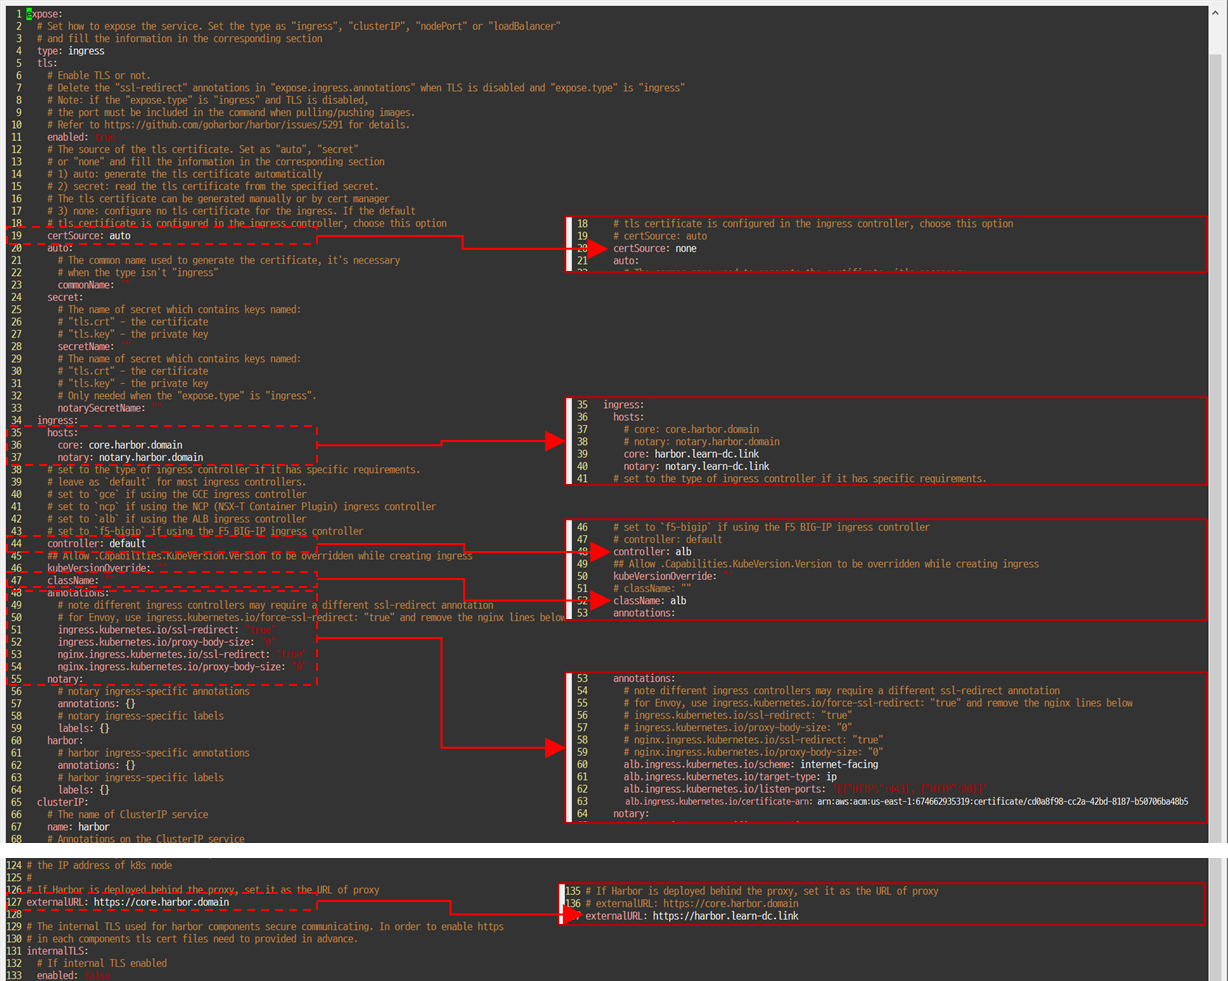
helm repo add harbor https://helm.goharbor.io helm fetch harbor/harbor --untar vim ~/harbor/values.yaml # ... # expose.tls.certSource=none # 19줄 ## expose.ingress.hosts.core=harbor.<각자자신의도메인> # 36줄 ## expose.ingress.hosts.notary=notary.<각자자신의도메인> # 37줄 # expose.ingress.hosts.core=harbor.learn-dc.link # expose.ingress.hosts.notary=notary.learn-dc.link # expose.ingress.controller=alb # 44줄 # expose.ingress.className=alb # 47줄 # expose.ingress.annotations=alb.ingress.kubernetes.io/scheme: internet-facing # expose.ingress.annotations=alb.ingress.kubernetes.io/target-type: ip # expose.ingress.annotations=alb.ingress.kubernetes.io/listen-ports: '[{"HTTPS":443}, {"HTTP":80}]' # expose.ingress.annotations=alb.ingress.kubernetes.io/certificate-arn: ${CERT_ARN} ## externalURL=https://harbor.<각자자신의도메인> # 127줄 # externalURL=https://harbor.learn-dc.link # ...
-
-
모니터링
-
1
2
kubectl create ns harbor watch kubectl get pod,pvc,ingress -n harbor
-
-
설치
-
1helm install harbor harbor/harbor -f ~/harbor/values.yaml --namespace harbor --version 1.11.0
-
-
확인
-
1
2
3
4
5
6
7
8
9
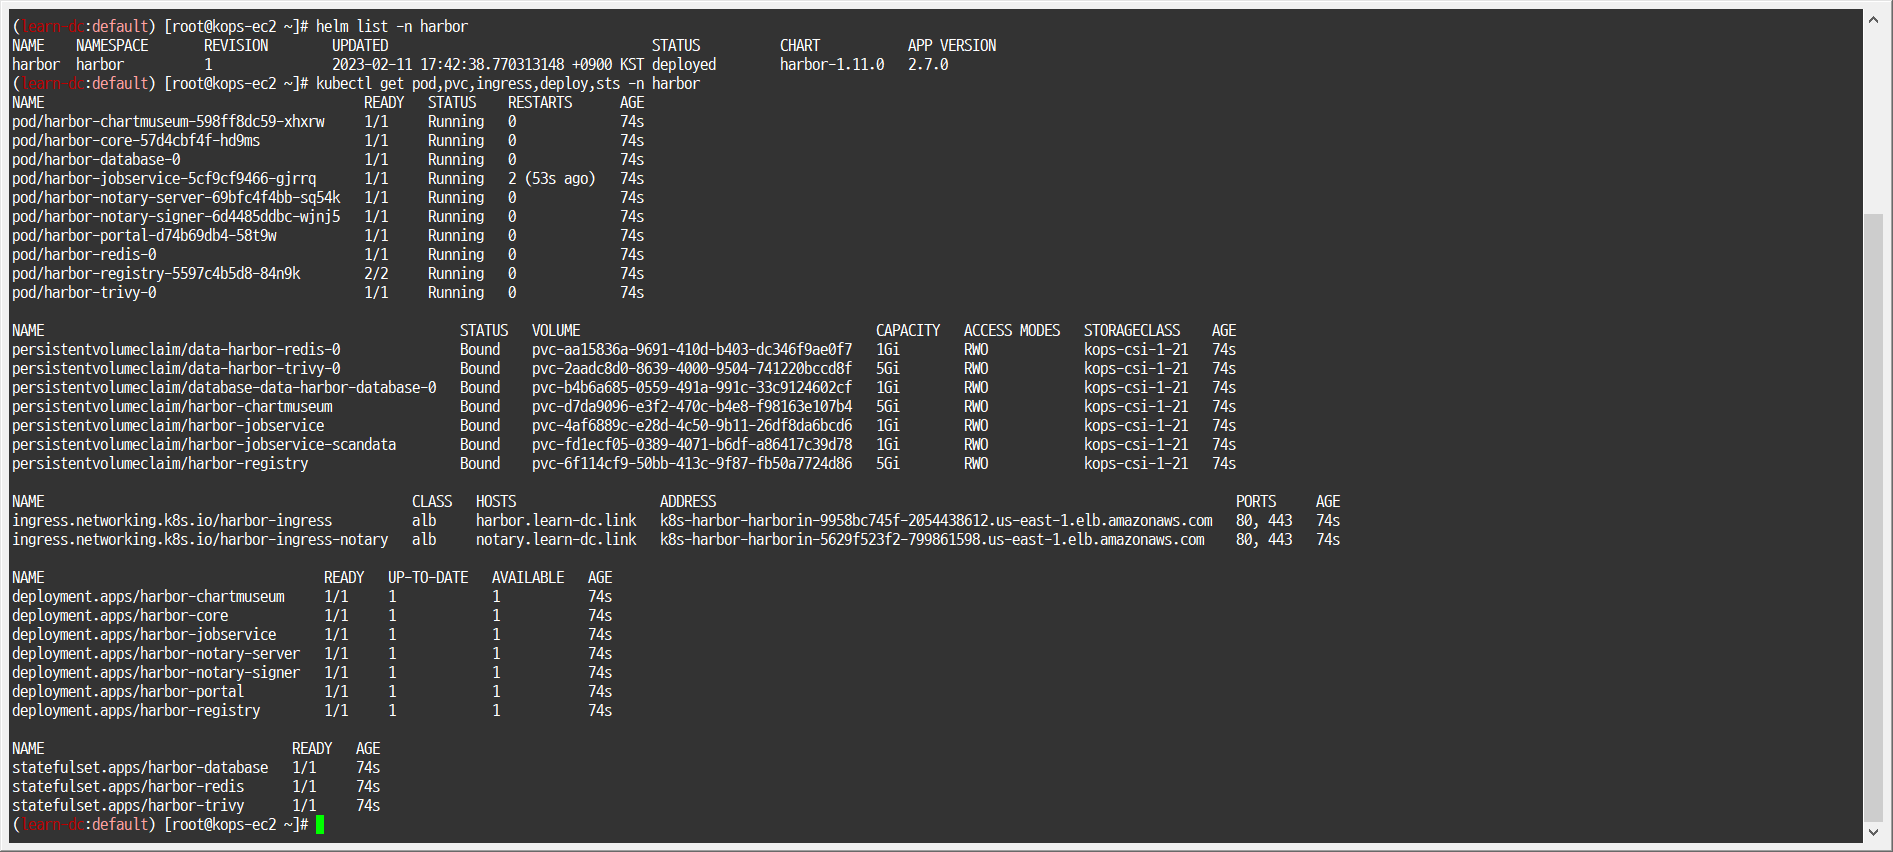
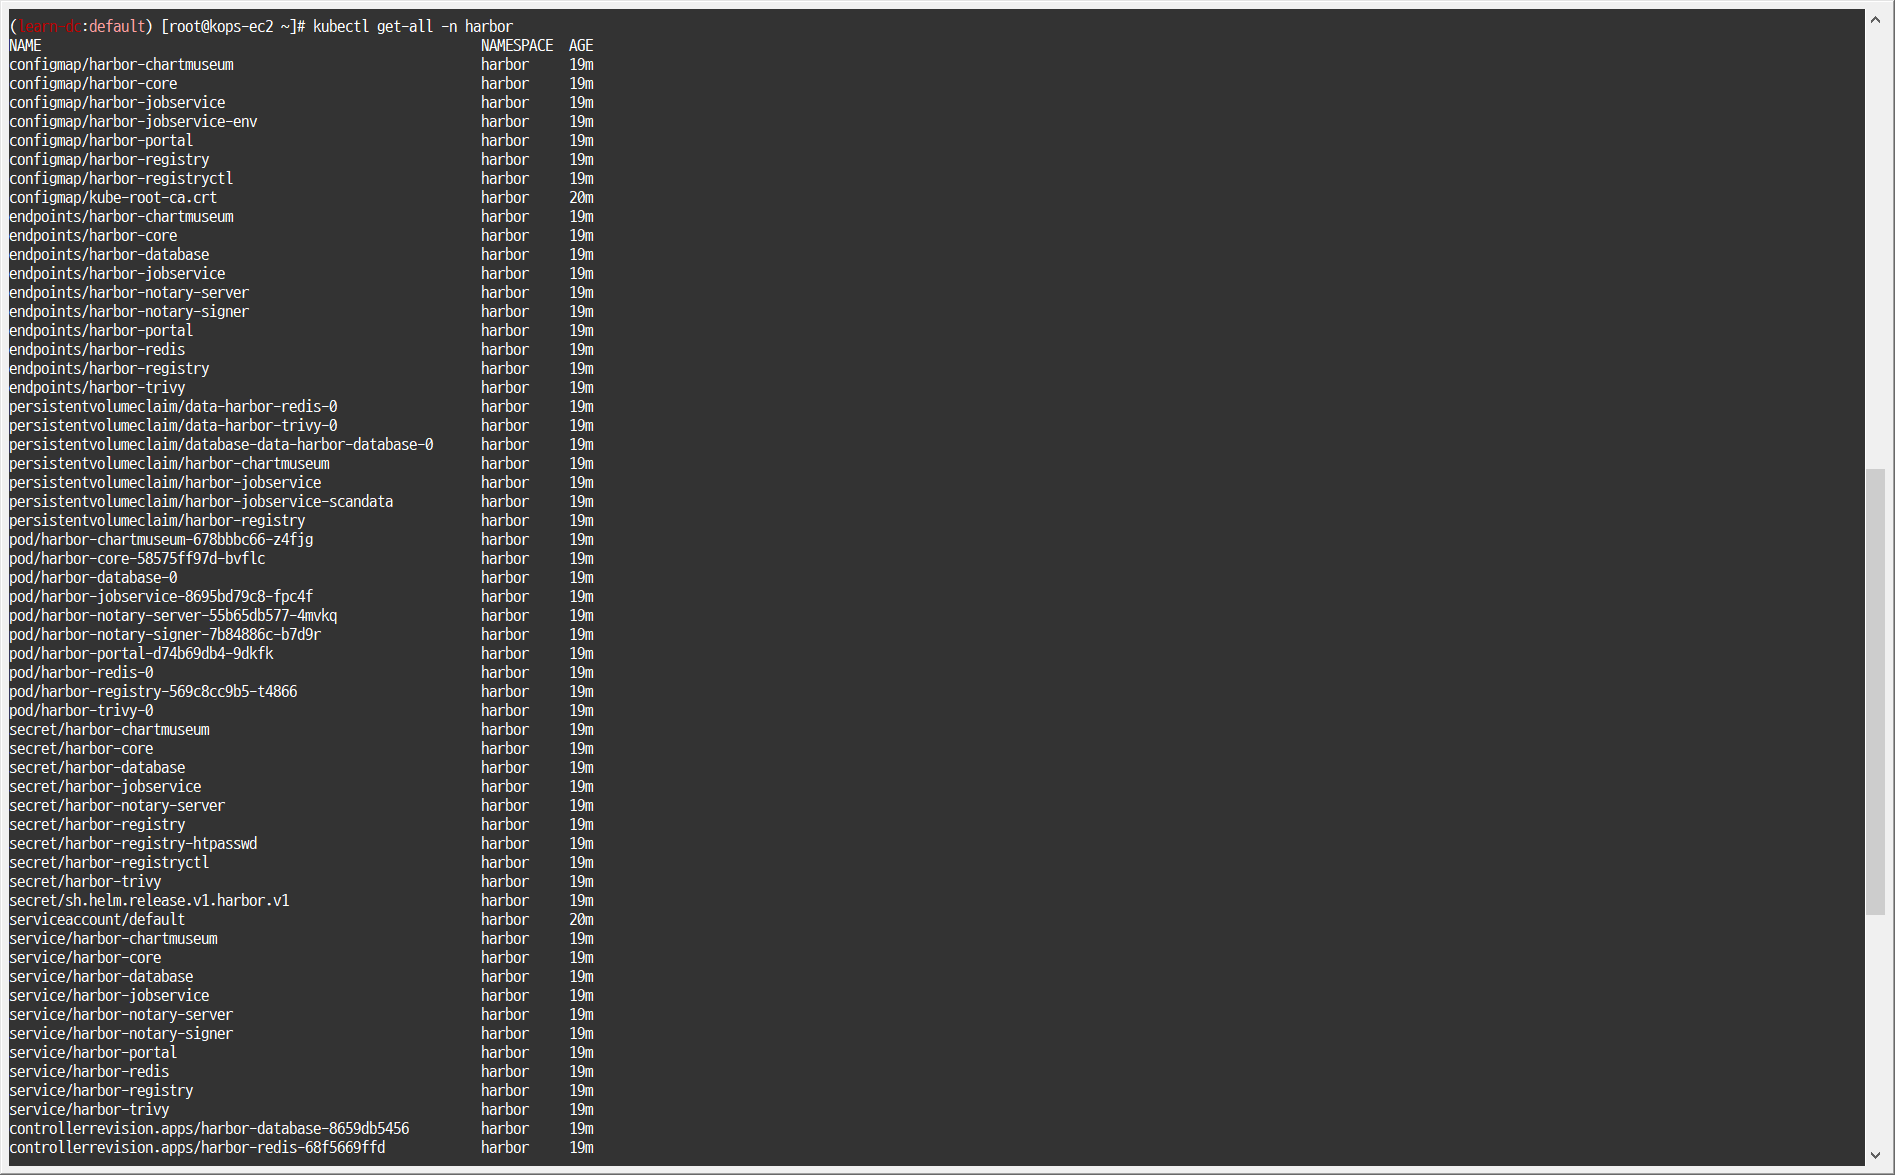
# registry : 컨테이너 이미지를 저장 # chartmuseum : 하버를 컨테이너 이미지뿐 아니라, 헬름 차트 리포지토리로도 사용 # notary : 서명이 완료된 컨테이너 이미지만 운영 환경에 사용하도록 설정. 서명이 완료된 이미지는 별도로 구분 # trivy : 컨테이너 이미지의 보안 취약점을 스캔, 스캔 기능은 별도 솔루션에서 제공하여 관리자는 보안 스캔용 도구를 선택 가능 helm list -n harbor kubectl get pod,pvc,ingress,deploy,sts -n harbor kubectl get ingress -n harbor harbor-ingress -o json | jq kubectl get-all -n harbor kubectl krew install df-pv && kubectl df-pv-

-

-
  1
  2
  3
  4
  5
  6
  7
  8
  9
 10
 11
 12
 13
 14
 15
 16
 17
 18
 19
 20
 21
 22
 23
 24
 25
 26
 27
 28
 29
 30
 31
 32
 33
 34
 35
 36
 37
 38
 39
 40
 41
 42
 43
 44
 45
 46
 47
 48
 49
 50
 51
 52
 53
 54
 55
 56
 57
 58
 59
 60
 61
 62
 63
 64
 65
 66
 67
 68
 69
 70
 71
 72
 73
 74
 75
 76
 77
 78
 79
 80
 81
 82
 83
 84
 85
 86
 87
 88
 89
 90
 91
 92
 93
 94
 95
 96
 97
 98
 99
100
101
102
103
104
105
106
107
108
109
110
111
112
113
114
115
116
117
118
119
120
121
122
123
124
125
126
127
128
129
{ "apiVersion": "networking.k8s.io/v1", "kind": "Ingress", "metadata": { "annotations": { "alb.ingress.kubernetes.io/certificate-arn": "${CERT_ARN}", "alb.ingress.kubernetes.io/listen-ports": "[{\"HTTPS\":443}, {\"HTTP\":80}]", "alb.ingress.kubernetes.io/scheme": "internet-facing", "alb.ingress.kubernetes.io/target-type": "ip", "ingress.kubernetes.io/proxy-body-size": "0", "ingress.kubernetes.io/ssl-redirect": "true", "meta.helm.sh/release-name": "harbor", "meta.helm.sh/release-namespace": "harbor", "nginx.ingress.kubernetes.io/proxy-body-size": "0", "nginx.ingress.kubernetes.io/ssl-redirect": "true" }, "creationTimestamp": "2023-02-11T04:55:21Z", "finalizers": [ "ingress.k8s.aws/resources" ], "generation": 1, "labels": { "app": "harbor", "app.kubernetes.io/managed-by": "Helm", "chart": "harbor", "heritage": "Helm", "release": "harbor" }, "name": "harbor-ingress", "namespace": "harbor", "resourceVersion": "13950", "uid": "2265a4ea-16b7-471b-958e-ba34bd44172f" }, "spec": { "ingressClassName": "alb", "rules": [ { "host": "harbor.learn-dc.link", "http": { "paths": [ { "backend": { "service": { "name": "harbor-core", "port": { "number": 80 } } }, "path": "/api/", "pathType": "Prefix" }, { "backend": { "service": { "name": "harbor-core", "port": { "number": 80 } } }, "path": "/service/", "pathType": "Prefix" }, { "backend": { "service": { "name": "harbor-core", "port": { "number": 80 } } }, "path": "/v2/", "pathType": "Prefix" }, { "backend": { "service": { "name": "harbor-core", "port": { "number": 80 } } }, "path": "/chartrepo/", "pathType": "Prefix" }, { "backend": { "service": { "name": "harbor-core", "port": { "number": 80 } } }, "path": "/c/", "pathType": "Prefix" }, { "backend": { "service": { "name": "harbor-portal", "port": { "number": 80 } } }, "path": "/", "pathType": "Prefix" } ] } } ], "tls": [ { "hosts": [ "harbor.learn-dc.link" ] } ] }, "status": { "loadBalancer": {} } } -

-

-

-
-
-
(참고) 삭제 시
-
1
2
3
helm uninstall -n harbor harbor kubectl delete pvc --all -n harbor kubectl delete ns harbor
-
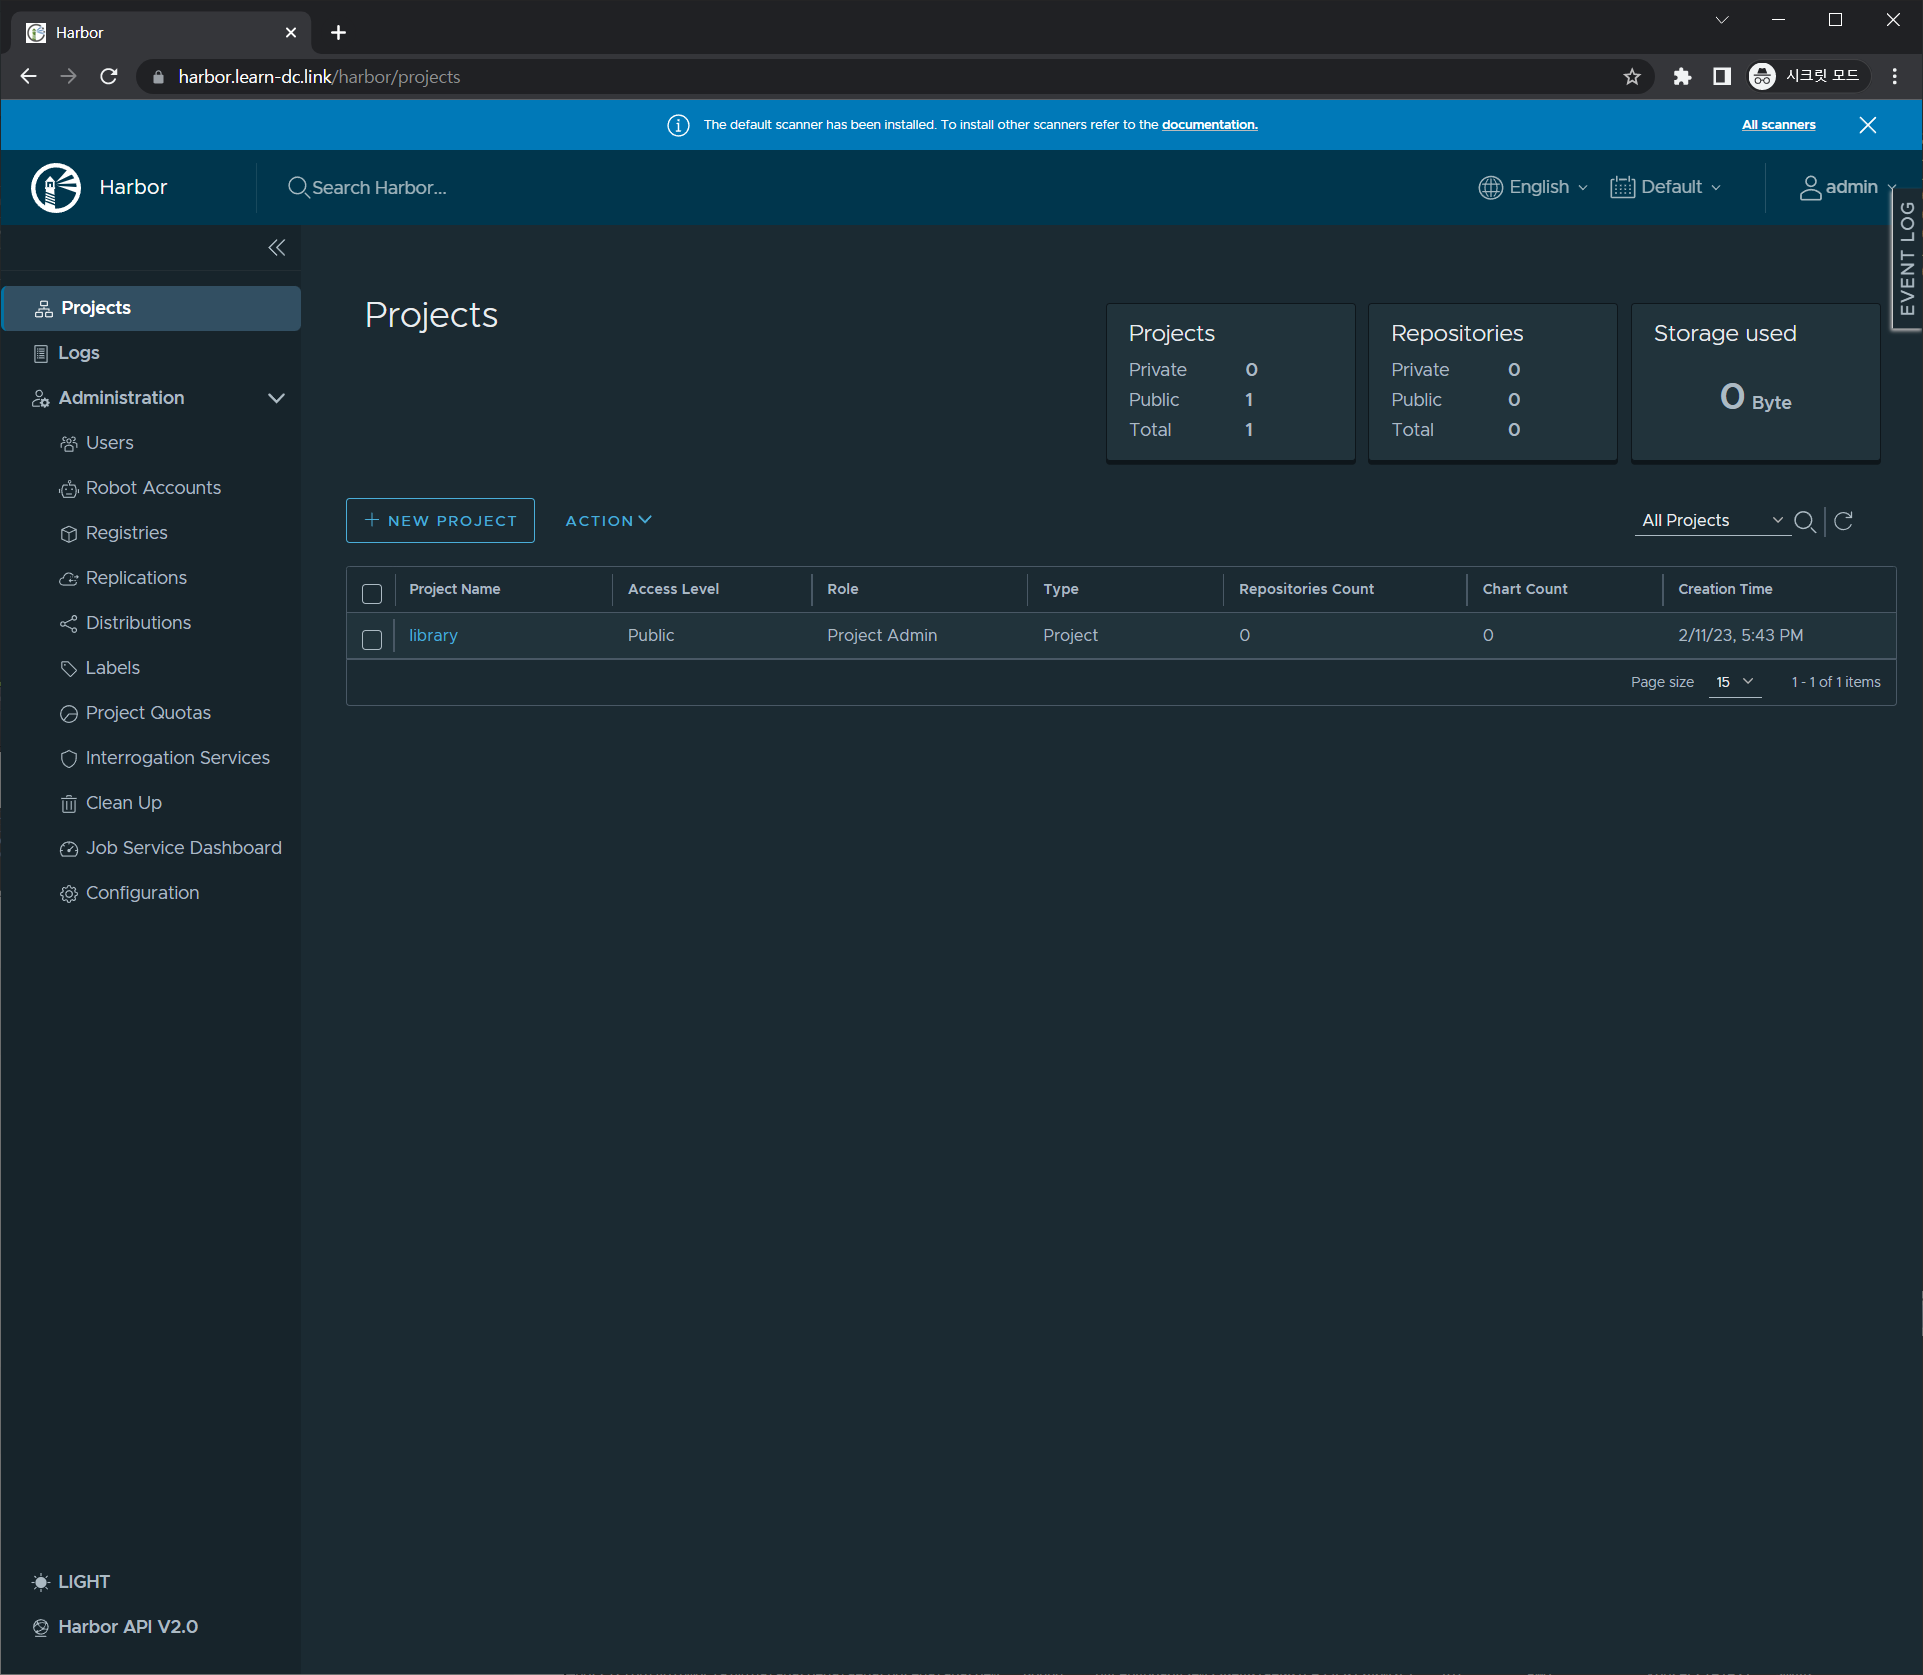
2.2 하버 웹 접속 및 로컬 이미지 업로드: https://harbor.<각자 자신의 도메인>
-
로그인 : admin/Harbor12345
-
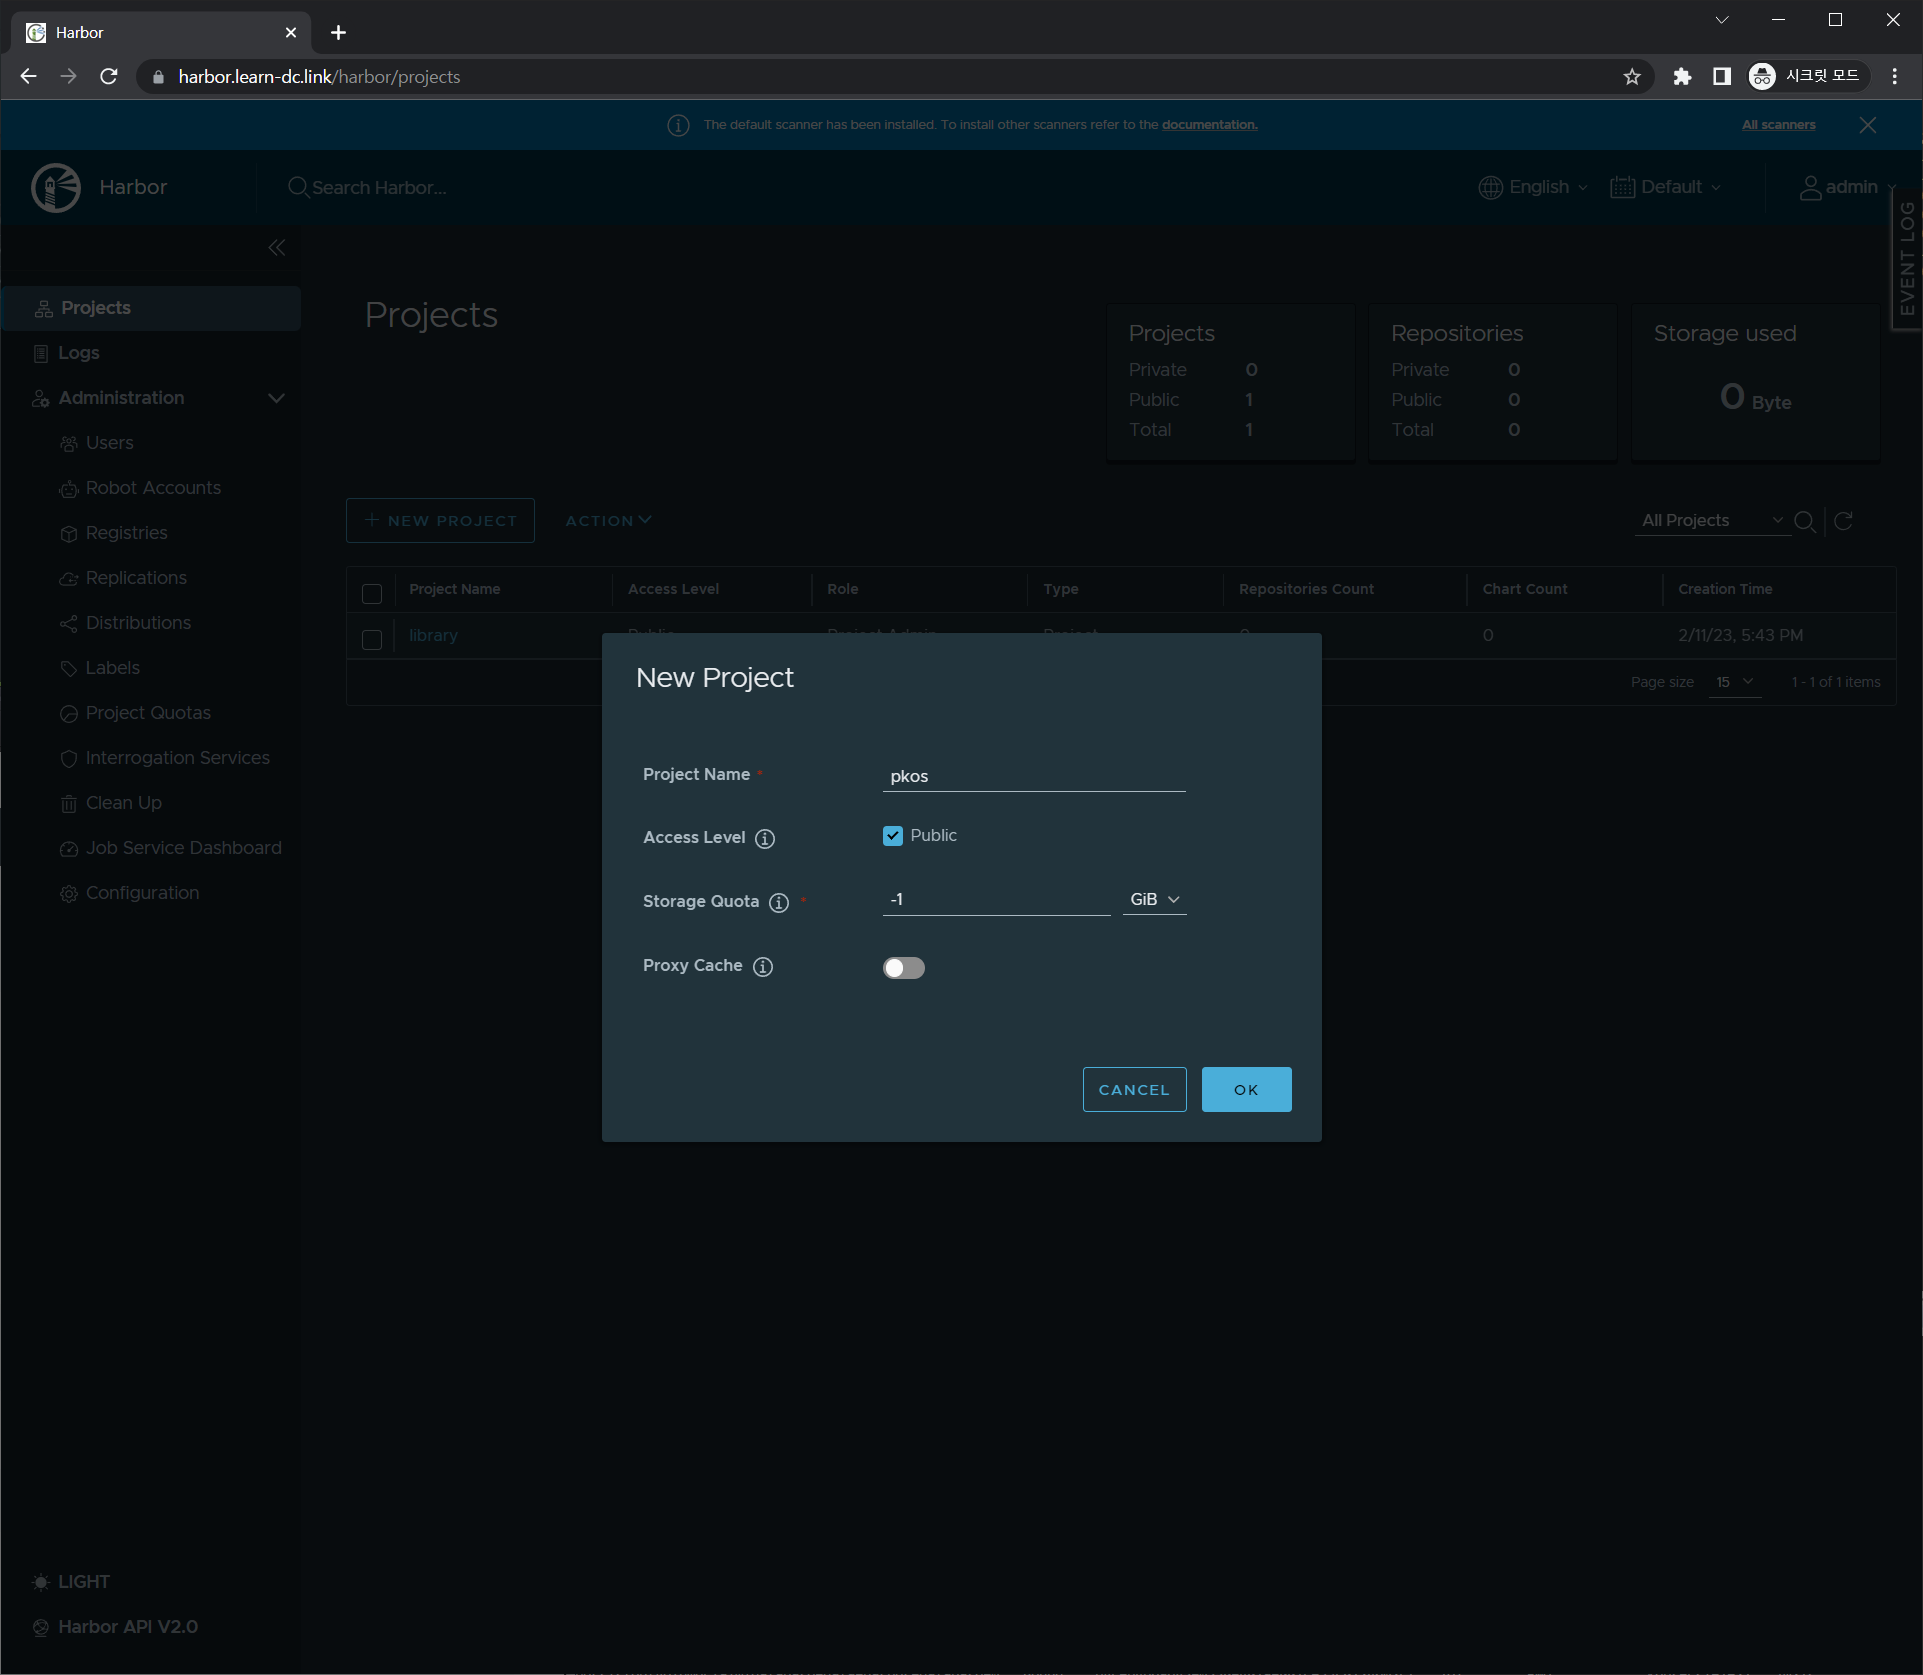
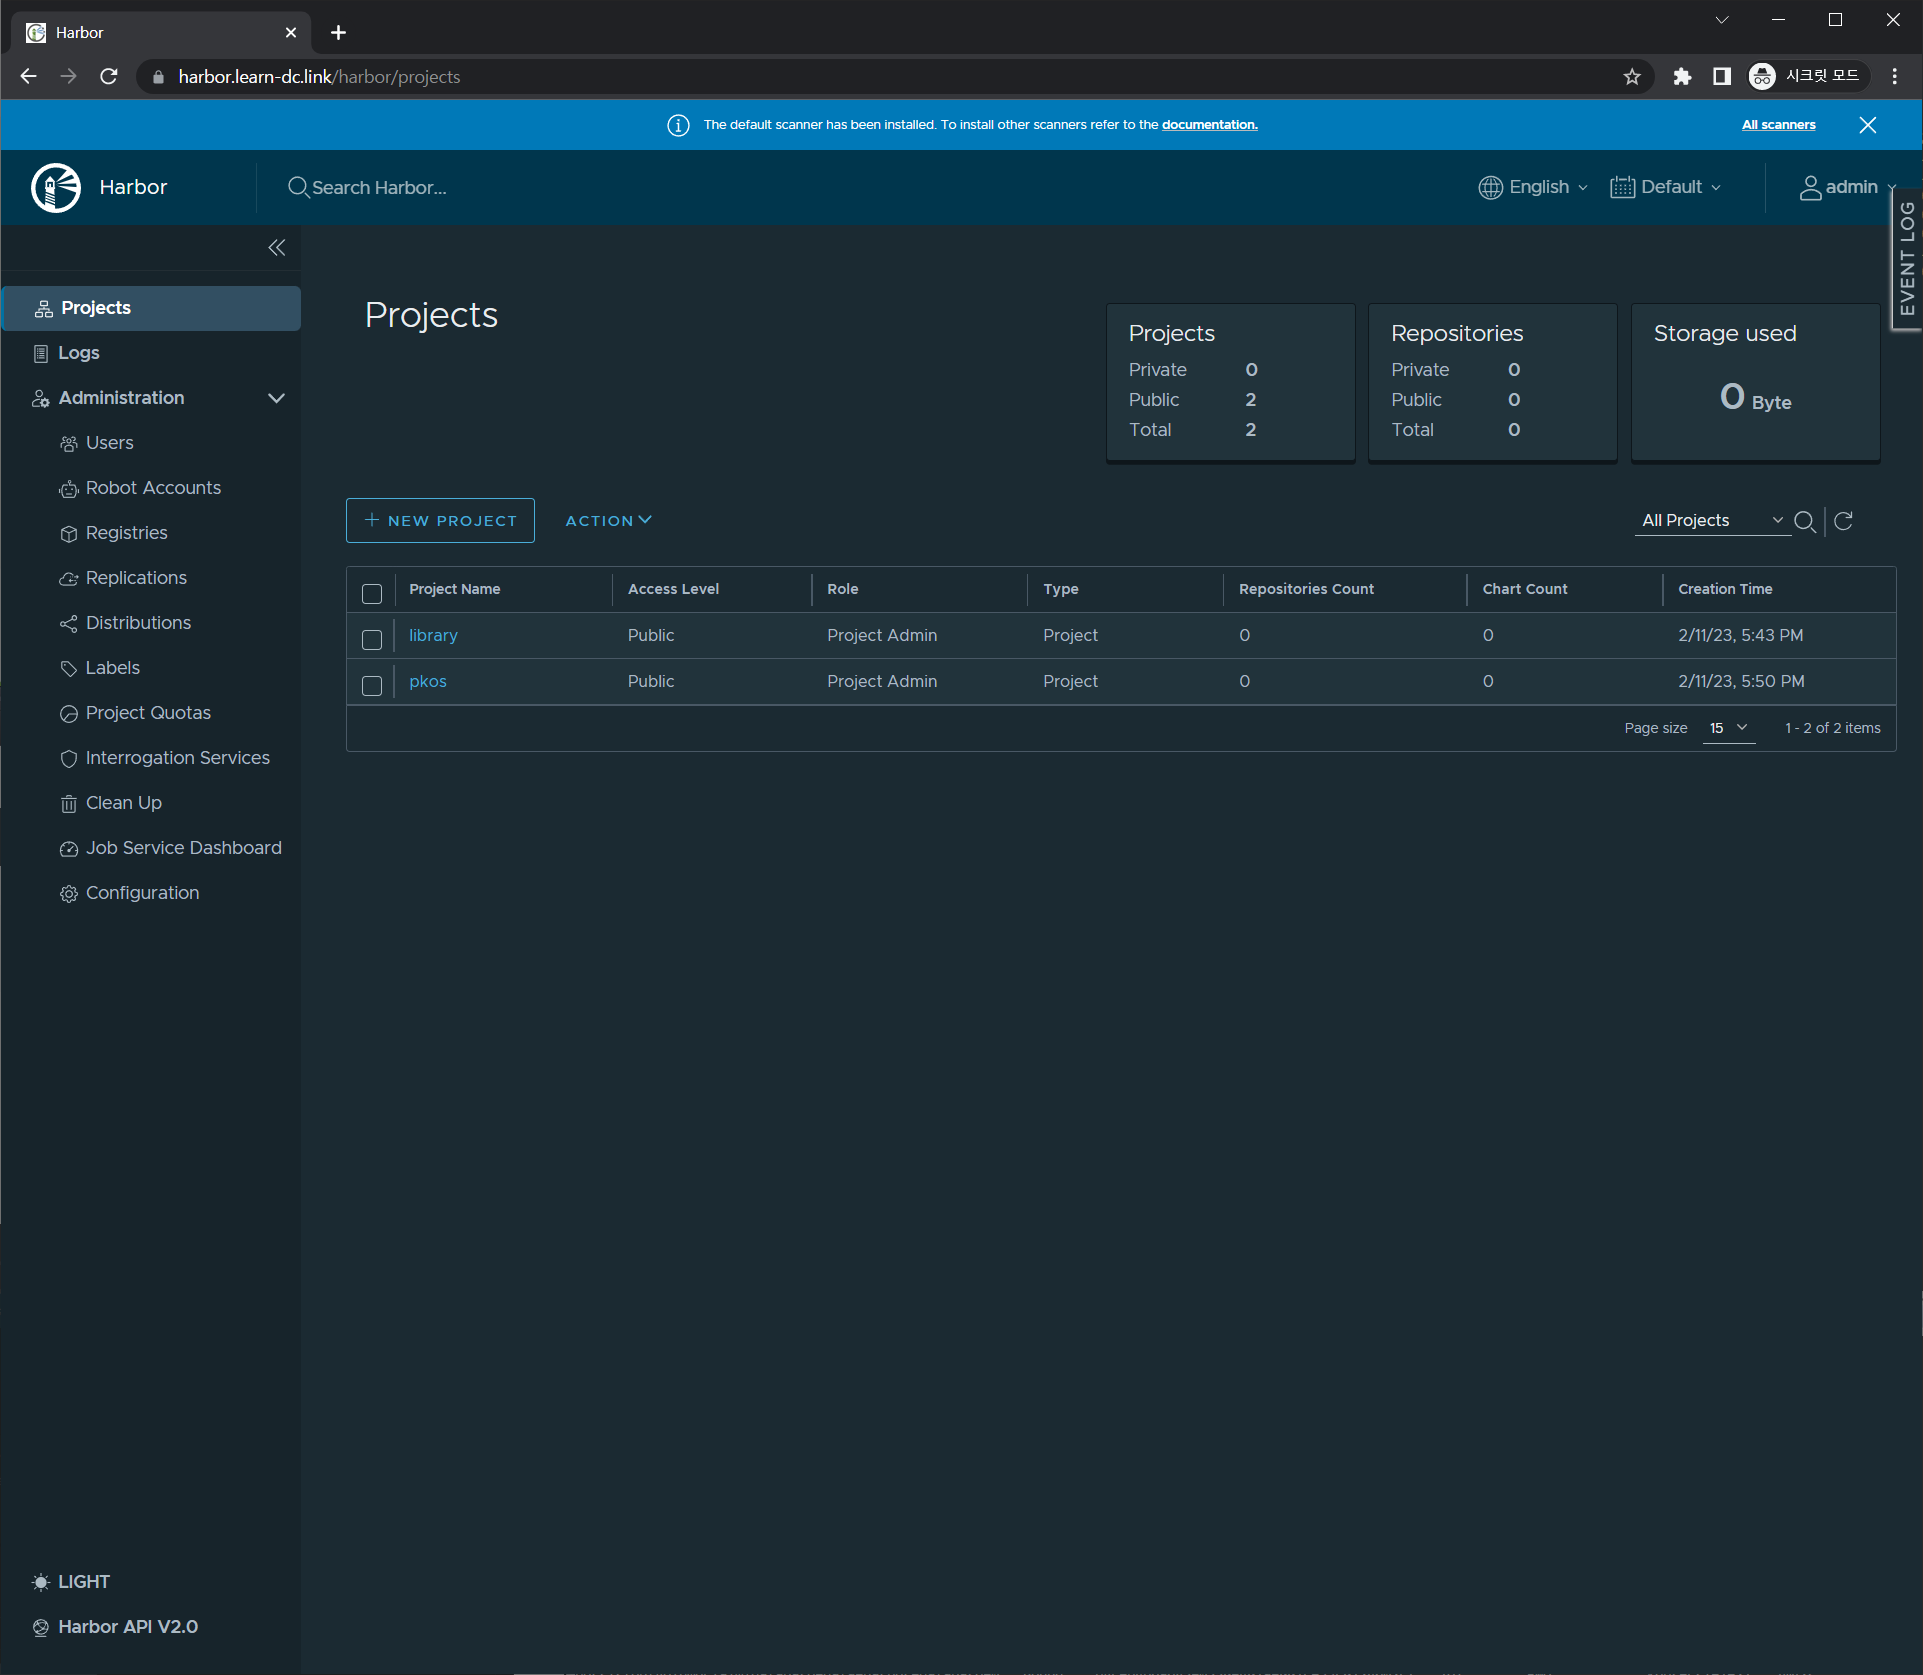
NEW PROJECT → Name(pkos), Access Level(Public Check) ⇒ OK 클릭
- 신규 프로젝트 생성 : 프로젝트 단위로 컨테이너 이미지 저장소를 관리, 프로젝트 별로 사용자 권한(RBAC) 보안 설정이 가능
- 신규 프로젝트 생성 : 프로젝트 단위로 컨테이너 이미지 저장소를 관리, 프로젝트 별로 사용자 권한(RBAC) 보안 설정이 가능
-
kops-ec2 에서 로컬 이미지를 원격 하버 이미지 저장소로 업로드
-
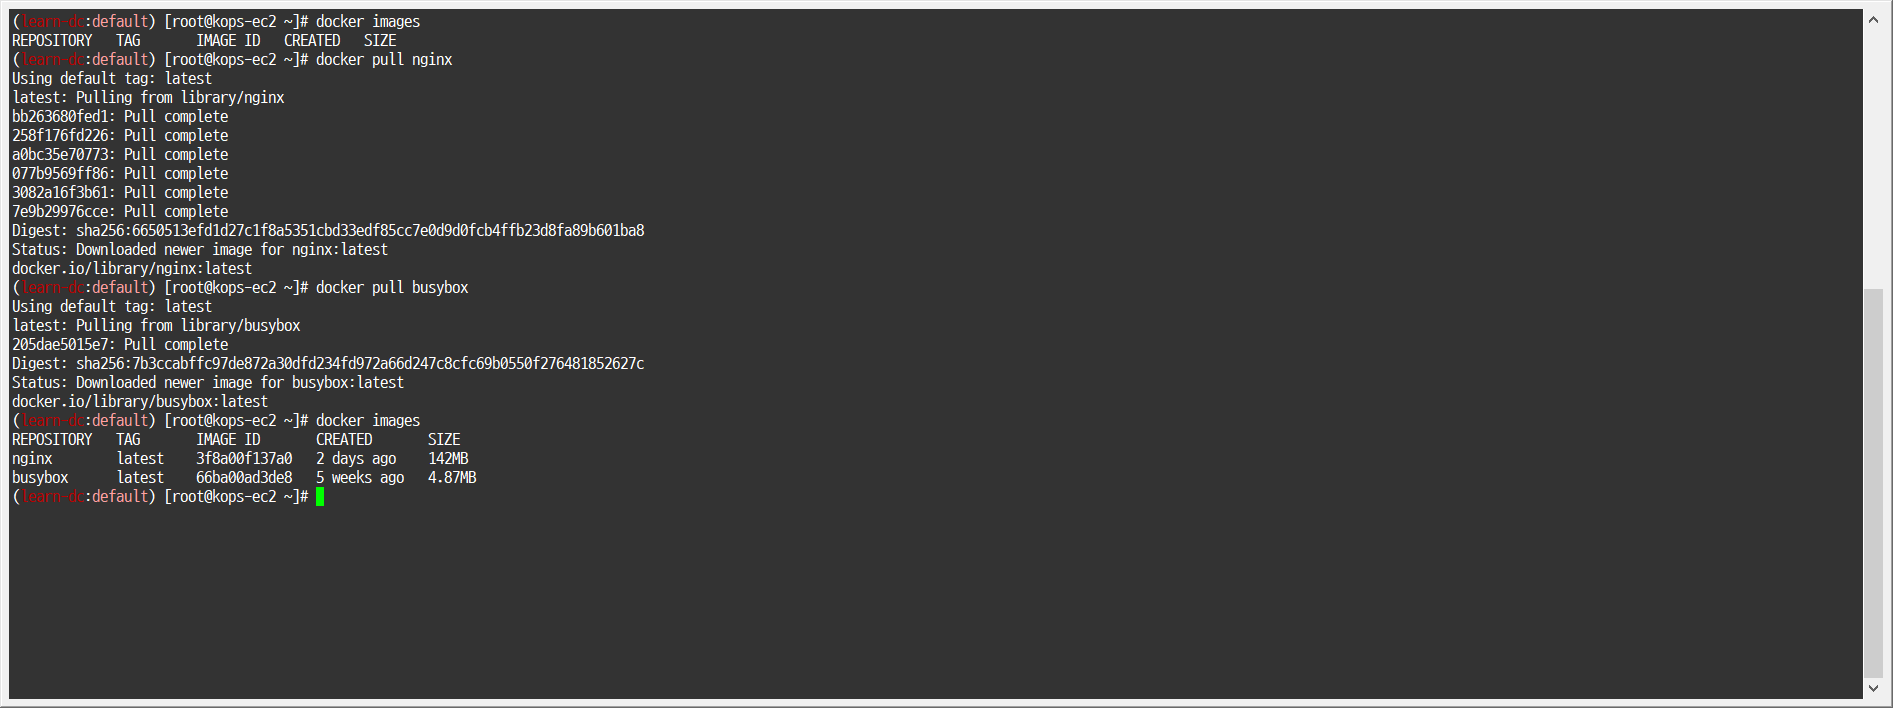
컨테이너 이미지 가져오기
-
1
2
3
docker pull nginx docker pull busybox docker images
-
-
태그 설정
-
1
2
docker tag busybox harbor.$KOPS_CLUSTER_NAME/pkos/busybox:0.1 docker image ls
-
-
insecure 설정
-
1
2
3
4
5
6
7
8
cat <<EOT> /etc/docker/daemon.json { "insecure-registries" : ["harbor.$KOPS_CLUSTER_NAME"] } EOT cat /etc/docker/daemon.json systemctl daemon-reload && systemctl restart docker
-
-
로그인 - 방안1
-
1
2
docker login harbor.$KOPS_CLUSTER_NAME -u admin -p Harbor12345 cat /root/.docker/config.json | jq
-
-
로그인 - 방안2
-
1
2
3
echo 'Harbor12345' > harborpw.txt cat harborpw.txt | docker login harbor.$KOPS_CLUSTER_NAME -u admin --password-stdin cat /root/.docker/config.json | jq- result
-
-
이미지 업로드
-
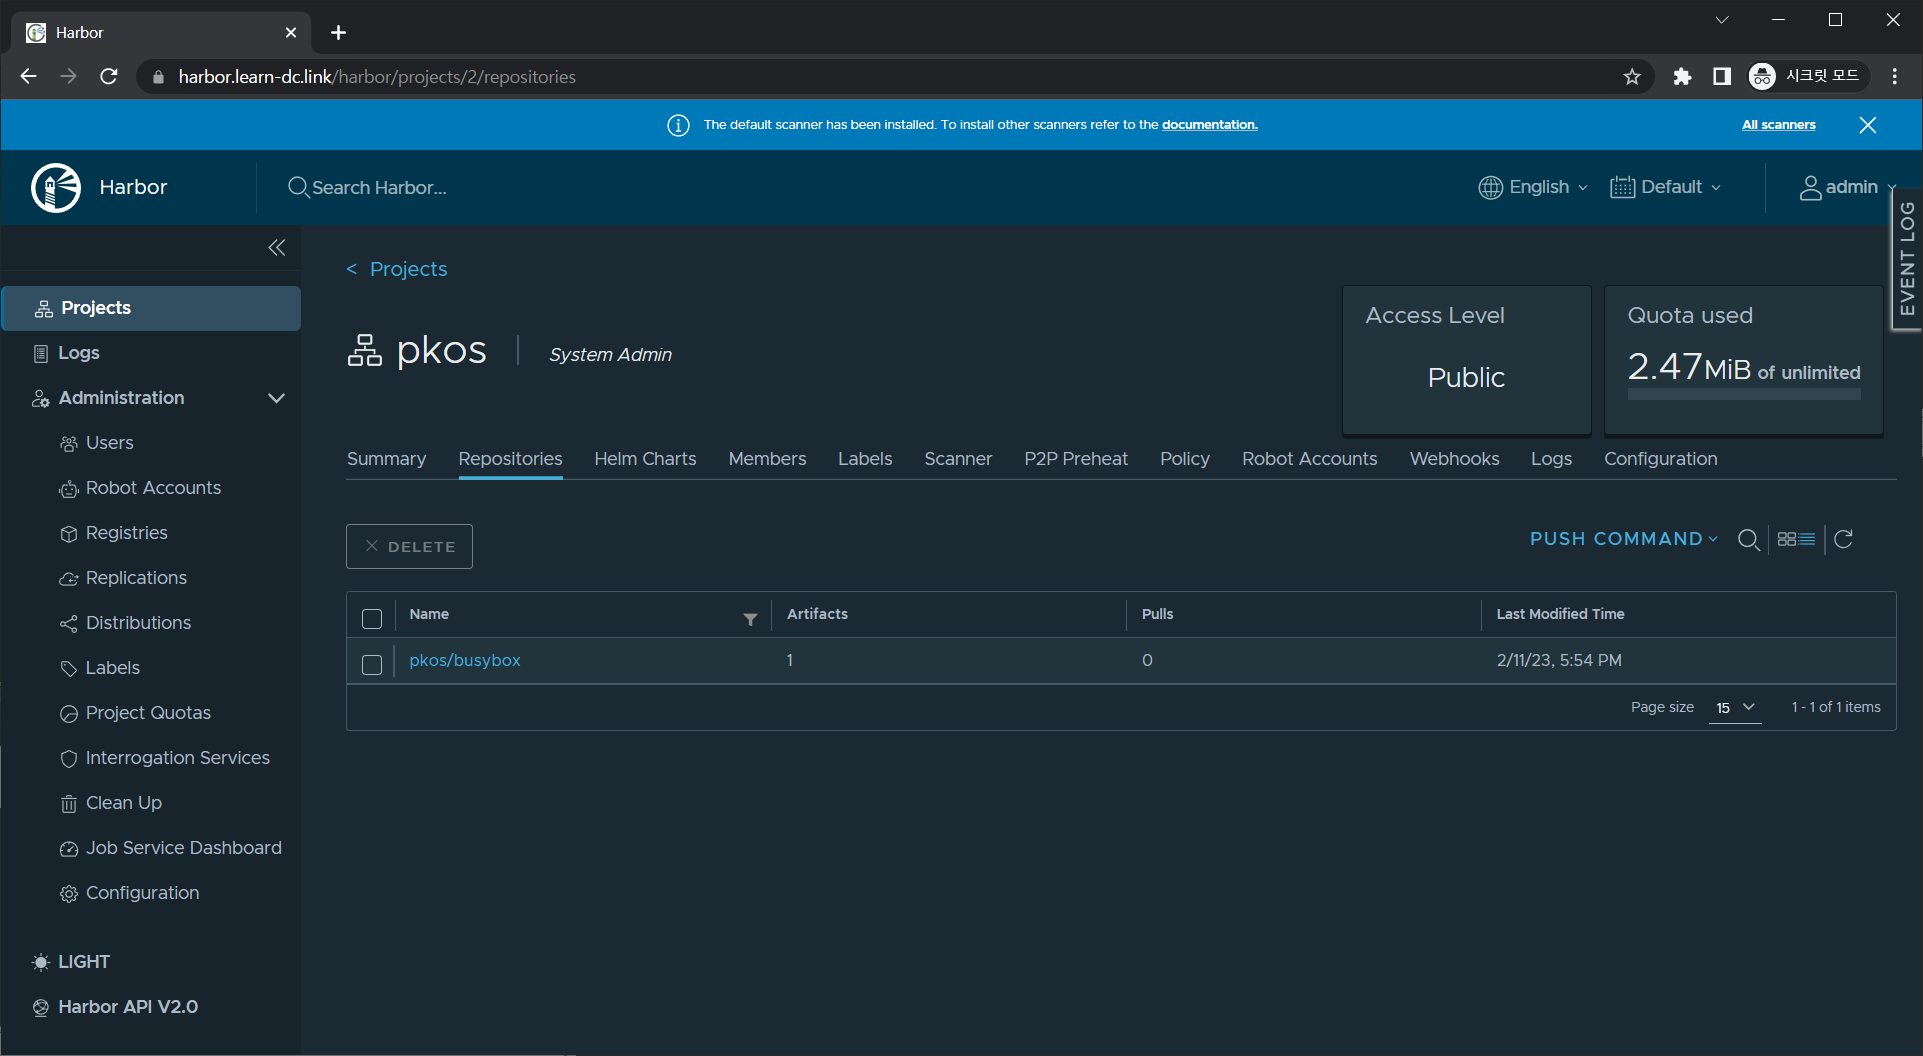
1docker push harbor.$KOPS_CLUSTER_NAME/pkos/busybox:0.1
-
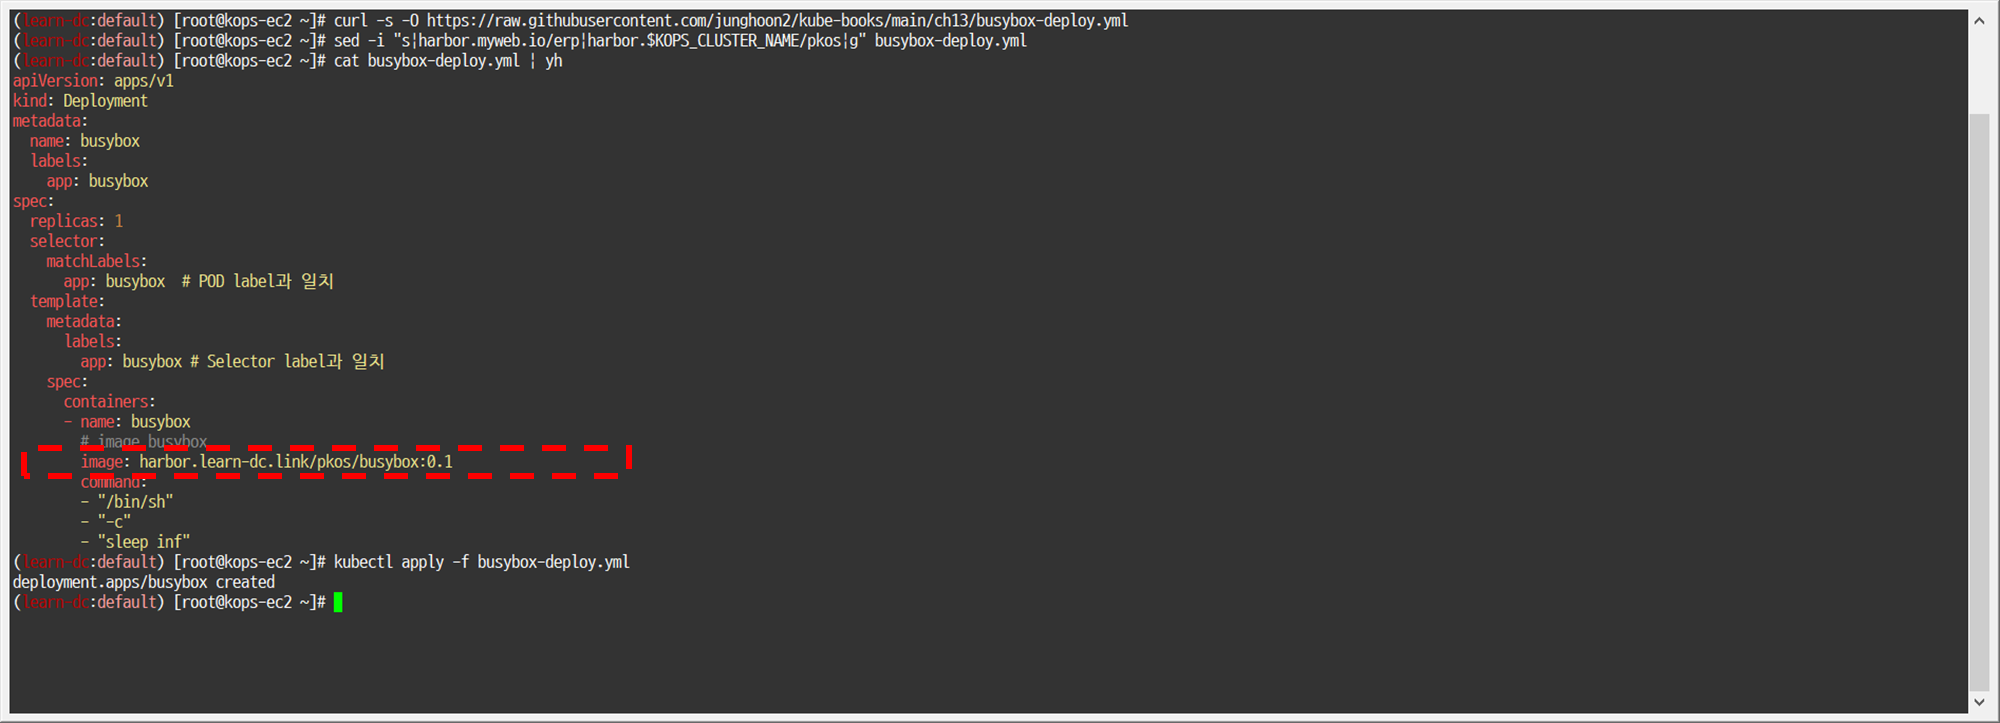
2.3 쿠버네티스 YAML 파일의 컨테이너 이미지 저장소 주소를 로컬 하버로 변경 : harbor 저장소 이미지를 사용하는 디플로이먼트 생성하기
-
파드 배포
-
1
2
3
4
curl -s -O https://raw.githubusercontent.com/junghoon2/kubepractice/main/ch13/busybox-deploy.yml sed -i "s|harbor.myweb.io/erp|harbor.$KOPS_CLUSTER_NAME/pkos|g" busybox-deploy.yml cat busybox-deploy.yml | yh kubectl apply -f busybox-deploy.yml
-
-
확인 : 정상적으로 harbor 에서 이미지 다운로드되어 파드가 동작!
-
1kubectl get pod -
1kubectl describe pod | grep Events: -A7
-
2.4 컨테이너 이미지 업로드 시 자동으로 이미지 보안 스캔 기능 사용
-
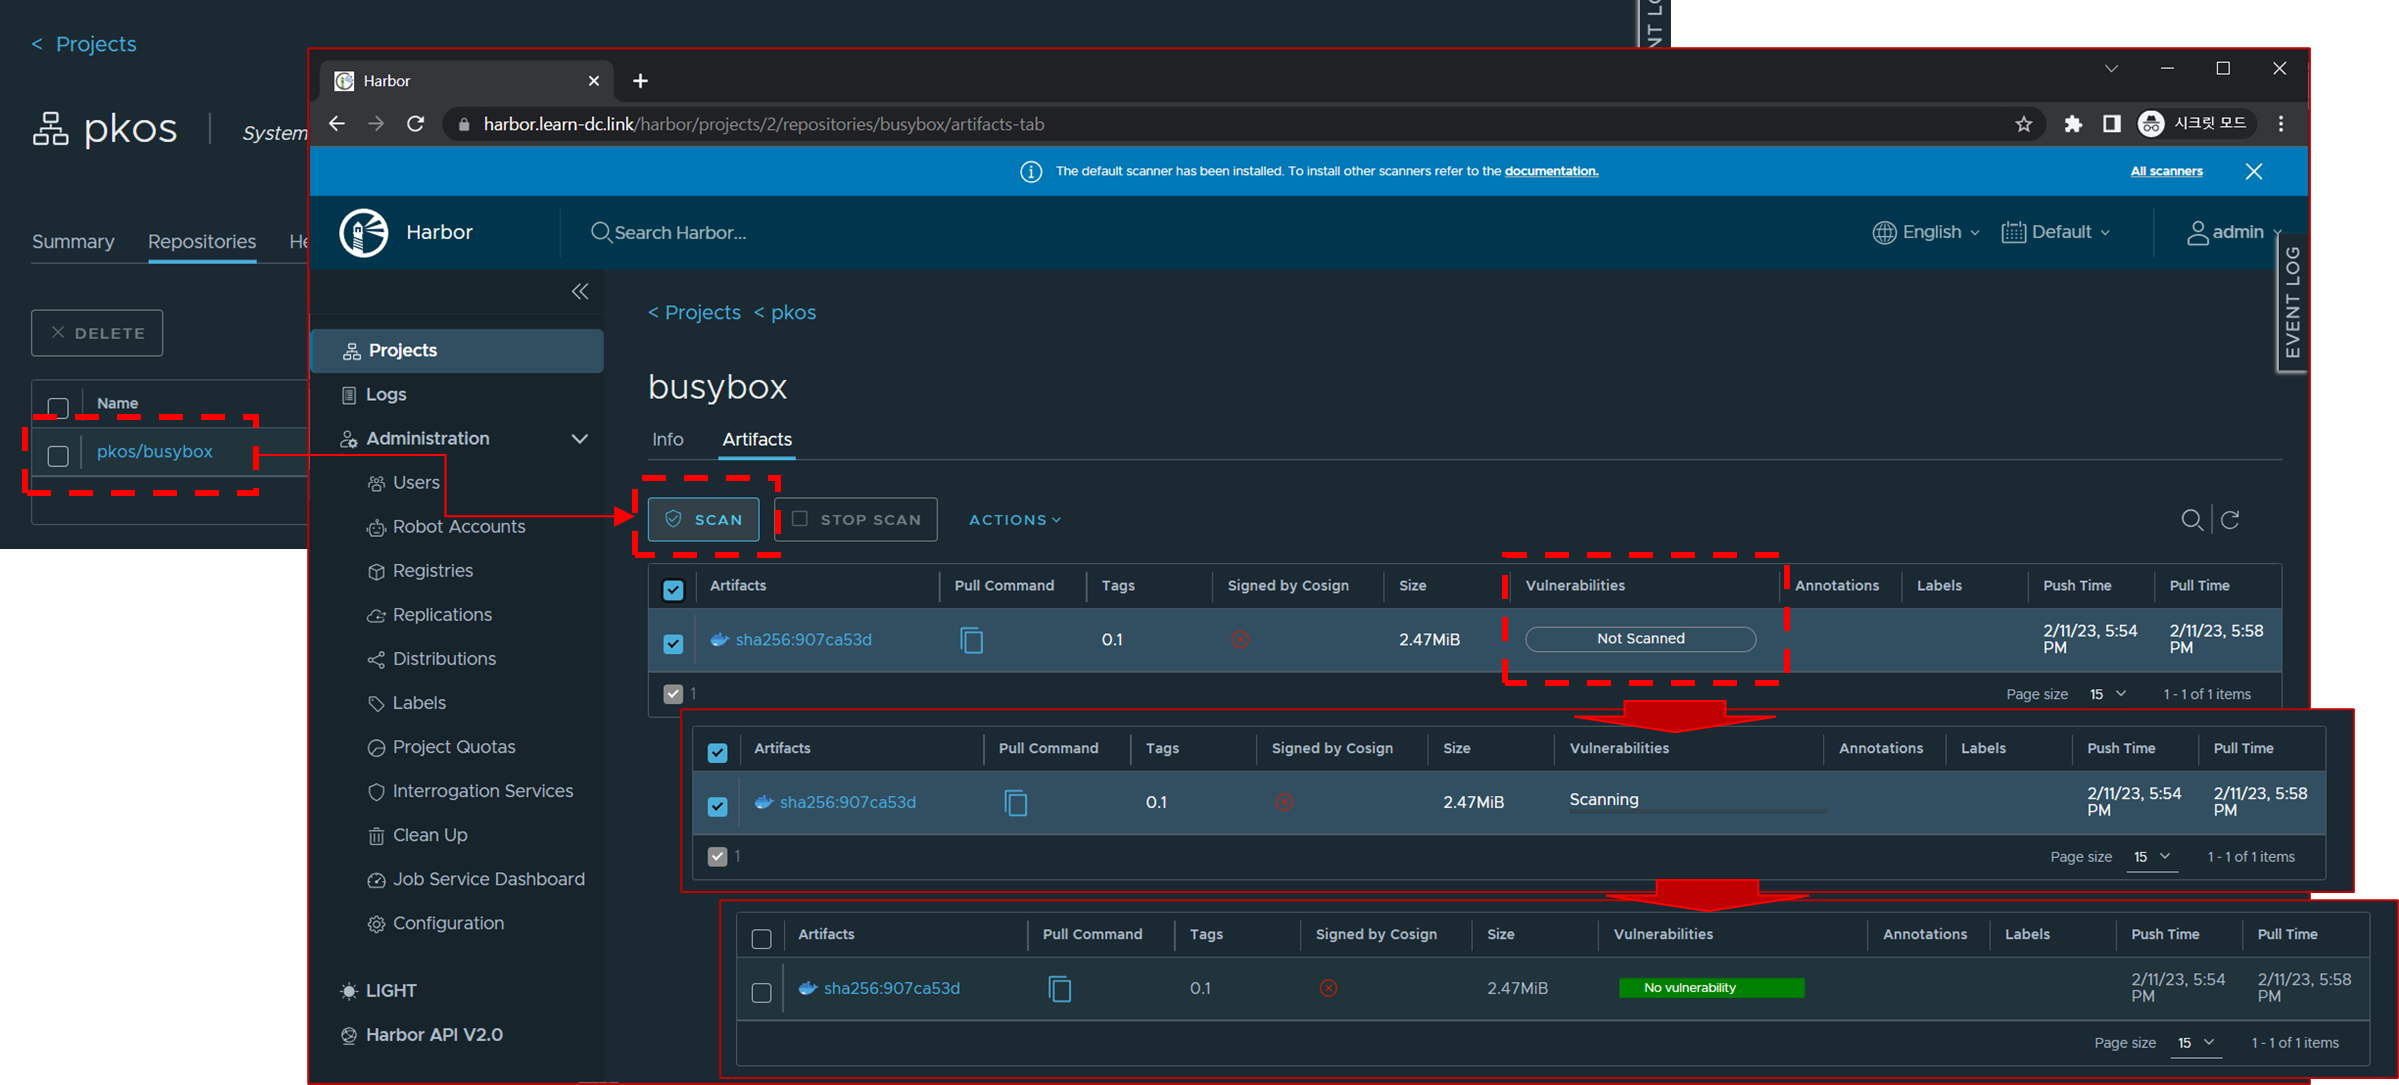
Trivy 이미지 스캐닝 도구를 통해서 스캔해보자 - 링크
-
- 이미지 선택 후 상단 SCAN 클릭해서 스캔 실행
- 스캔 결과 현재 busybox 이미지는 취약점이 없음을 확인
-
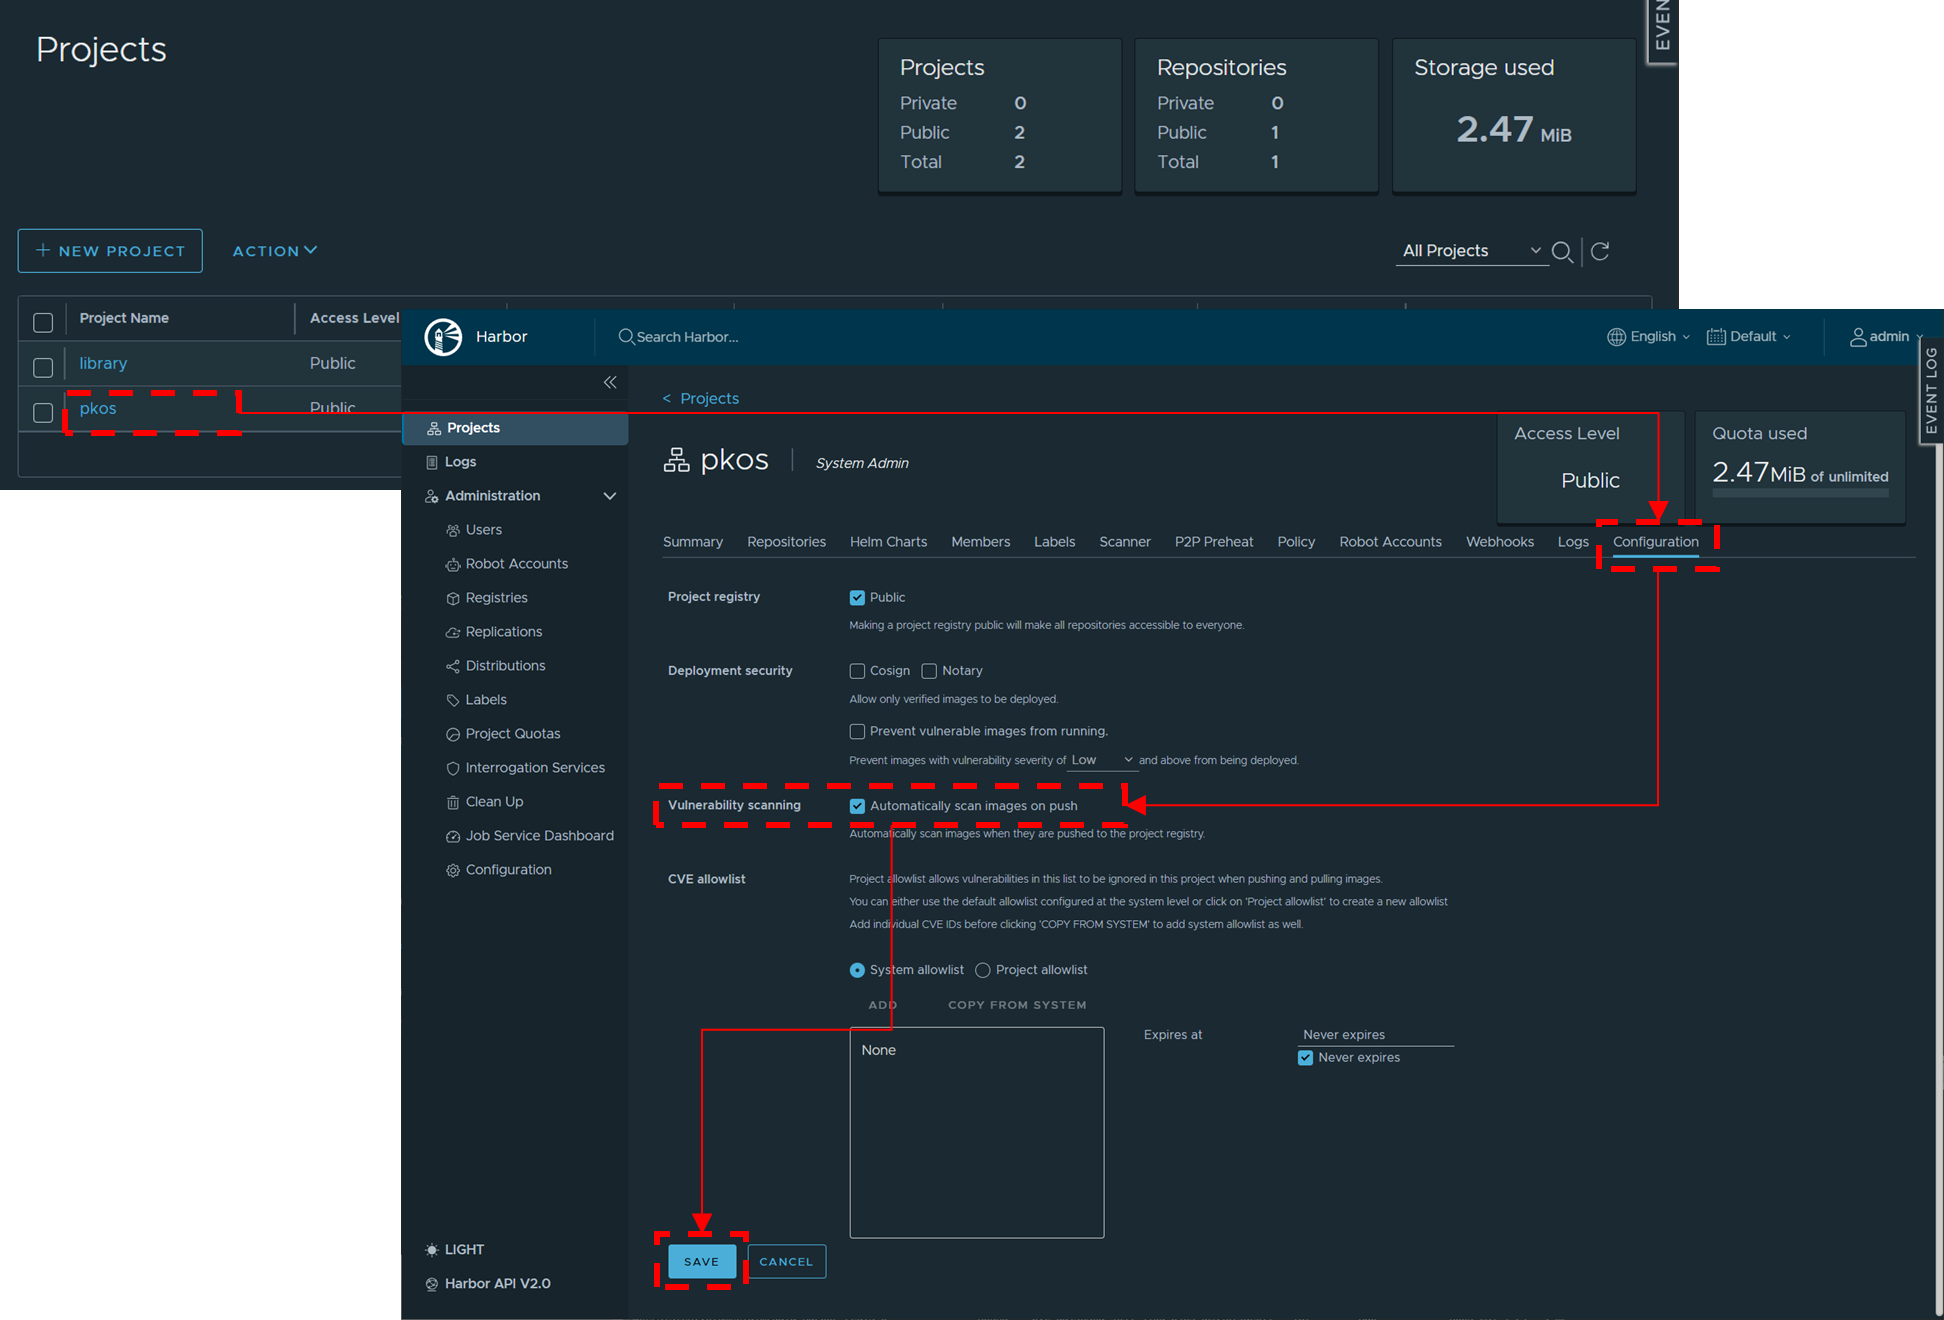
자동 보안 스캔 설정 및 확인
-
프로젝트에서 Configuration 클릭 후 아래 Automatically… 클릭 후 맨 하단에 Save 선택
-

-
태그 설정
-
1
2
docker tag nginx harbor.$KOPS_CLUSTER_NAME/pkos/nginx:0.1 docker image ls
-
-
이미지 업로드
-
1docker push harbor.$KOPS_CLUSTER_NAME/pkos/nginx:0.1
-
-
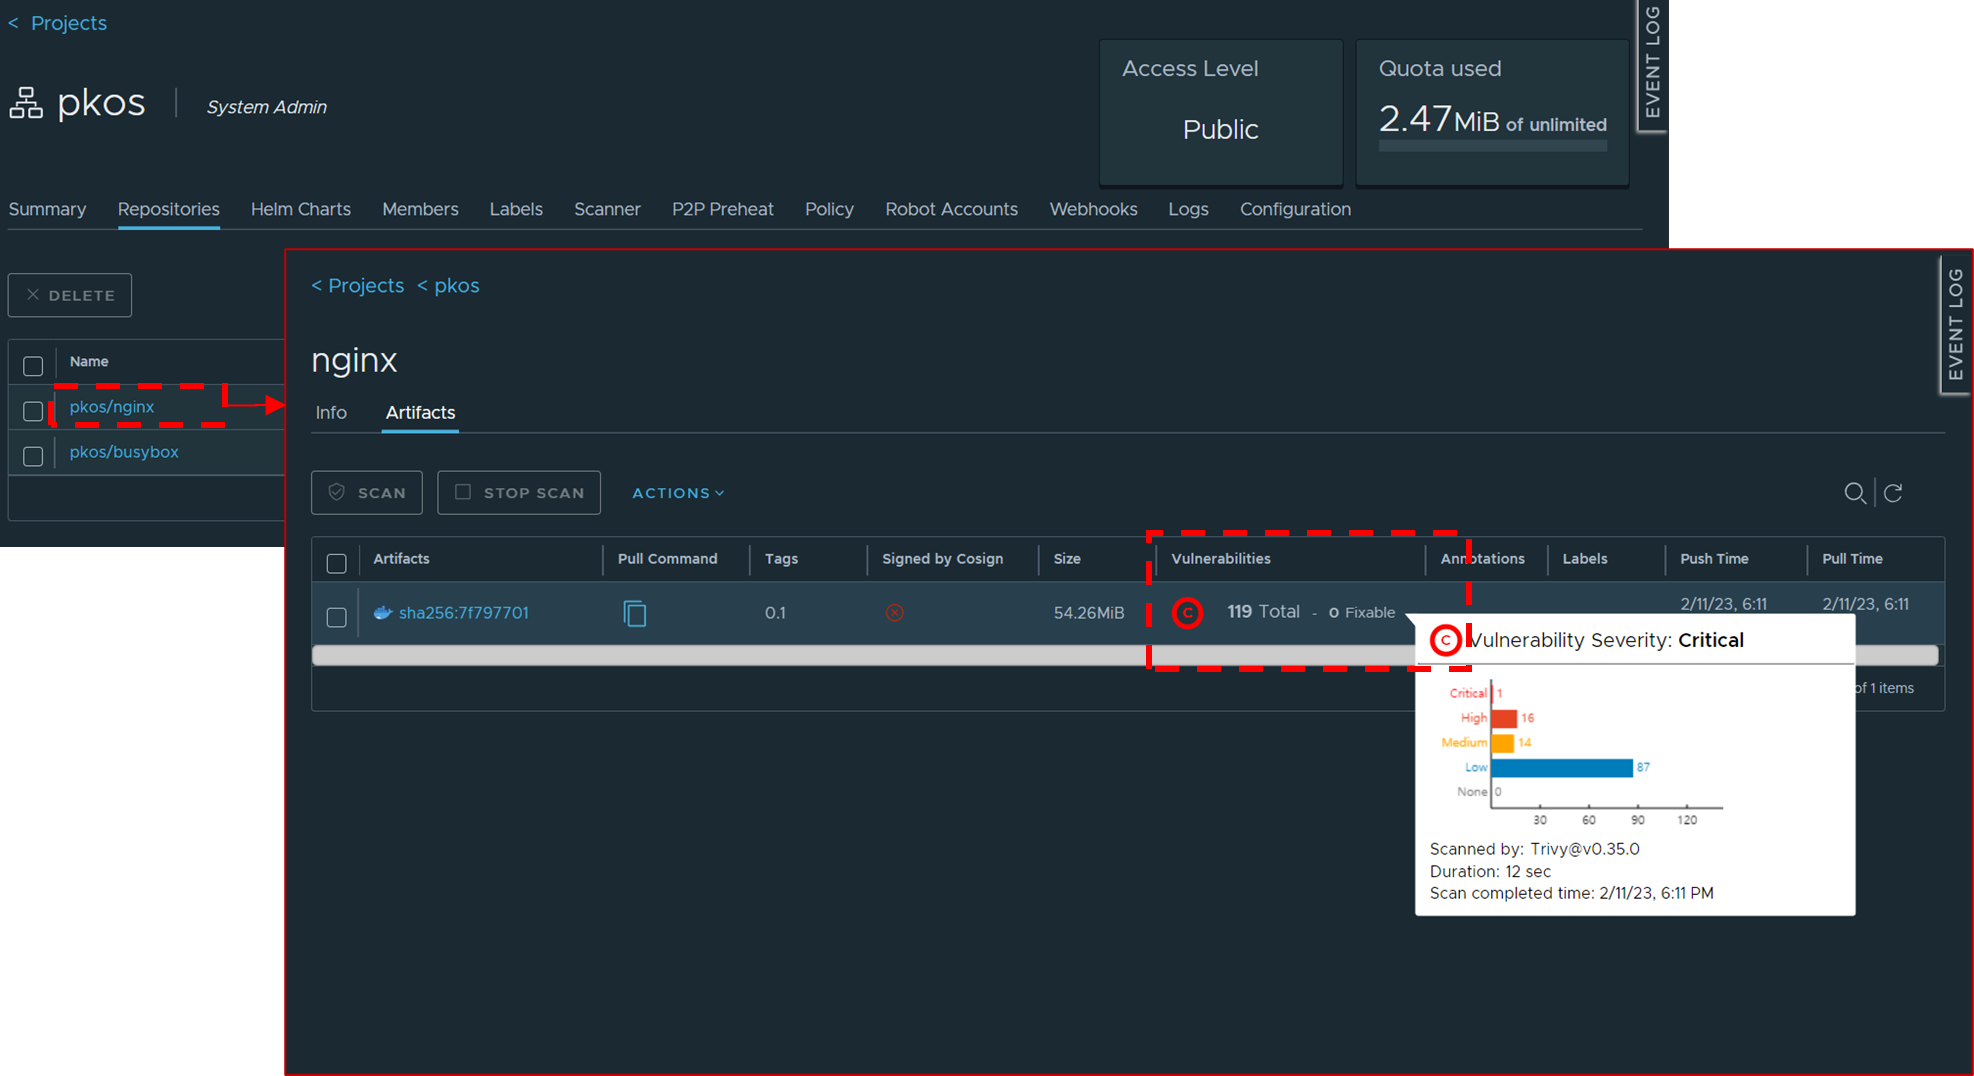
harbor 웹에서 확인 » 아래 처럼 자동으로 스캔 수행됨
-
-
취약점을 제거한 이미지를 서명된(Signed) 이미지로 분류해서 별도로 관리할 수 있습니다
2.5 과제1
-
목표: Harbor 에 자신만의 아무 이미지나 태그해서 업로드하고 다운로드 해보고, 관련 스샷 올려주세요
-
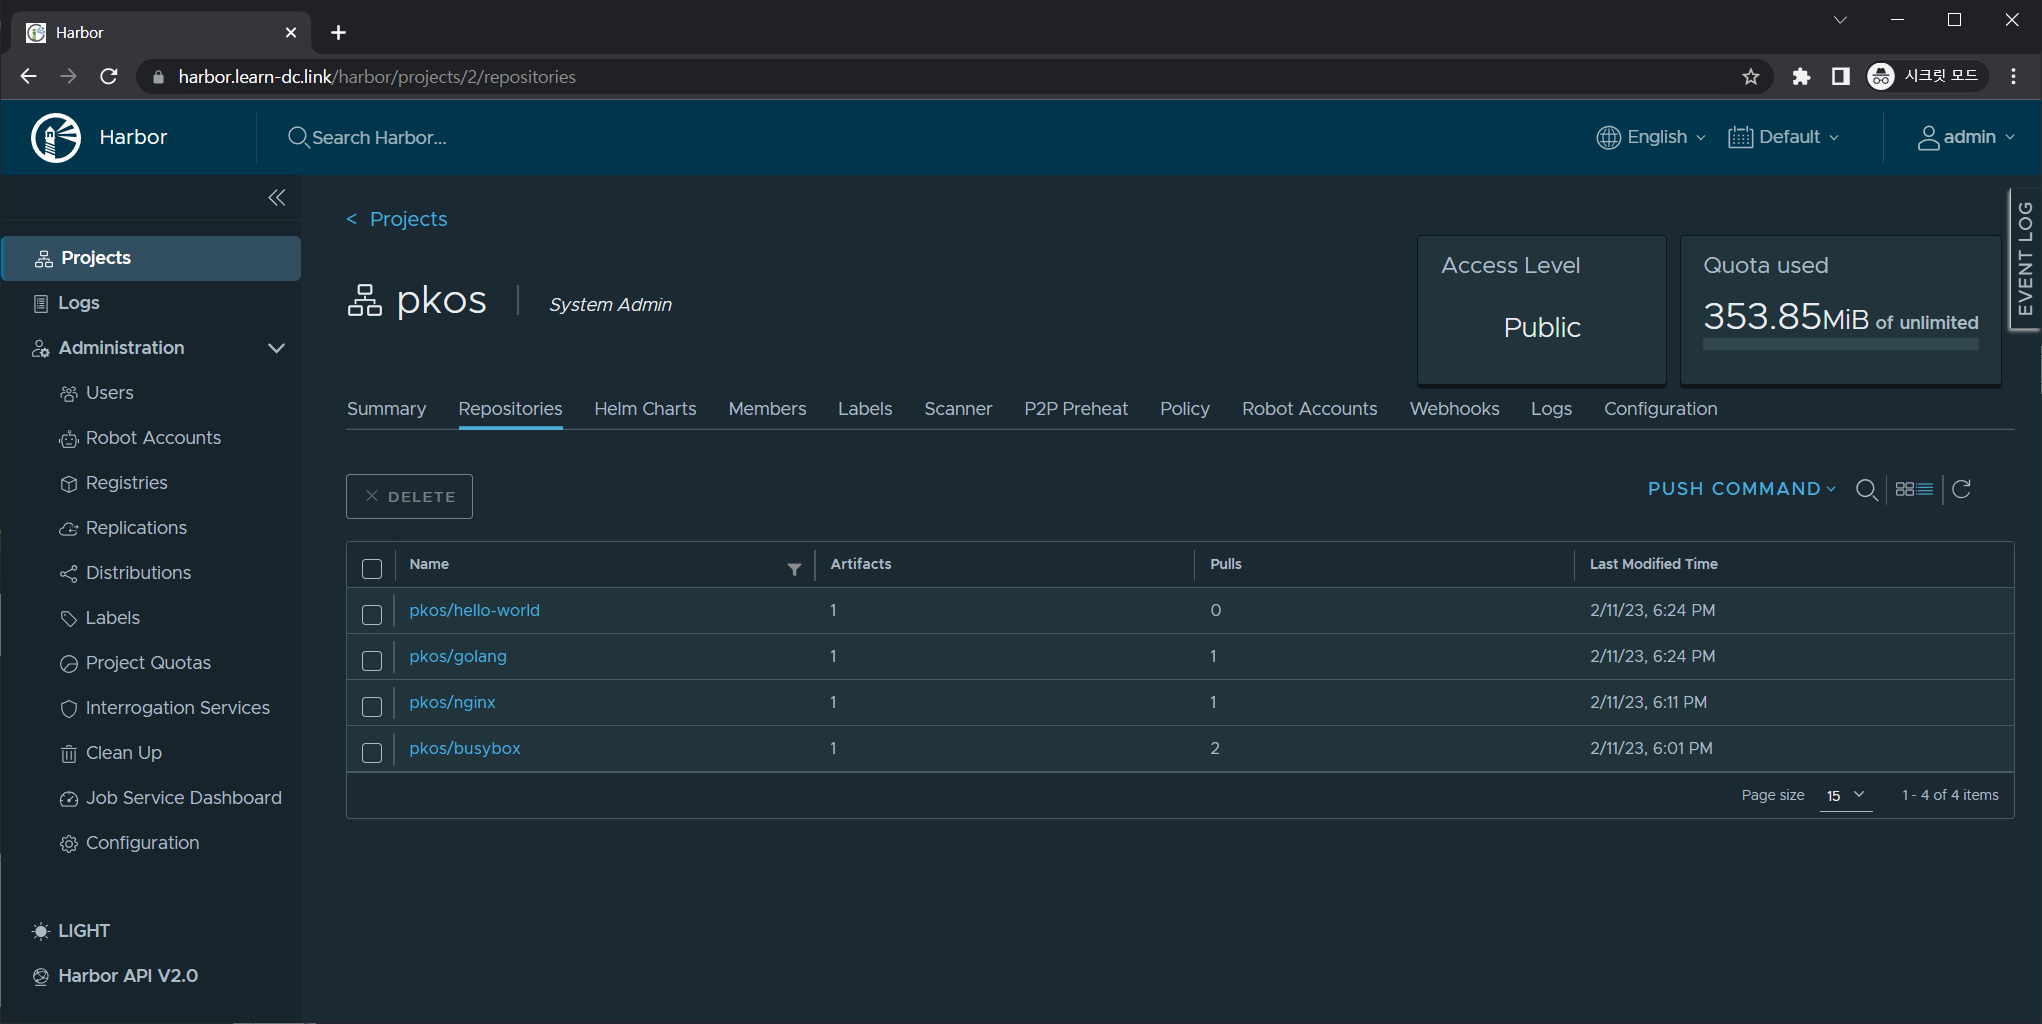
수행결과 및 과정
-
컨테이너 이미지 참고
-
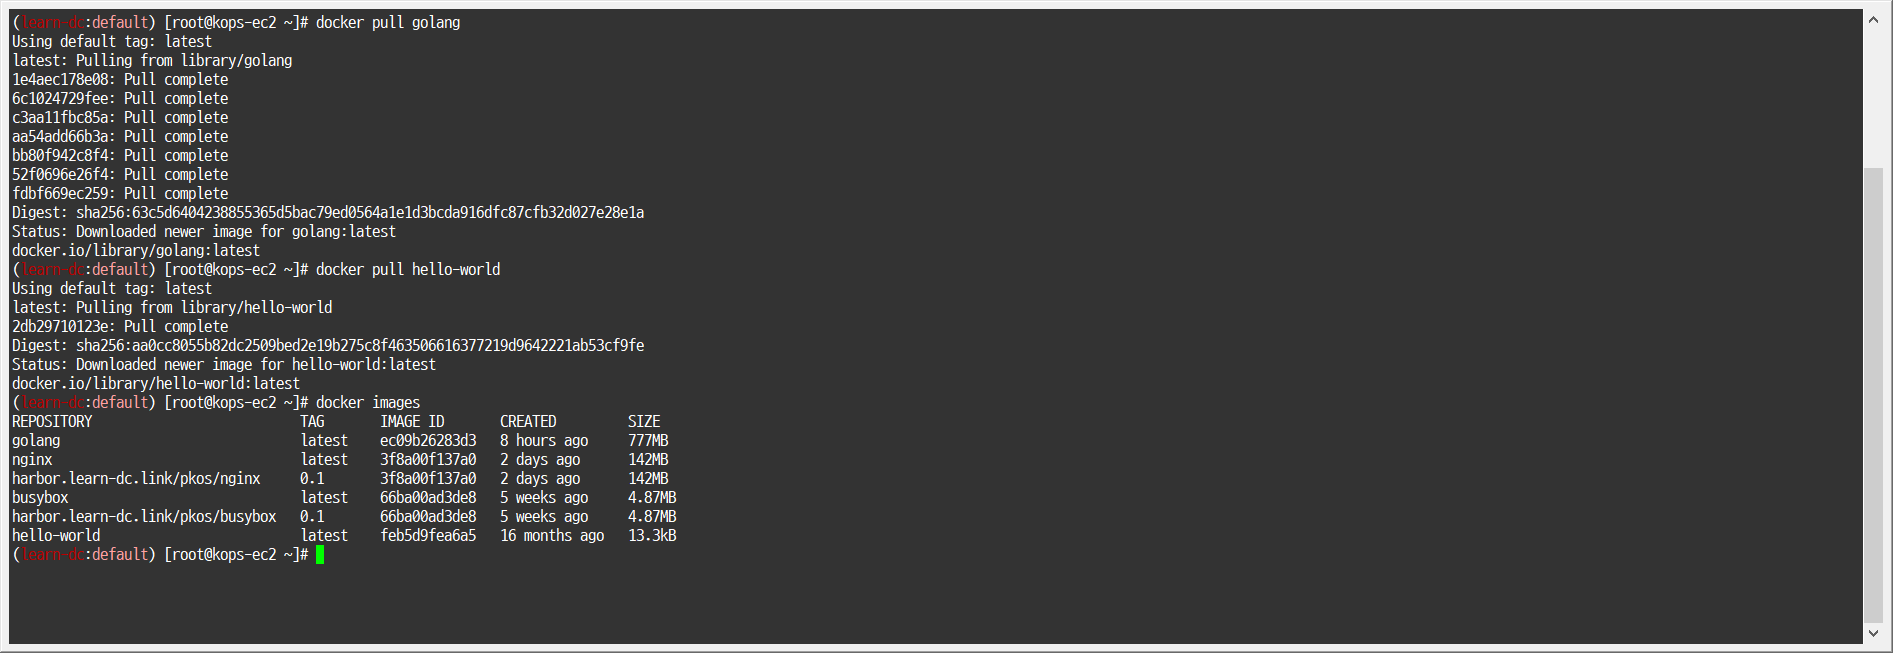
컨테이너 이미지 가져오기
-
1
2
3
docker pull golang docker pull hello-world docker images
-
-
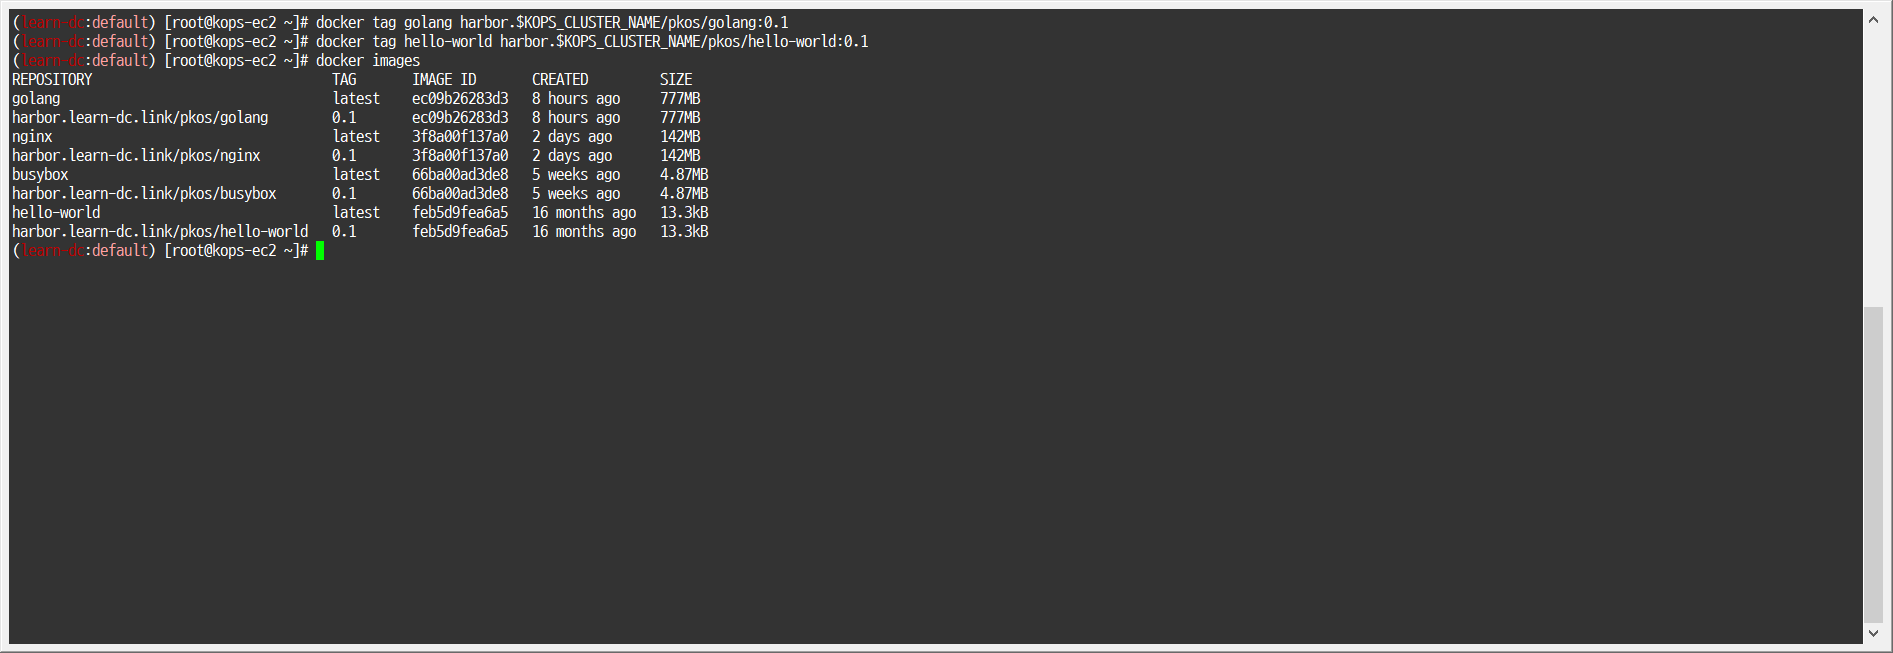
태그 설정
-
1
2
3
docker tag golang harbor.$KOPS_CLUSTER_NAME/pkos/golang:0.1 docker tag hello-world harbor.$KOPS_CLUSTER_NAME/pkos/hello-world:0.1 docker images
-
-
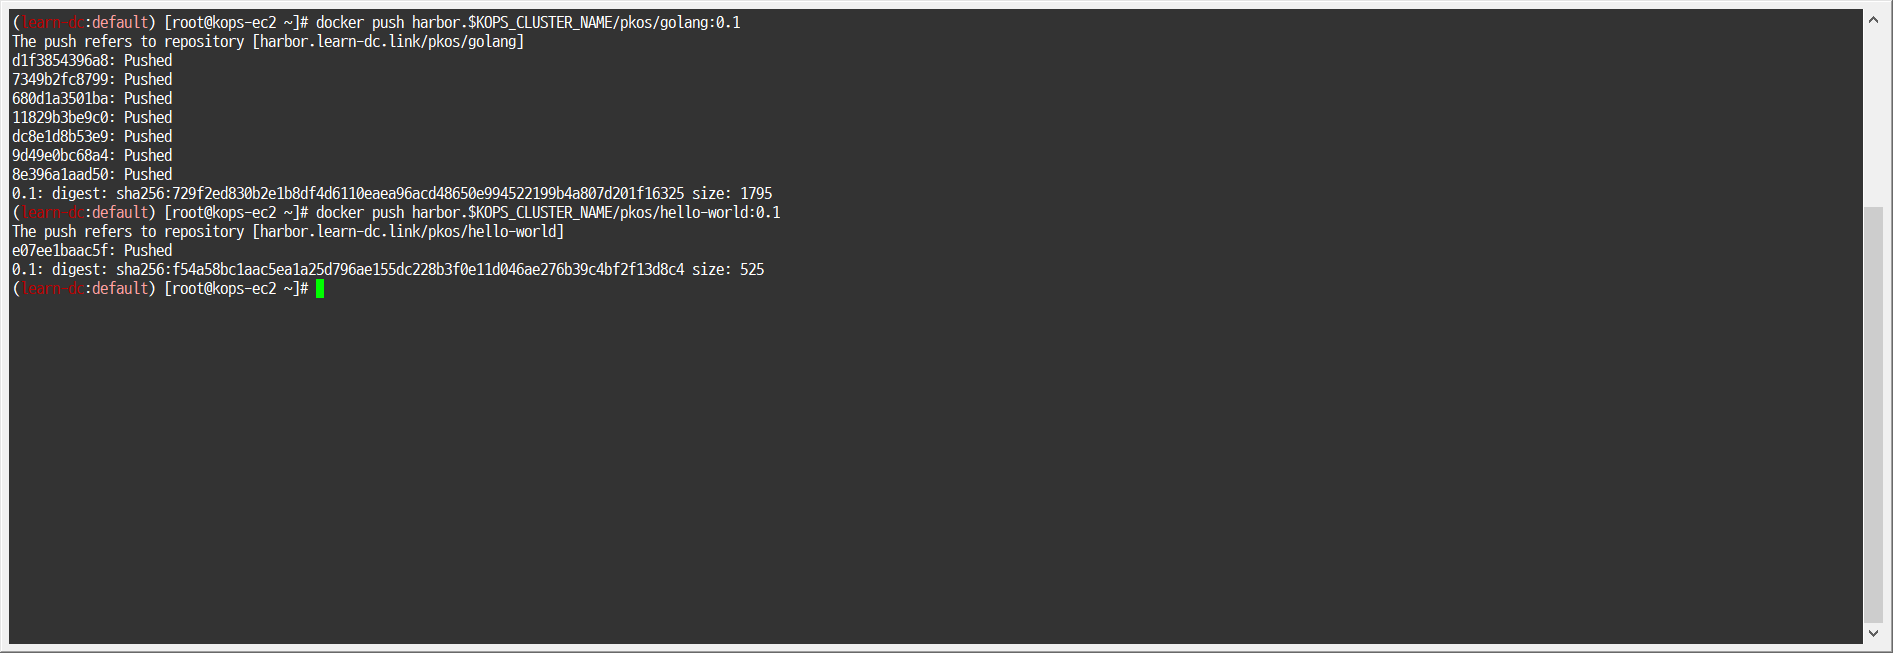
이미지 업로드
-
1
2
docker push harbor.$KOPS_CLUSTER_NAME/pkos/golang:0.1 docker push harbor.$KOPS_CLUSTER_NAME/pkos/hello-world:0.1
-
-
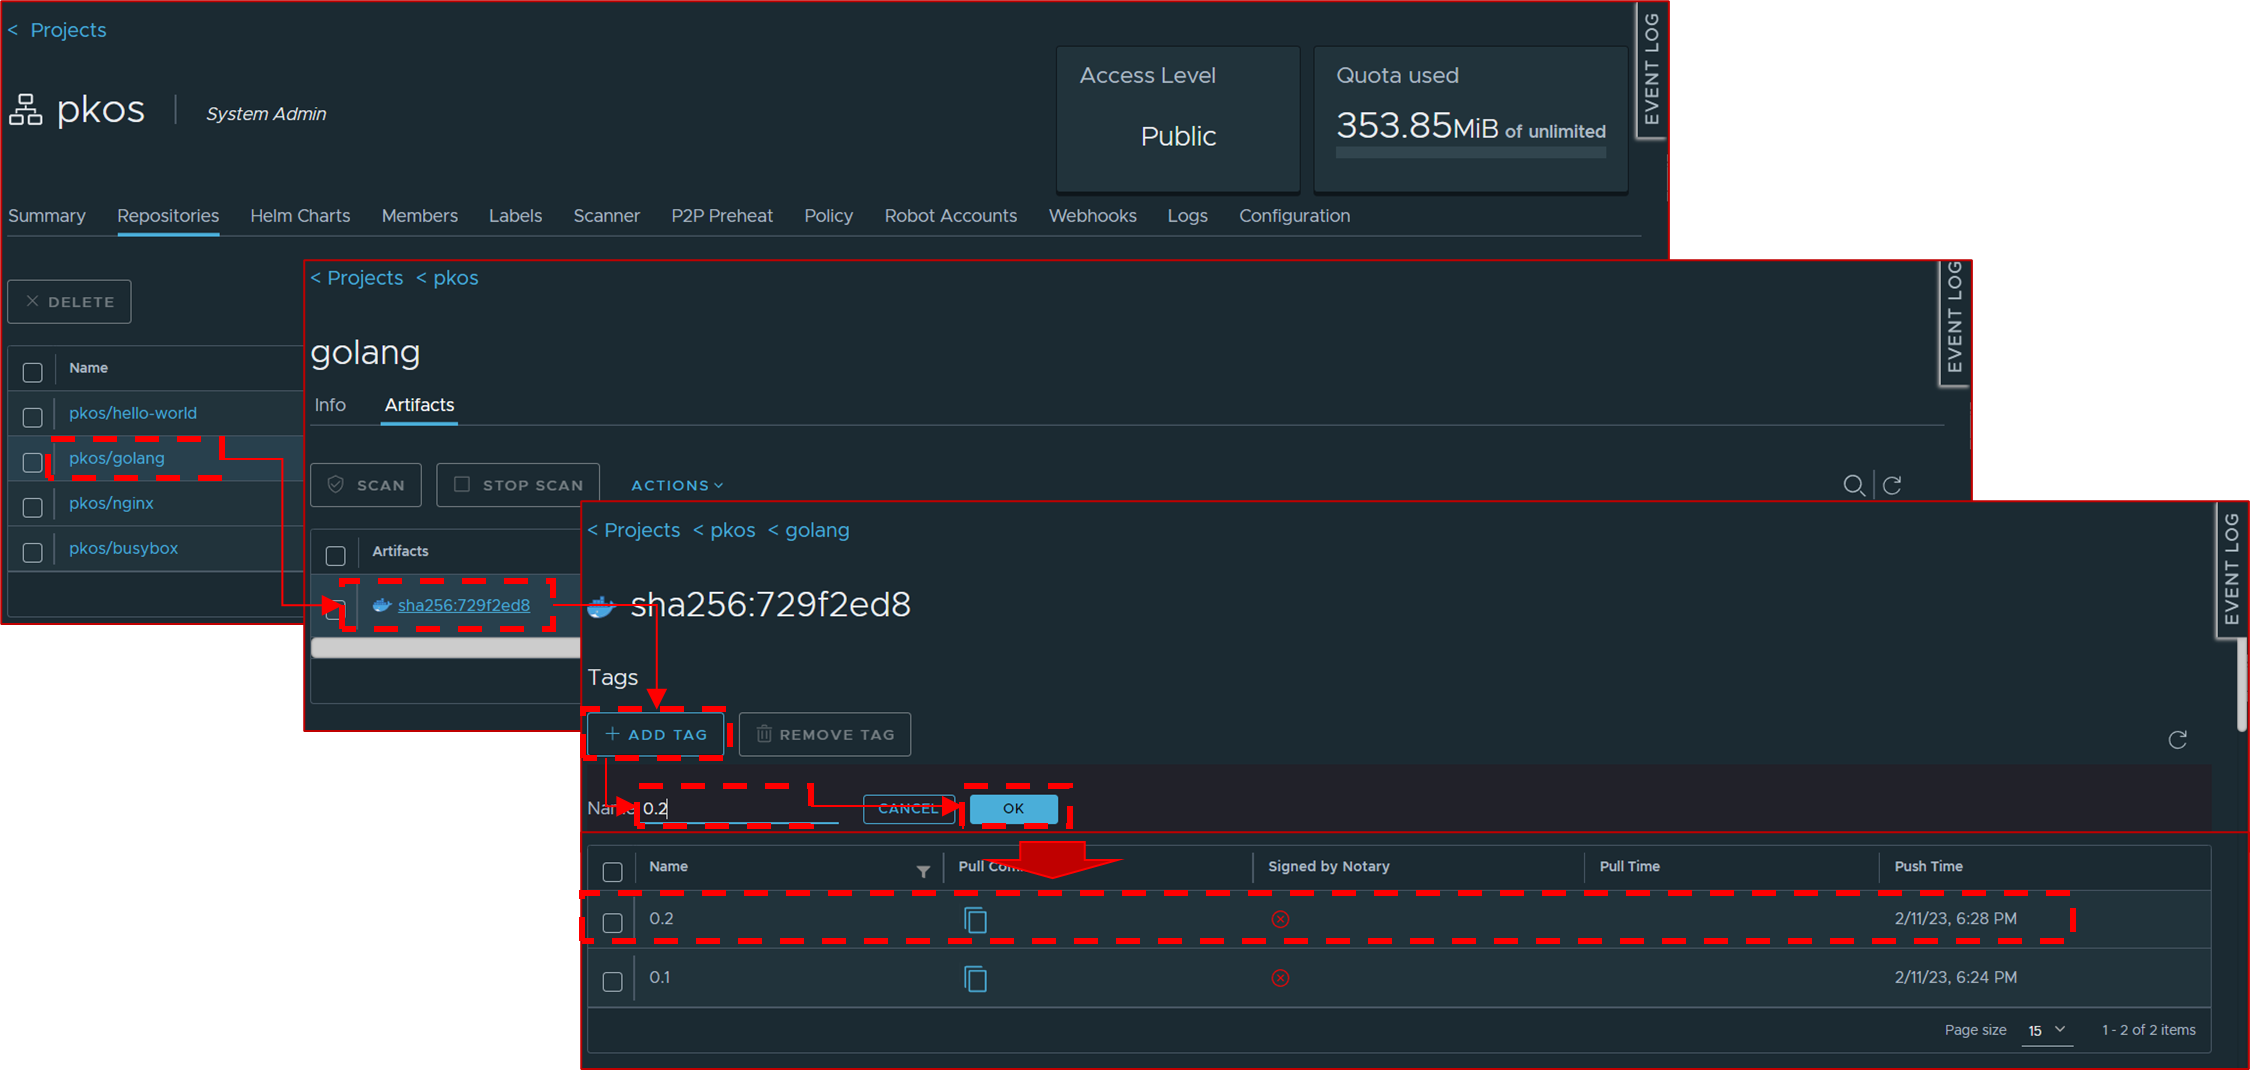
이미지 태그 추가
-
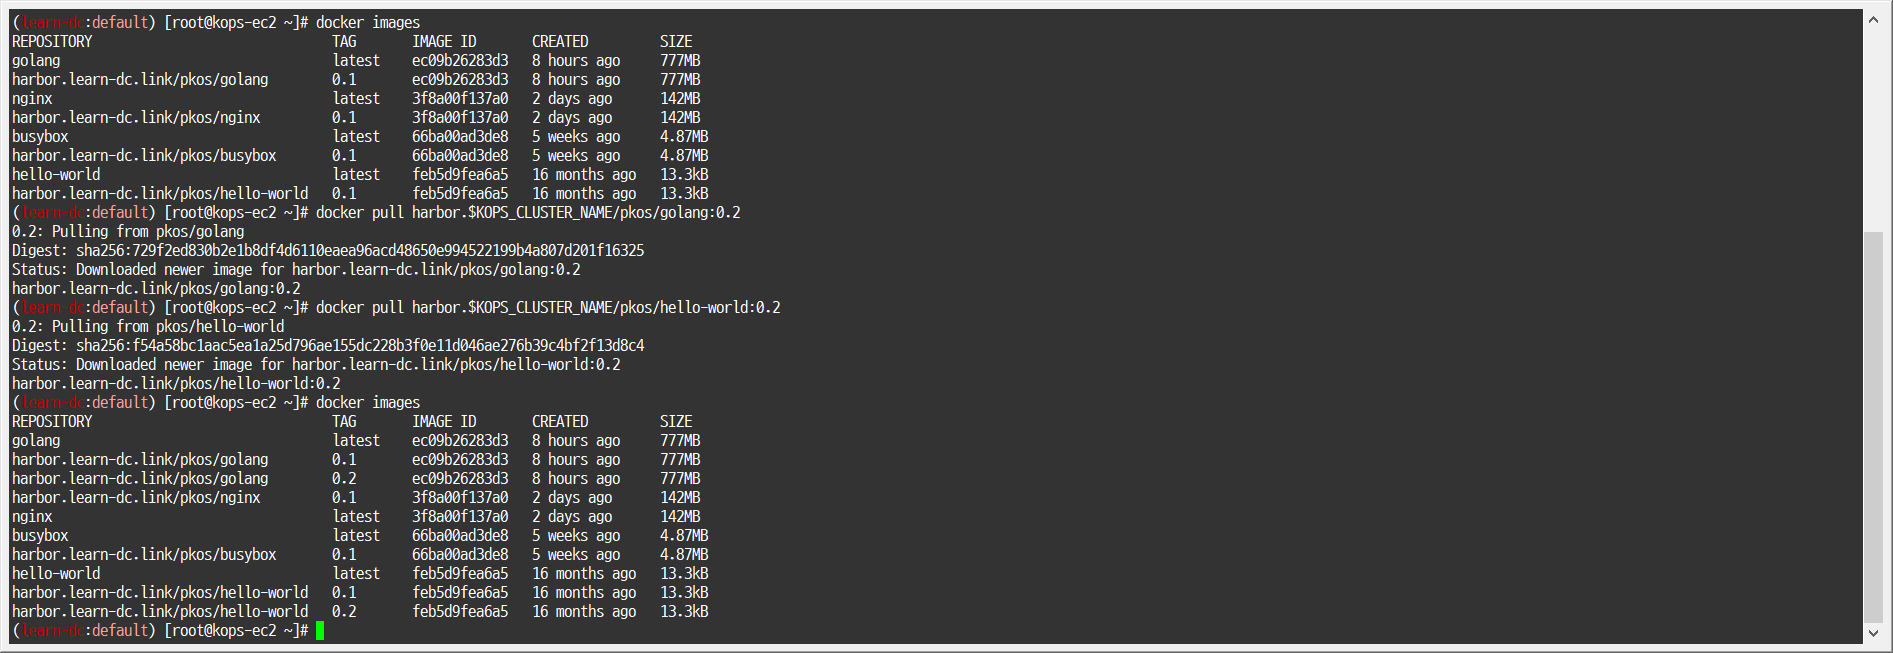
이미지 다운로드
-
1
2
docker pull harbor.$KOPS_CLUSTER_NAME/pkos/golang:0.2 docker pull harbor.$KOPS_CLUSTER_NAME/pkos/hello-world:0.2
-
-
3. 깃랩(GitLab)를 이용하여 로컬 깃(Git) 소스 저장소 구축
- 소개 : 무료 오픈소스로 사용 가능한 소스 코드 원격 저장소, 최소 Spec(4CPU, 4Mem, Disk 40GB) - Requirements Pricing GetStarted
3.1 헬름 차트로 깃랩 설치 후 웹 로그인 - HelmChart Docs
-
(옵션) Gitlab 관련 Ingress(ALB) 4개를 생성하는 대신, 1대만으로 동작하게 설정해보세요!
-
모니터링
-
1
2
kubectl create ns gitlab watch kubectl get pod,pvc,ingress -n gitlab
-
-
설치
-
 1
 2
 3
 4
 5
 6
 7
 8
 9
10
11
12
13
14
15
16
17
18
19
20
21
22
23
24
25
26
27
28
29
30
31
32
33
34
35
36
37
38
39
40
41
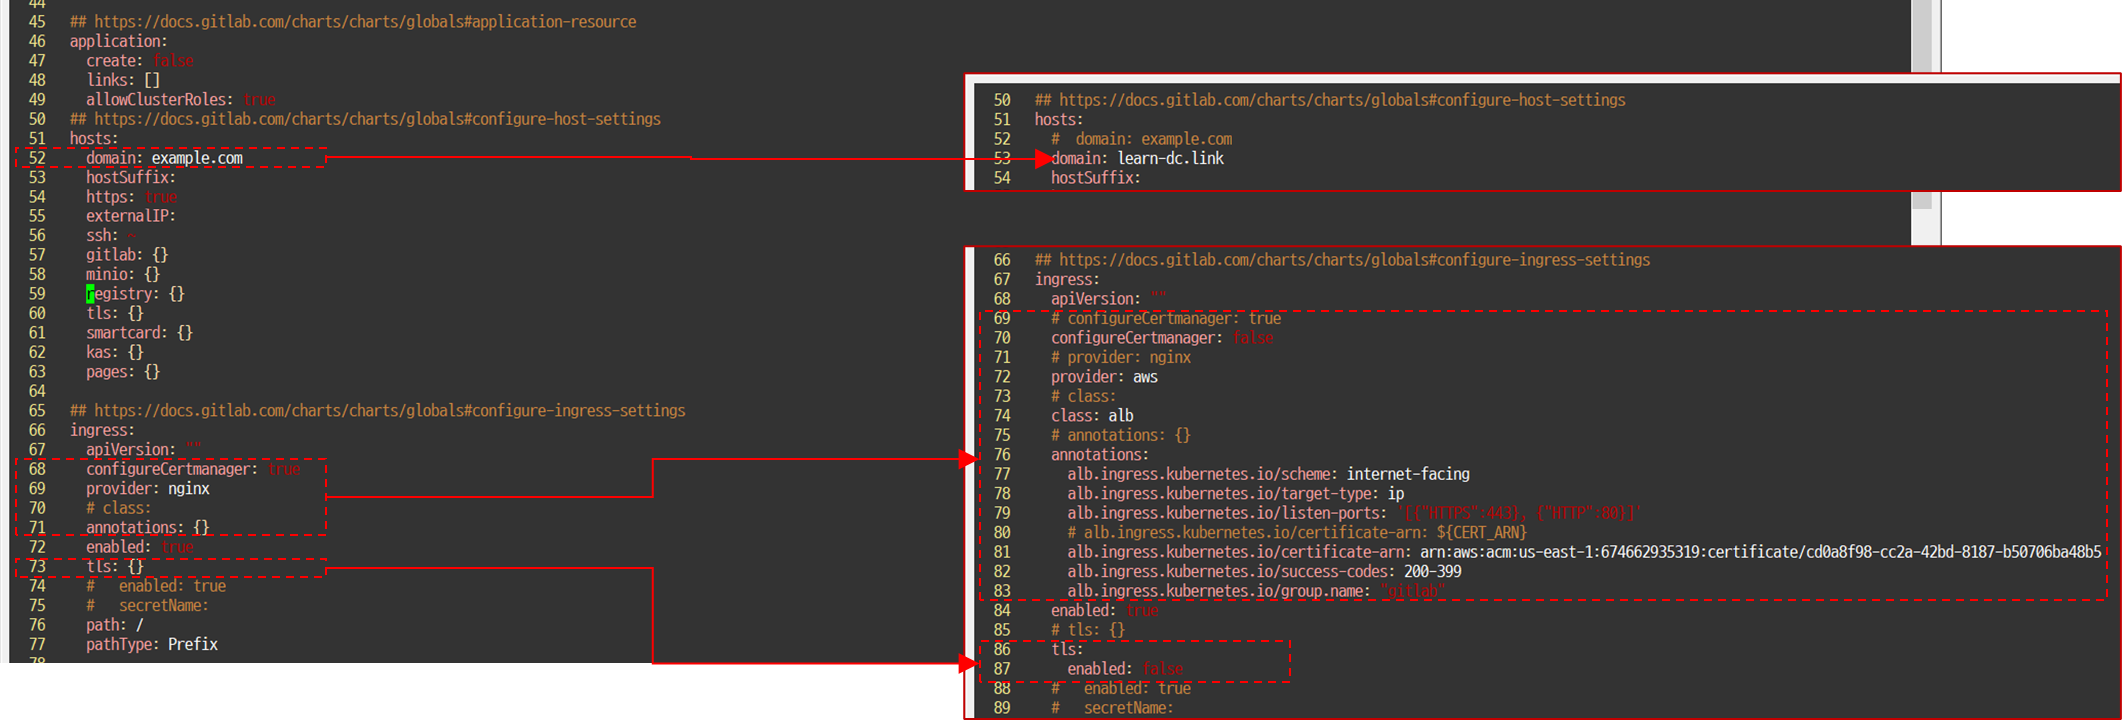
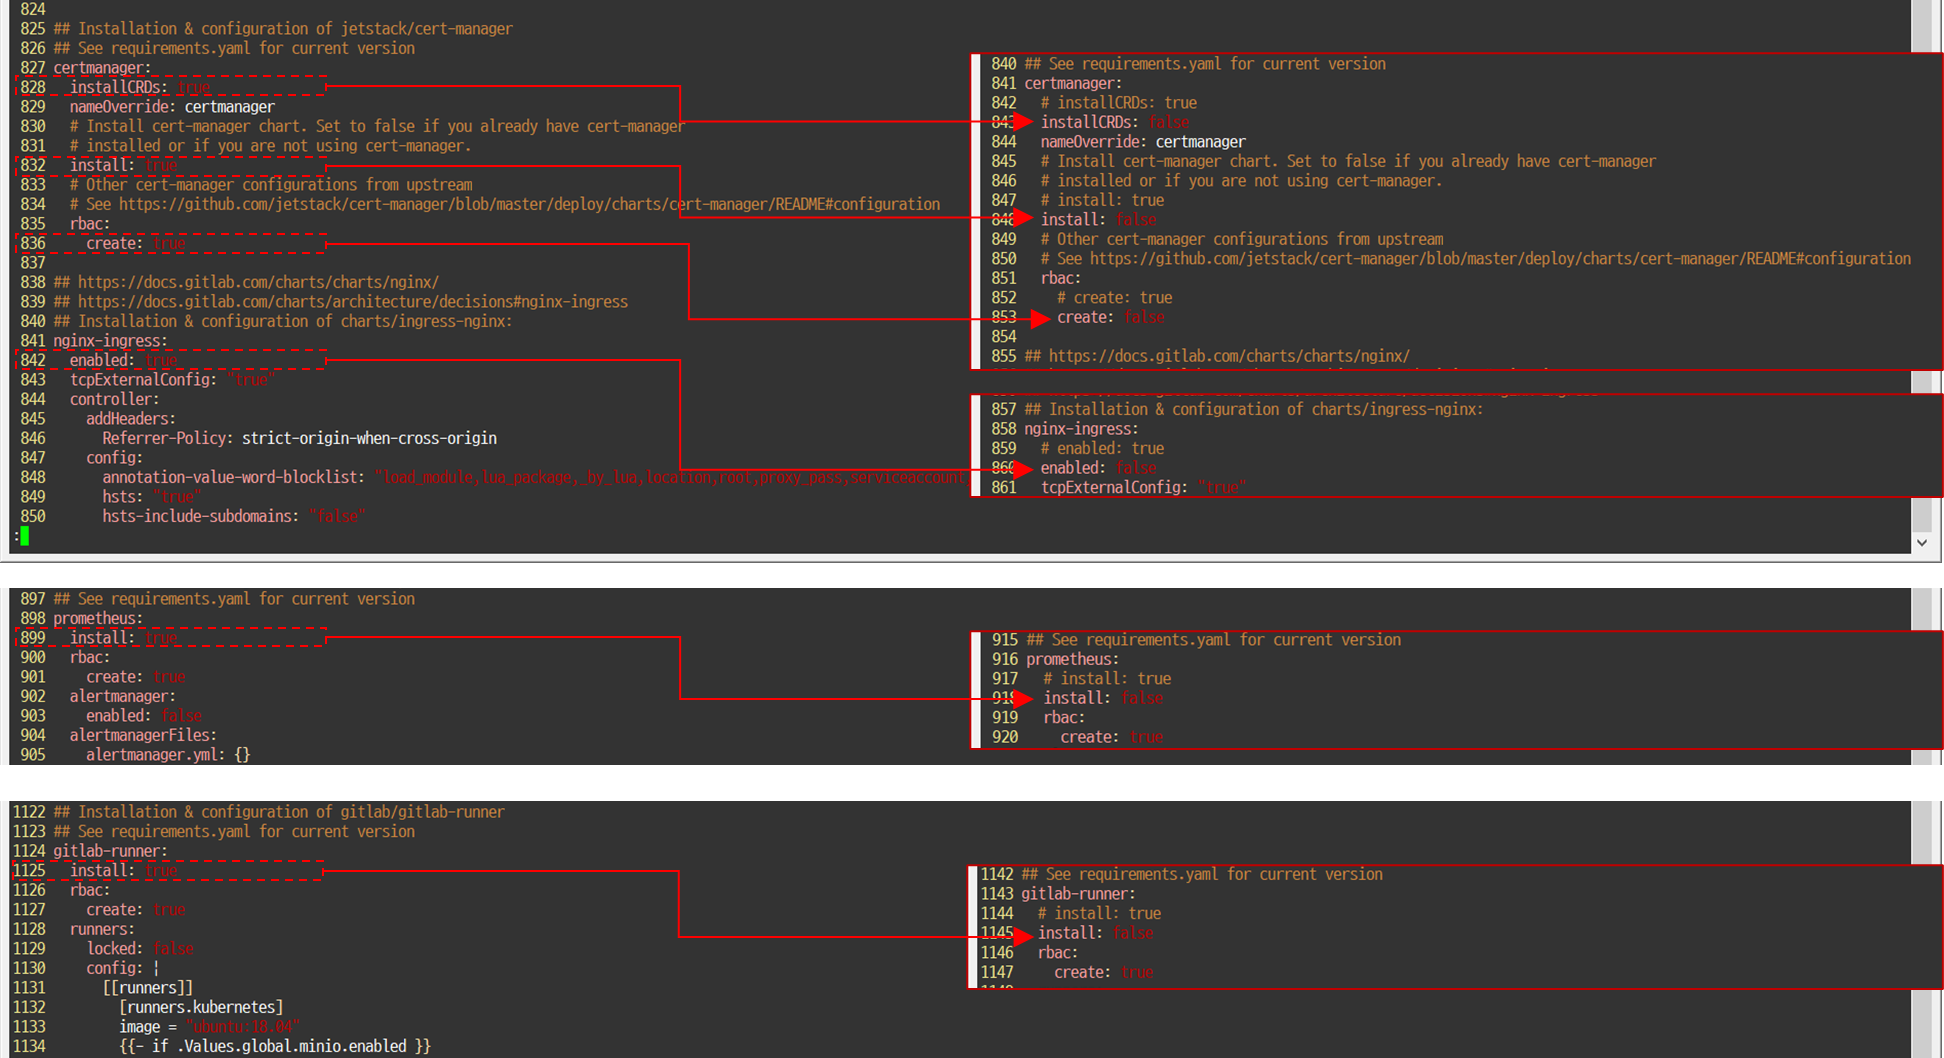
helm repo add gitlab https://charts.gitlab.io/ helm repo update helm fetch gitlab/gitlab --untar vim ~/gitlab/values.yaml # ---------------------- # global: # hosts: ## domain: <각자자신의도메인> # 52줄 # domain: learn-dc.link # https: true # # ingress: # configureCertmanager: false # 68줄 # provider: aws # 69줄 # class: alb # 70줄 # annotations: # 71줄 # alb.ingress.kubernetes.io/scheme: internet-facing # alb.ingress.kubernetes.io/target-type: ip # alb.ingress.kubernetes.io/listen-ports: '[{"HTTPS":443}, {"HTTP":80}]' # alb.ingress.kubernetes.io/certificate-arn: ${CERT_ARN} # alb.ingress.kubernetes.io/success-codes: 200-399 # alb.ingress.kubernetes.io/group.name: "gitlab" # tls: # 73줄 # enabled: false # # certmanager: # installCRDs: false # 828줄 # install: false # 832줄 # rbac: # create: false # 836줄 # # nginx-ingress: # enabled: false # 842줄 # # prometheus: # install: false # 899줄 # # gitlab-runner: # install: false # 1125줄 # ---------------------- -
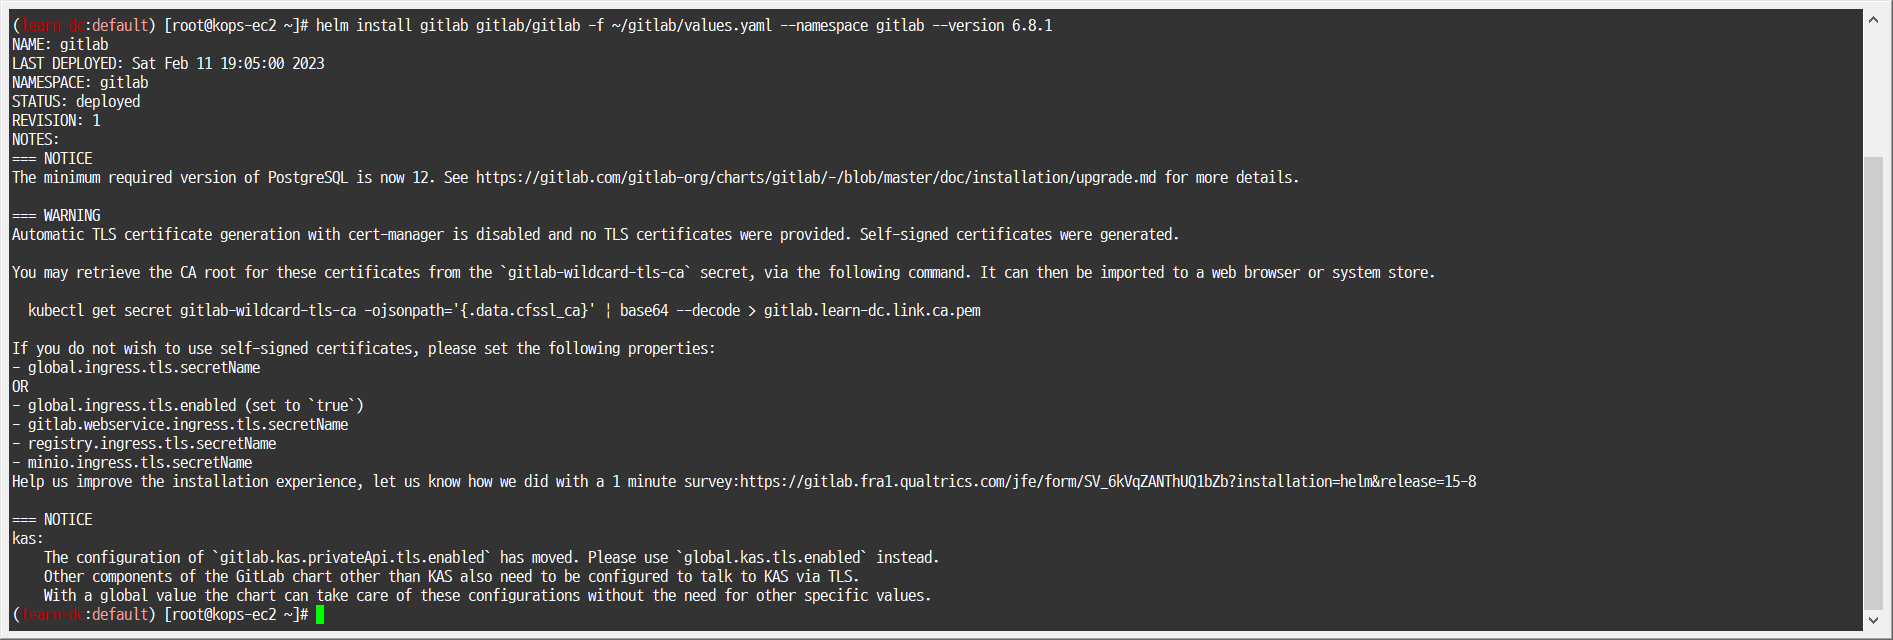
1helm install gitlab gitlab/gitlab -f ~/gitlab/values.yaml --namespace gitlab --version 6.8.1
-
-
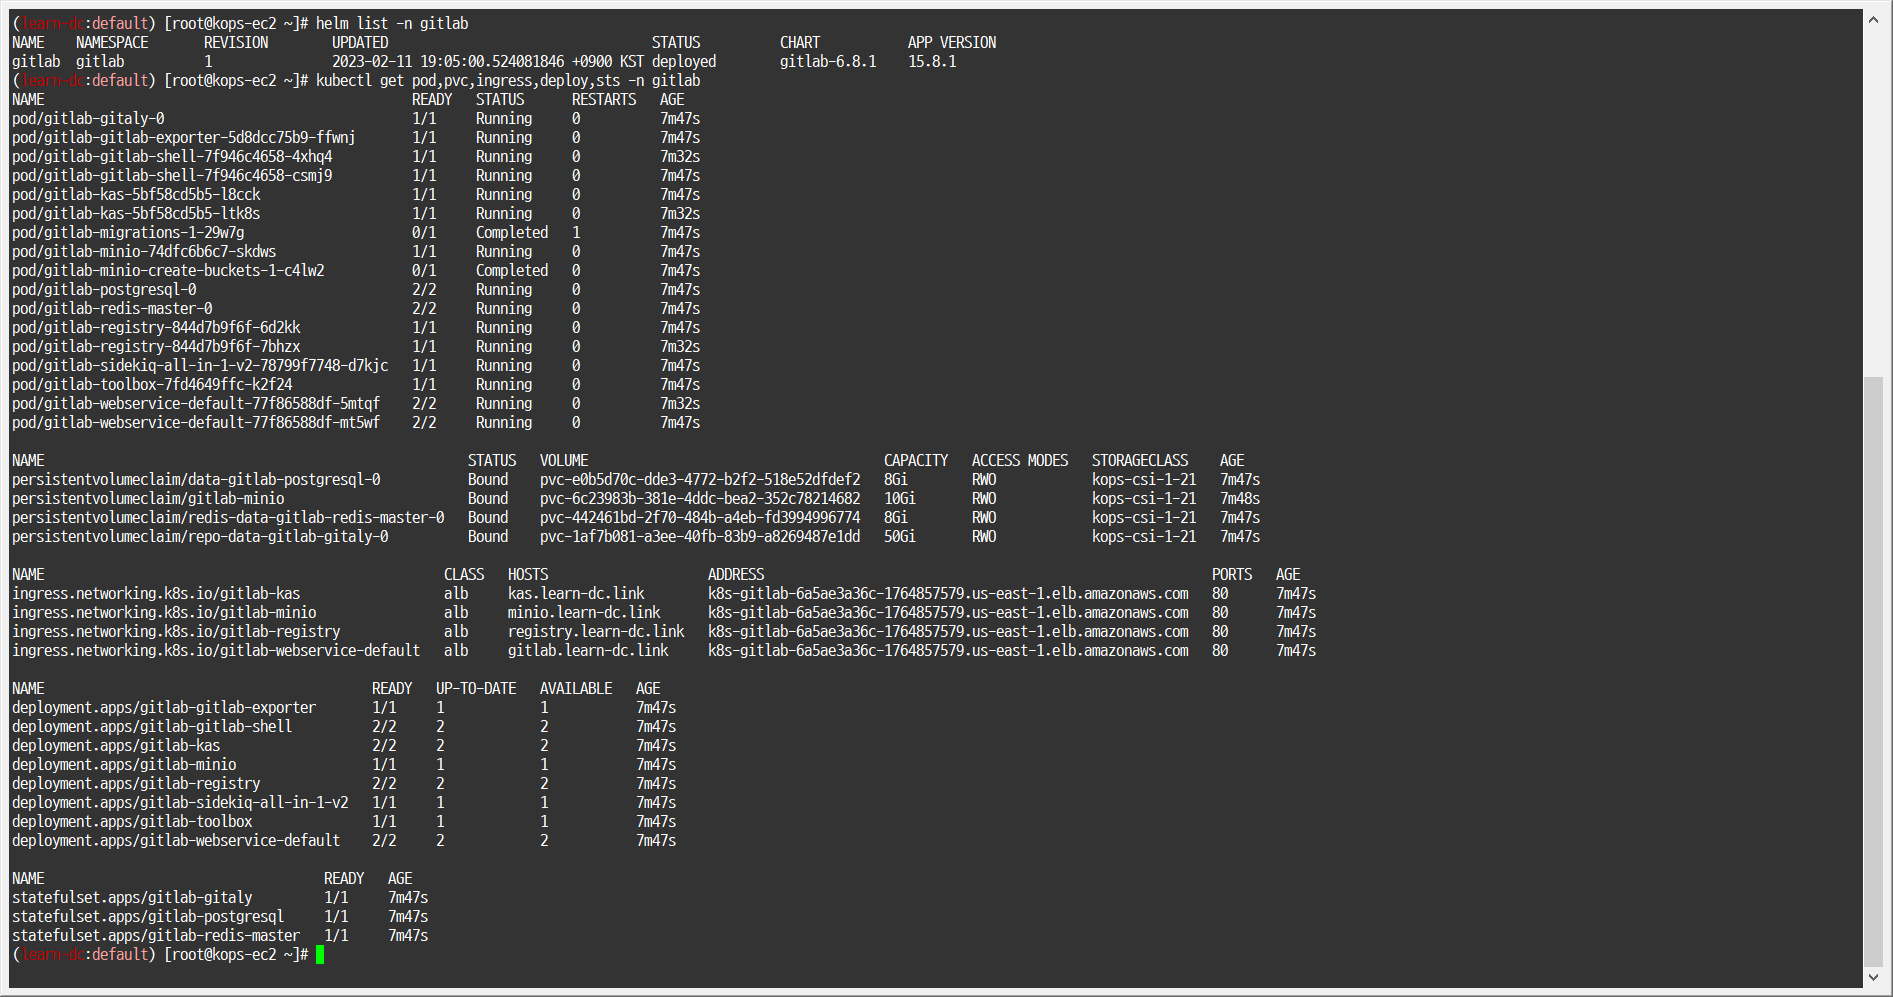
확인 - SubCharts
-
 1
 2
 3
 4
 5
 6
 7
 8
 9
10
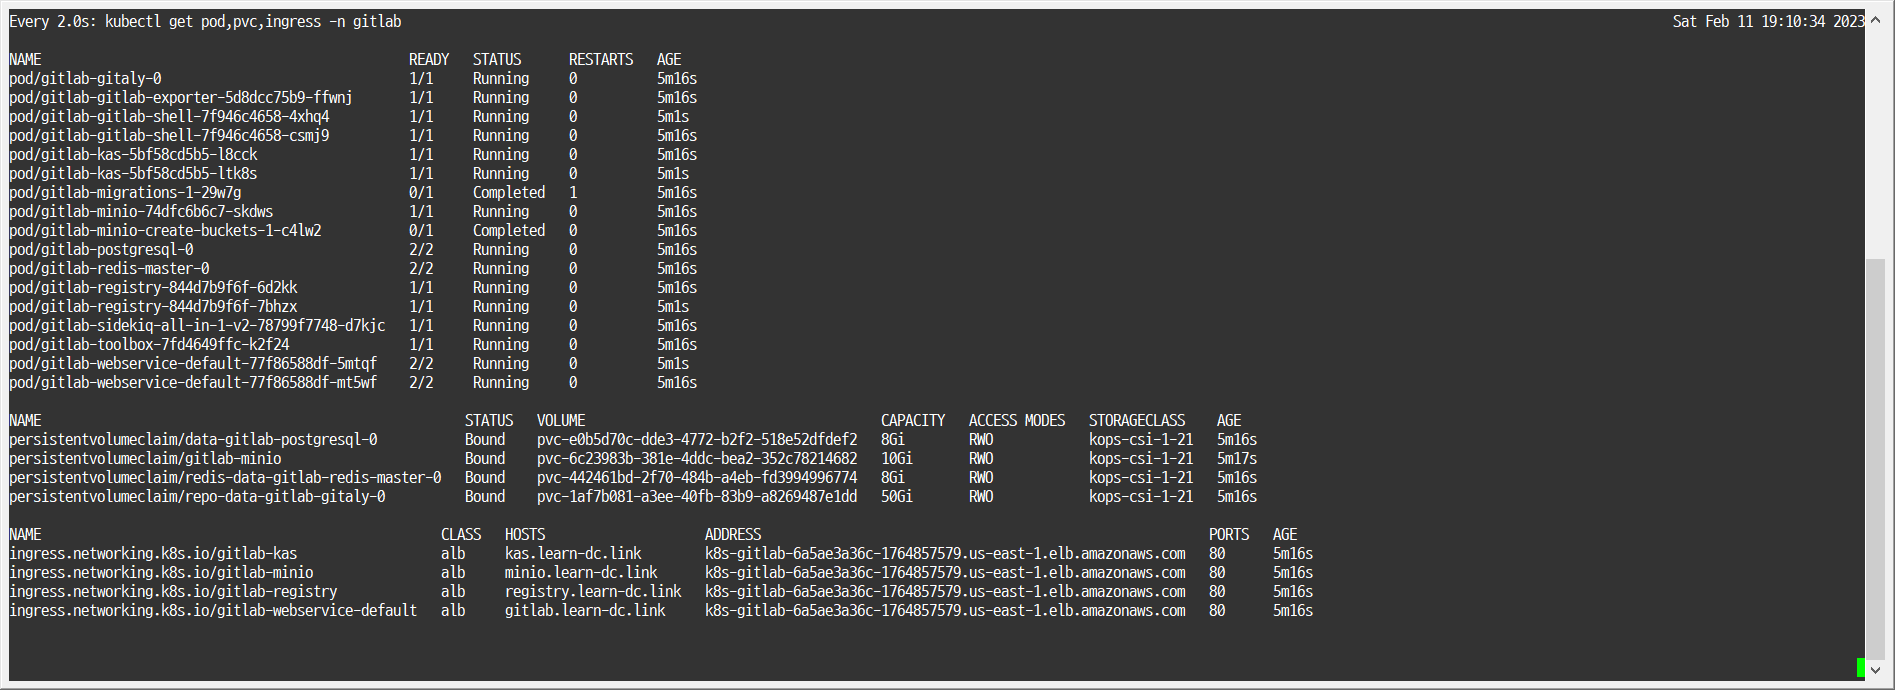
# gitlab-gitaly : 웹서비스 혹은 ssh 방식으로 진행되는 깃 제목, 브랜치, 태그 등의 깃 요청 등에 대한 작업을 담당 # gitlab-gitlab-shell : https 가 아닌 ssh 방식으로 깃 명령어 실행 시 해당 요청을 처리 # gitlab-kas : gitlab agent server # gitlab-postgresql : 유저, 권한, 이슈 등 깃랩의 메타 데이터 정보가 저장 # gitlab-redis-master : 깃랩 작업 정보는 레디스 캐시 서버를 이용하여 처리 # gitlab-sidekiq-all-in-1-v2 : 레디스와 연동하여 작업 큐 처리 용도로 사용 # gitlab-webservice-default : 깃랩 웹 서비스를 처리 helm list -n gitlab kubectl get pod,pvc,ingress,deploy,sts -n gitlab kubectl get-all -n gitlab
-
-
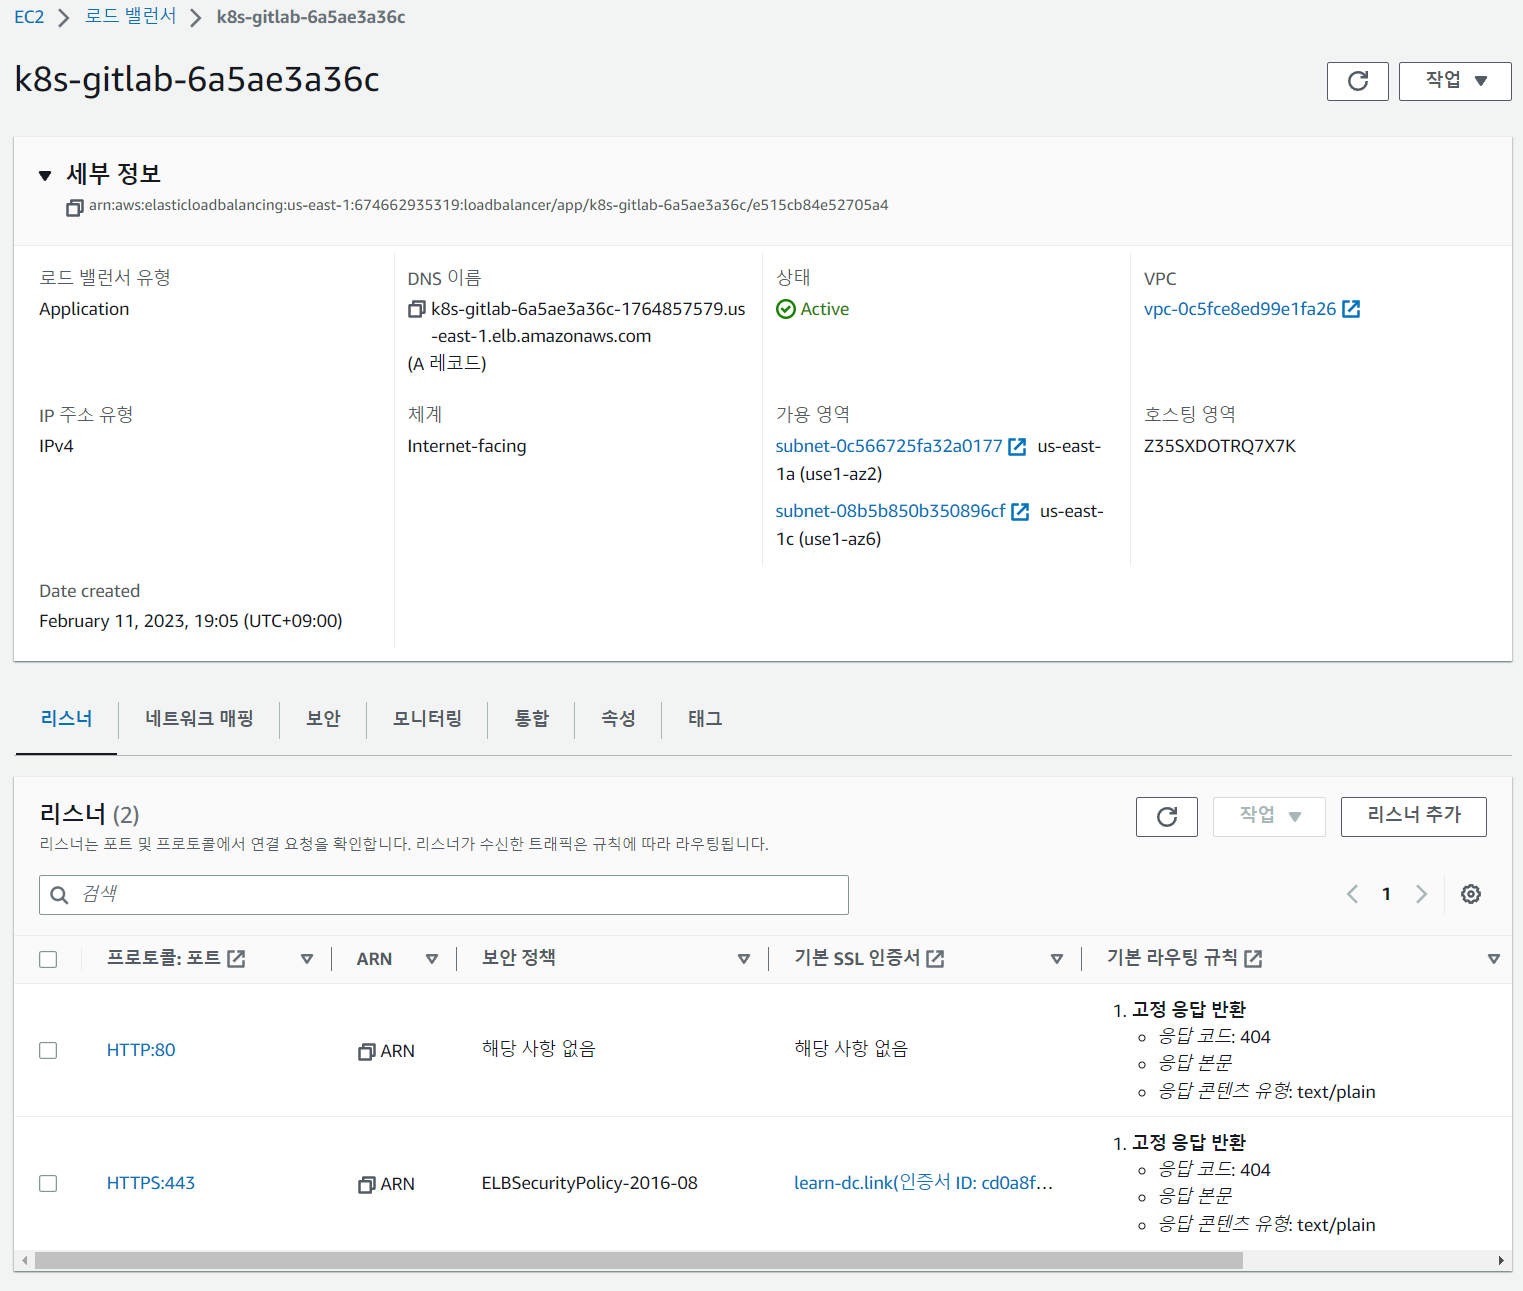
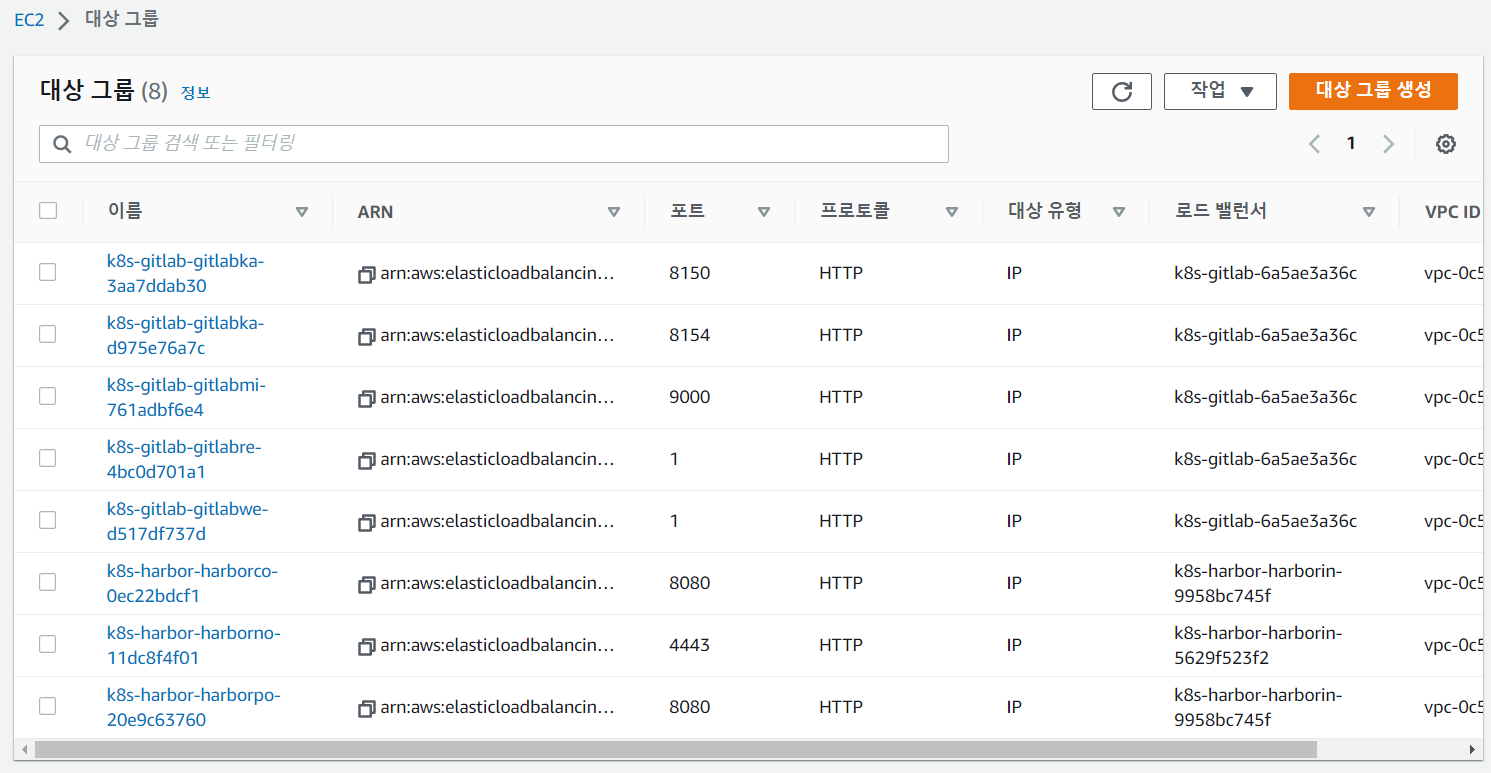
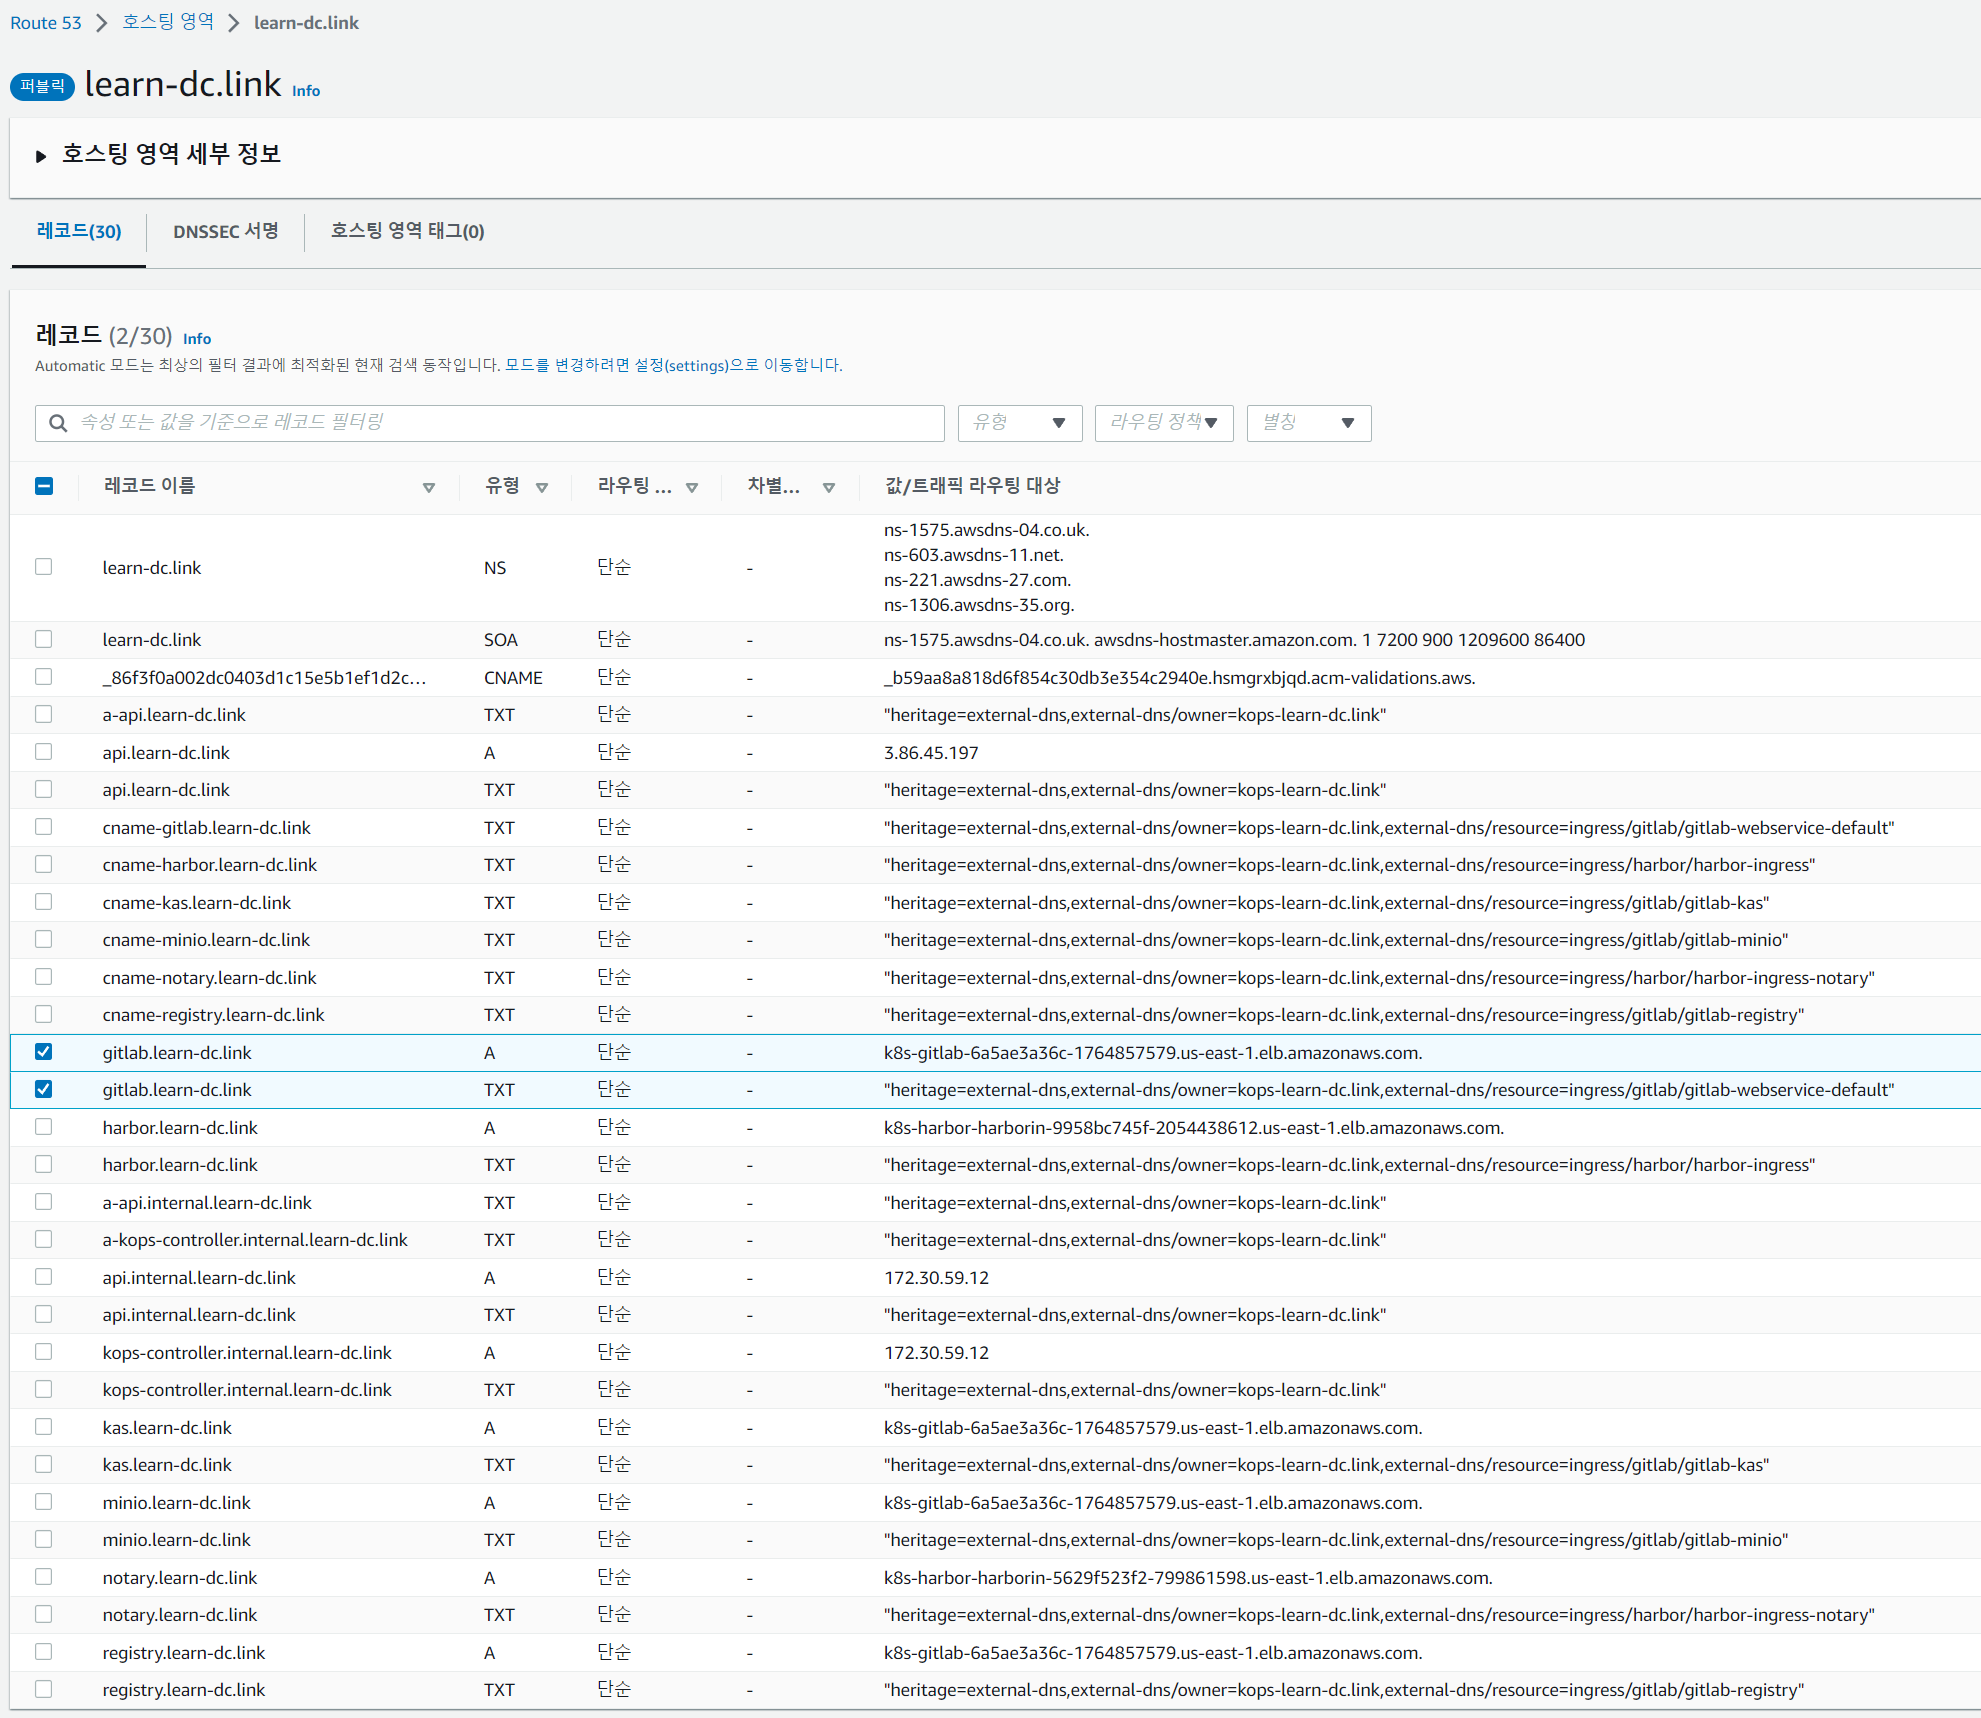
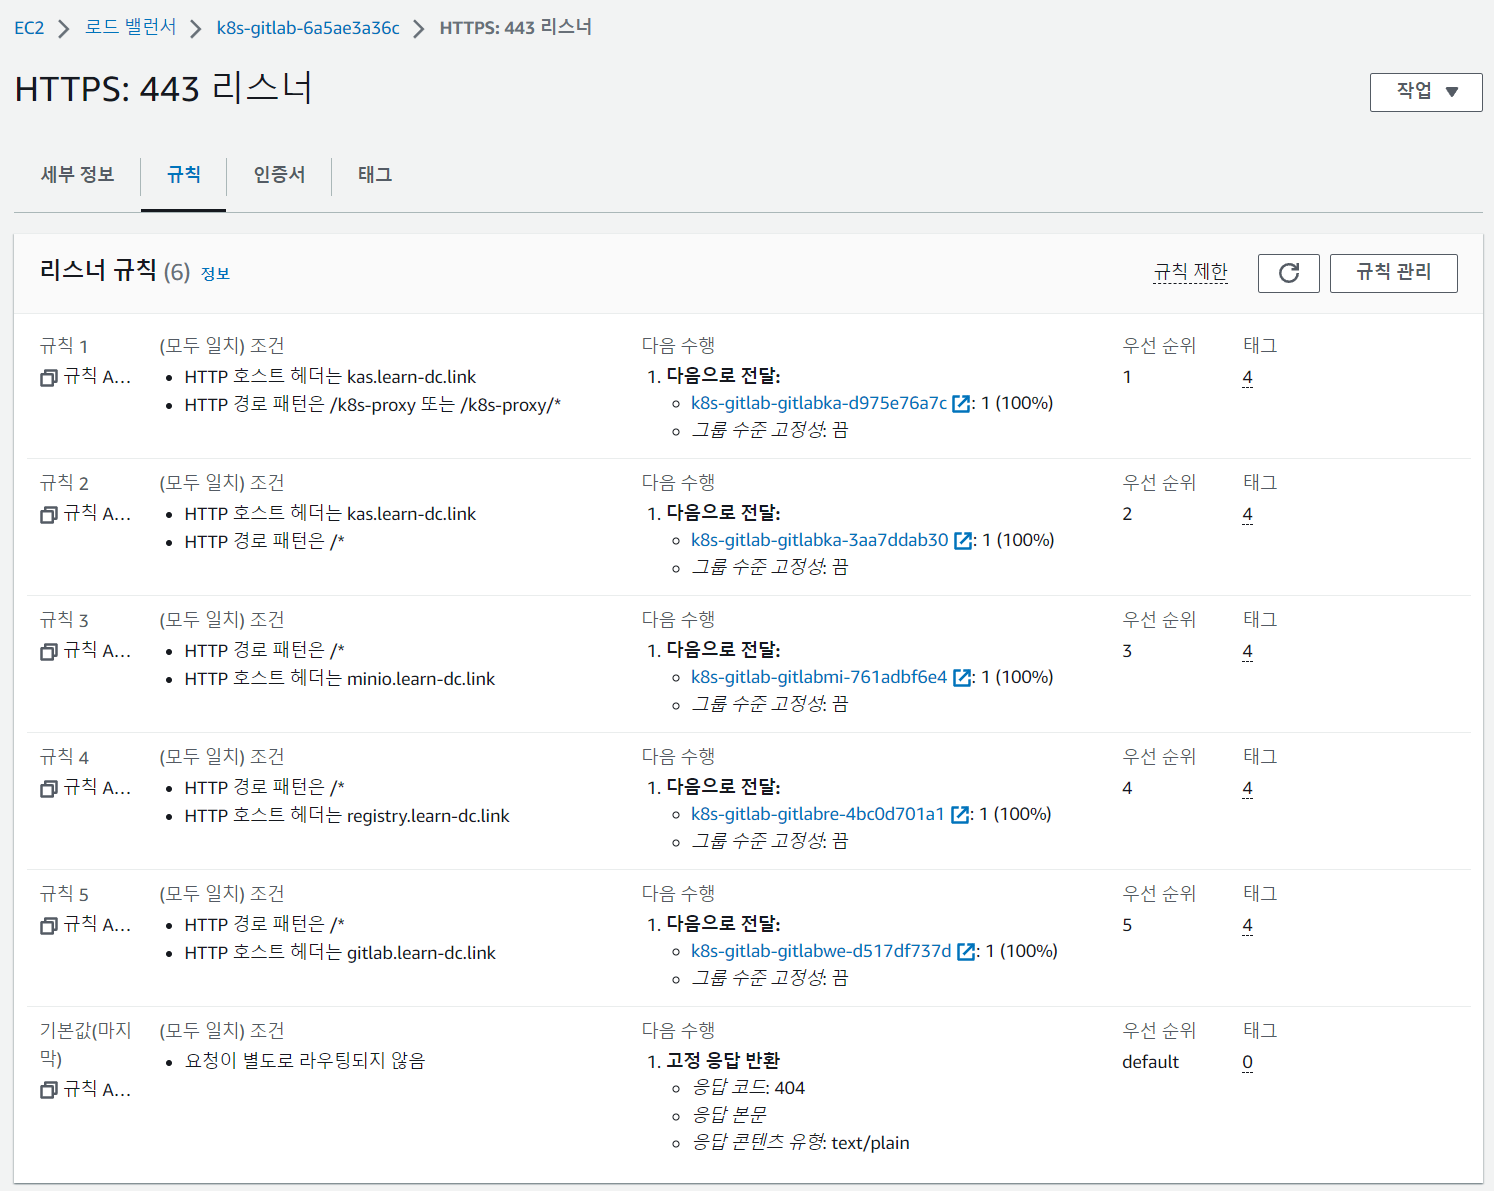
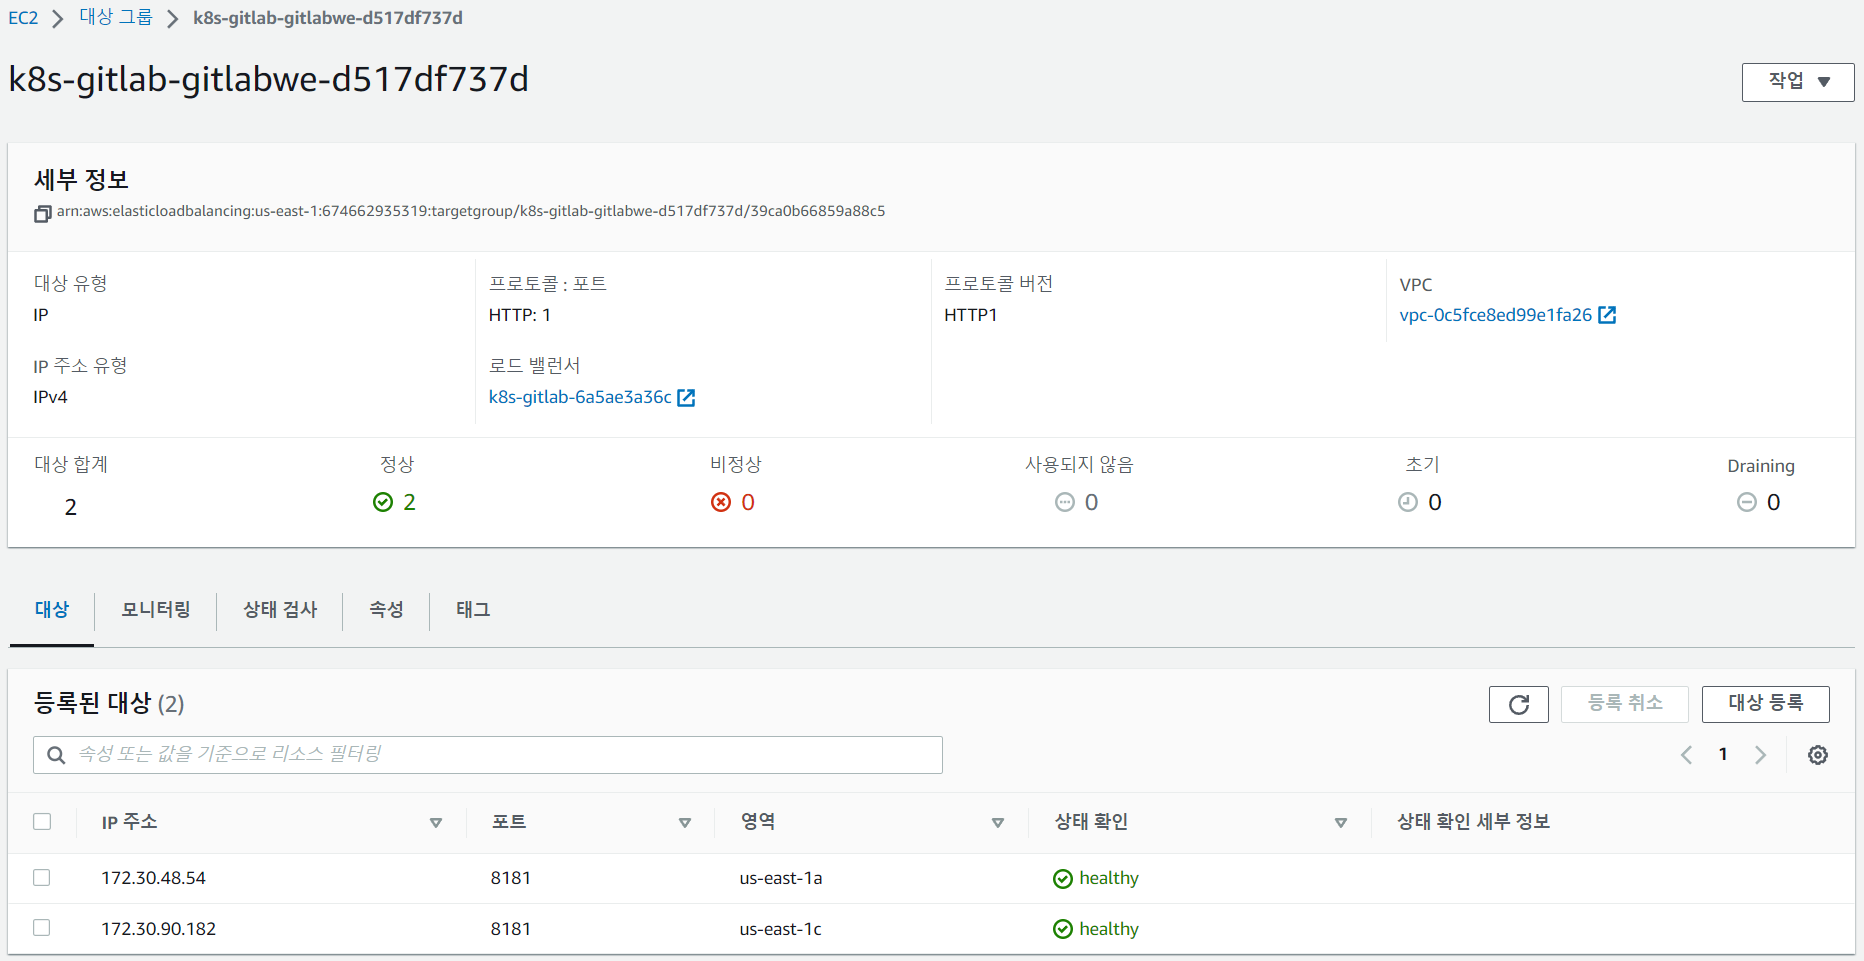
4개의 Ingress 가 1개의 ALB를 공유해서 사용 : ALB의 Rule 확인해볼것!
-
1
2
# alb.ingress.kubernetes.io/group.name: "gitlab" kubectl get ingress -n gitlab
-
-
웹 root 계정 암호 확인
-
1
2
kubectl get secrets -n gitlab gitlab-gitlab-initial-root-password --template={{.data.password}} | base64 -d ;echo # lqa0bvsETXIzFEuAuZkSsP7xz3oZJEWfaCYDBMKyHdolw281yp7fcnQOgej9iyl3
-
-
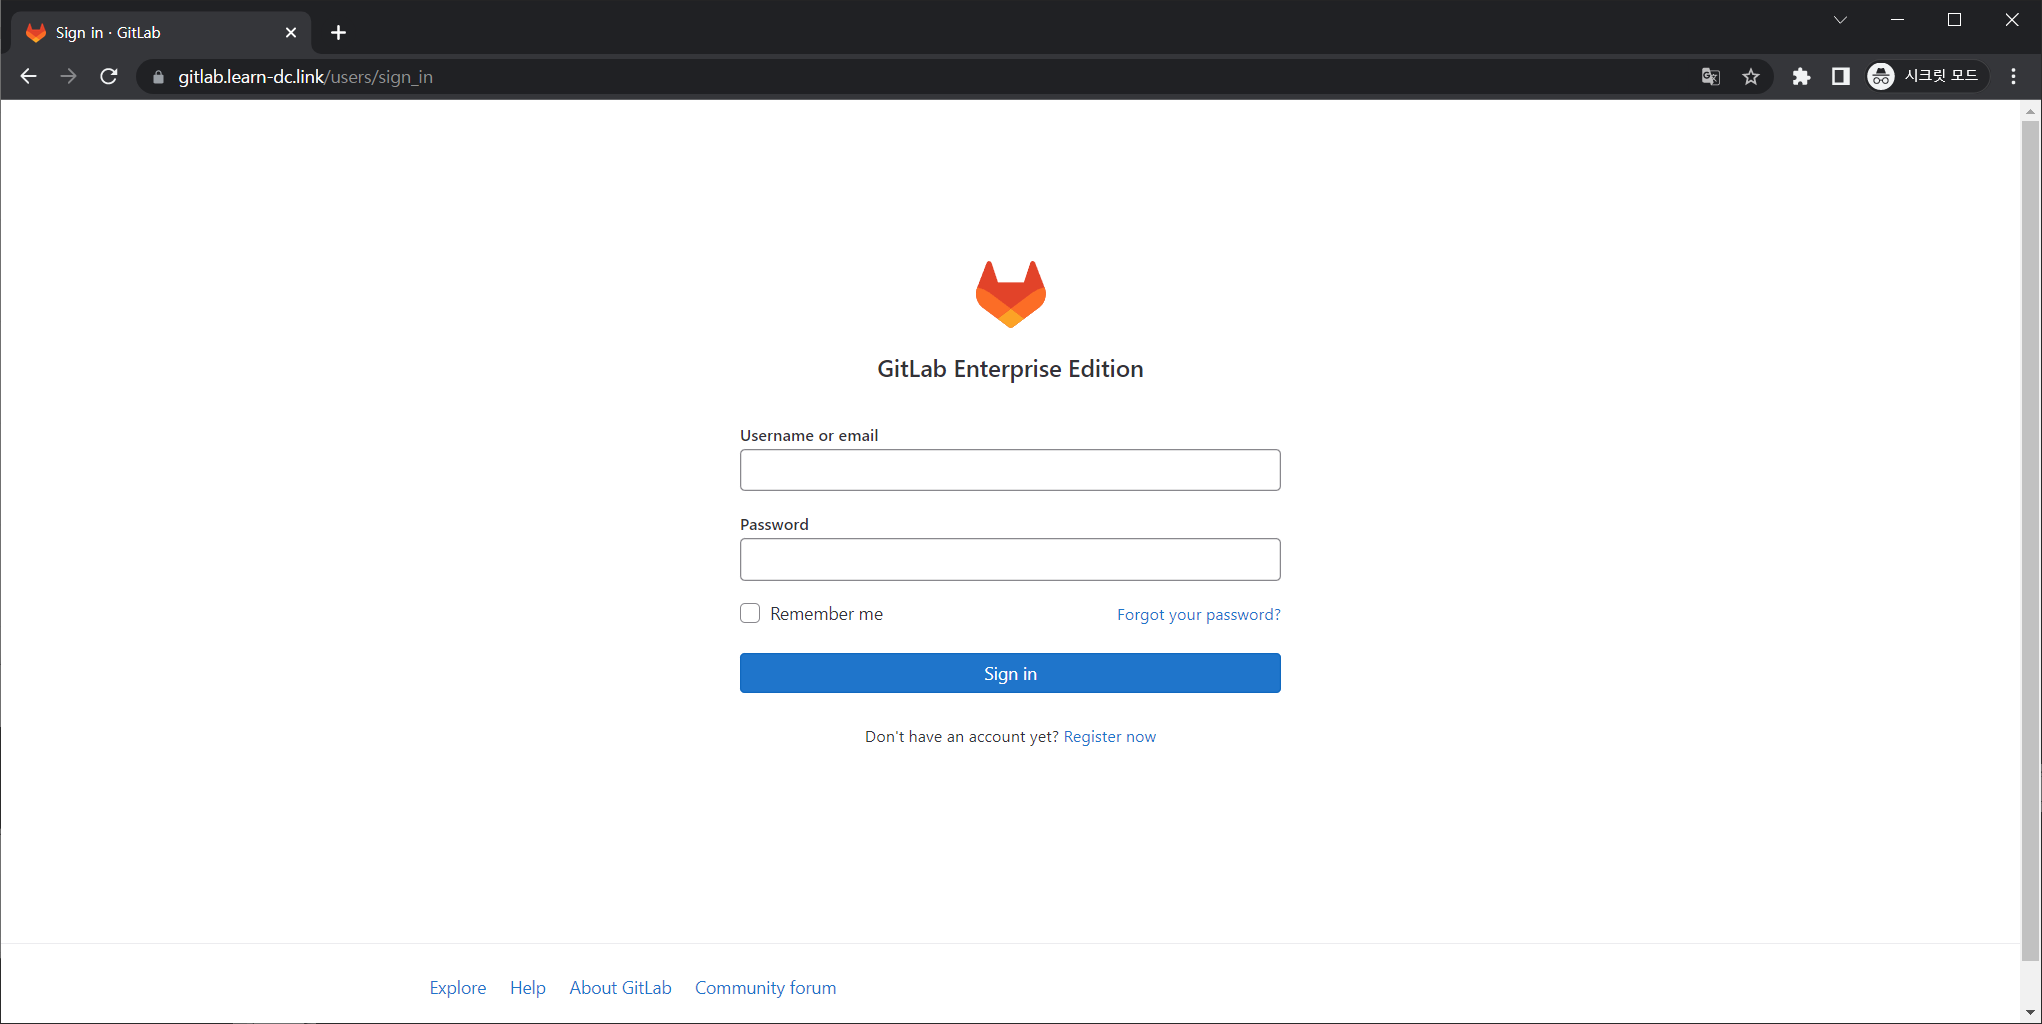
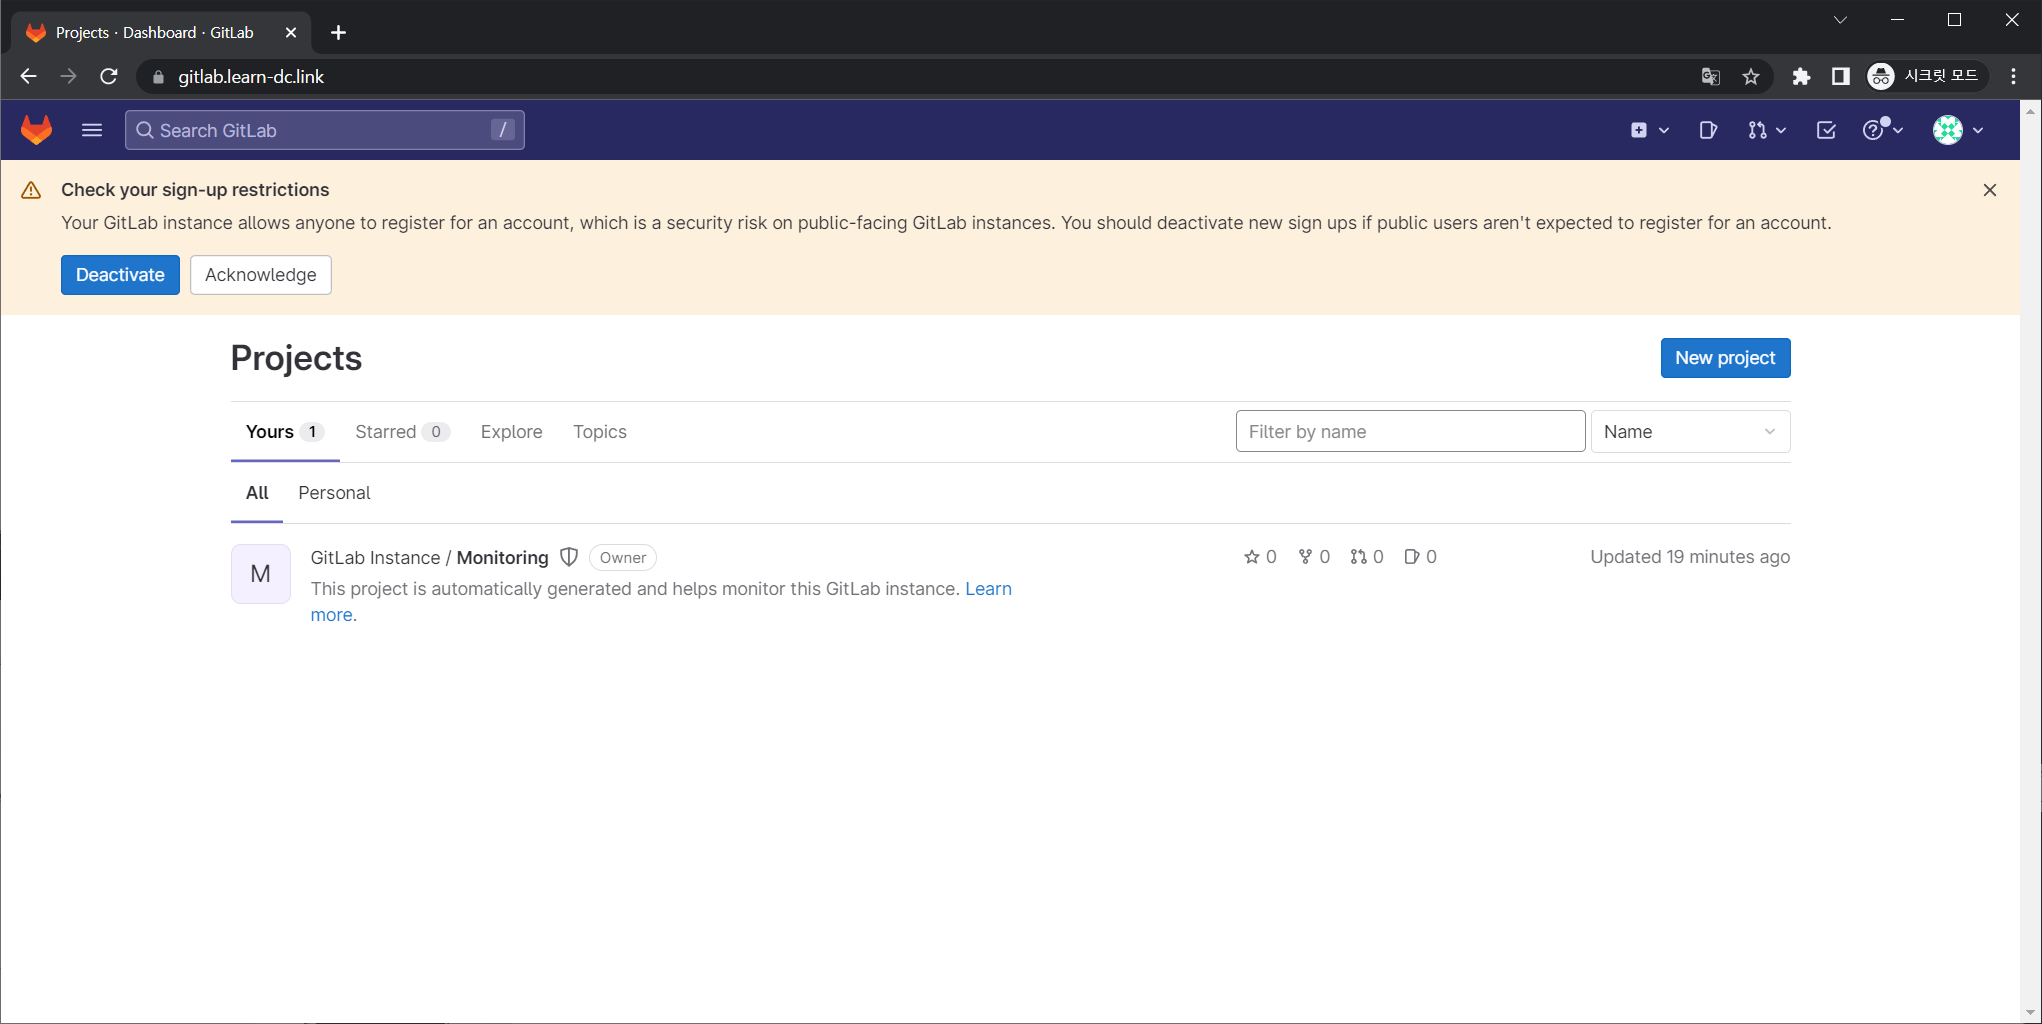
웹 접속 https://gitlab.<각자 자신의 도메인> (root / 웹 root 계정 암호)
-
-
4개의 Ingress 가 1개의 ALB를 공유해서 사용 : ALB의 Rule 확인
-
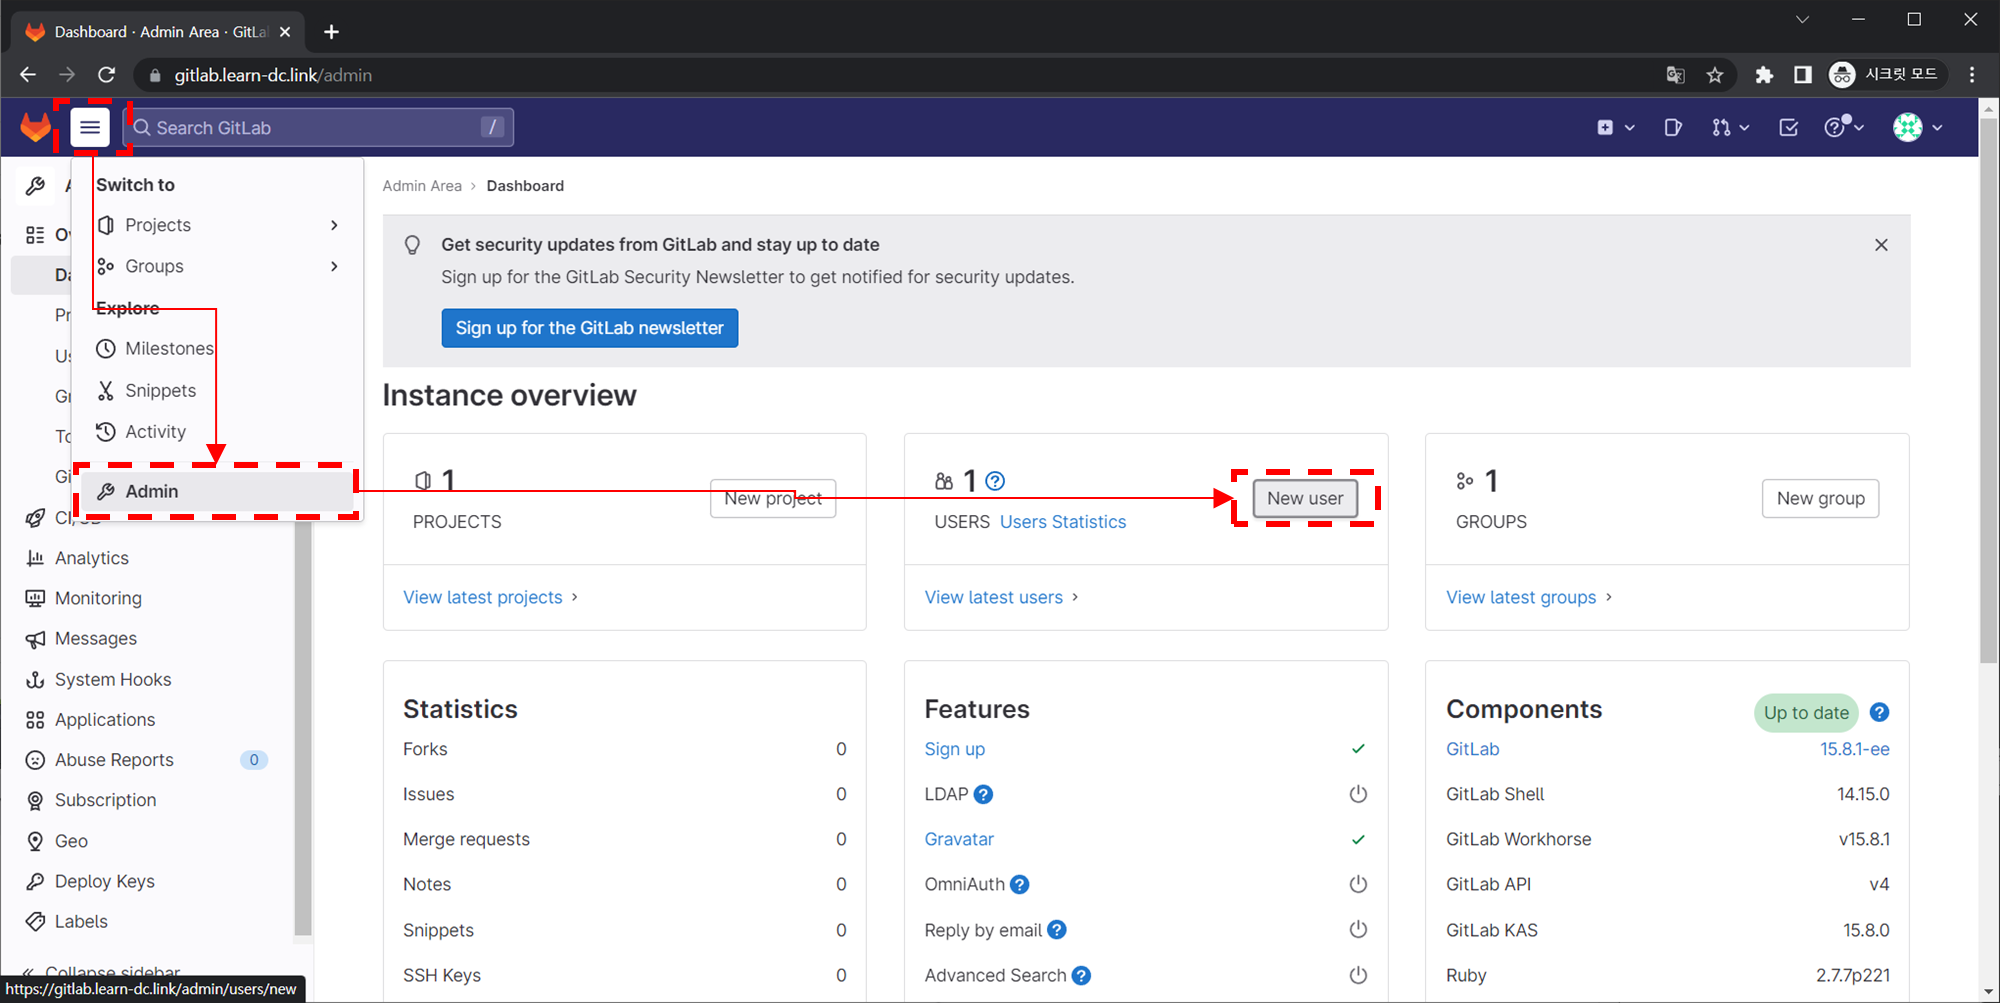
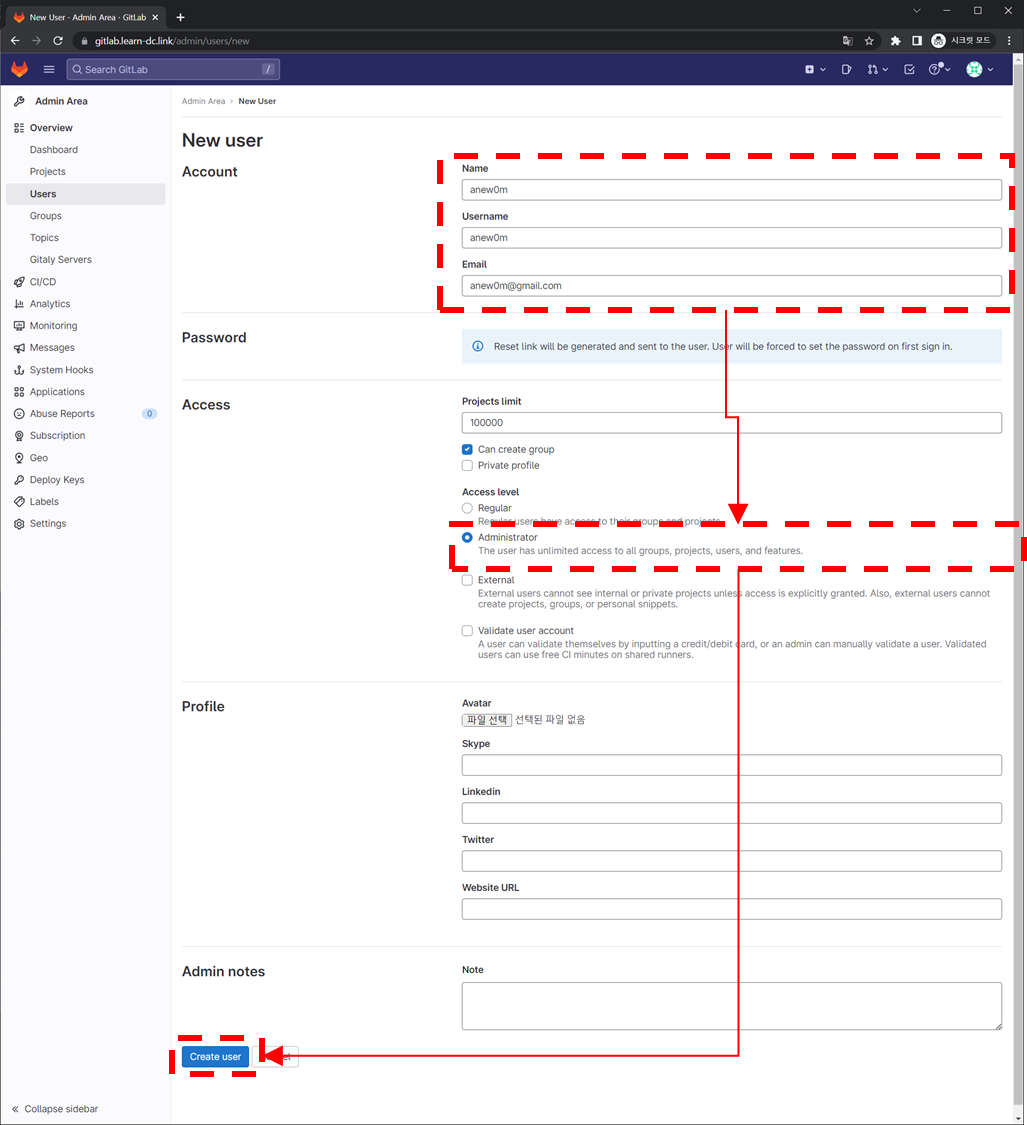
접속 후 별도의 사용자 생성 : Admins → Users : 각자 자신만의 편한 계정 (learn-dc , learn-dc@cloudneta.net, Administrator 권한 부여) ⇒ 해당 계정으로 git 명령어 실행


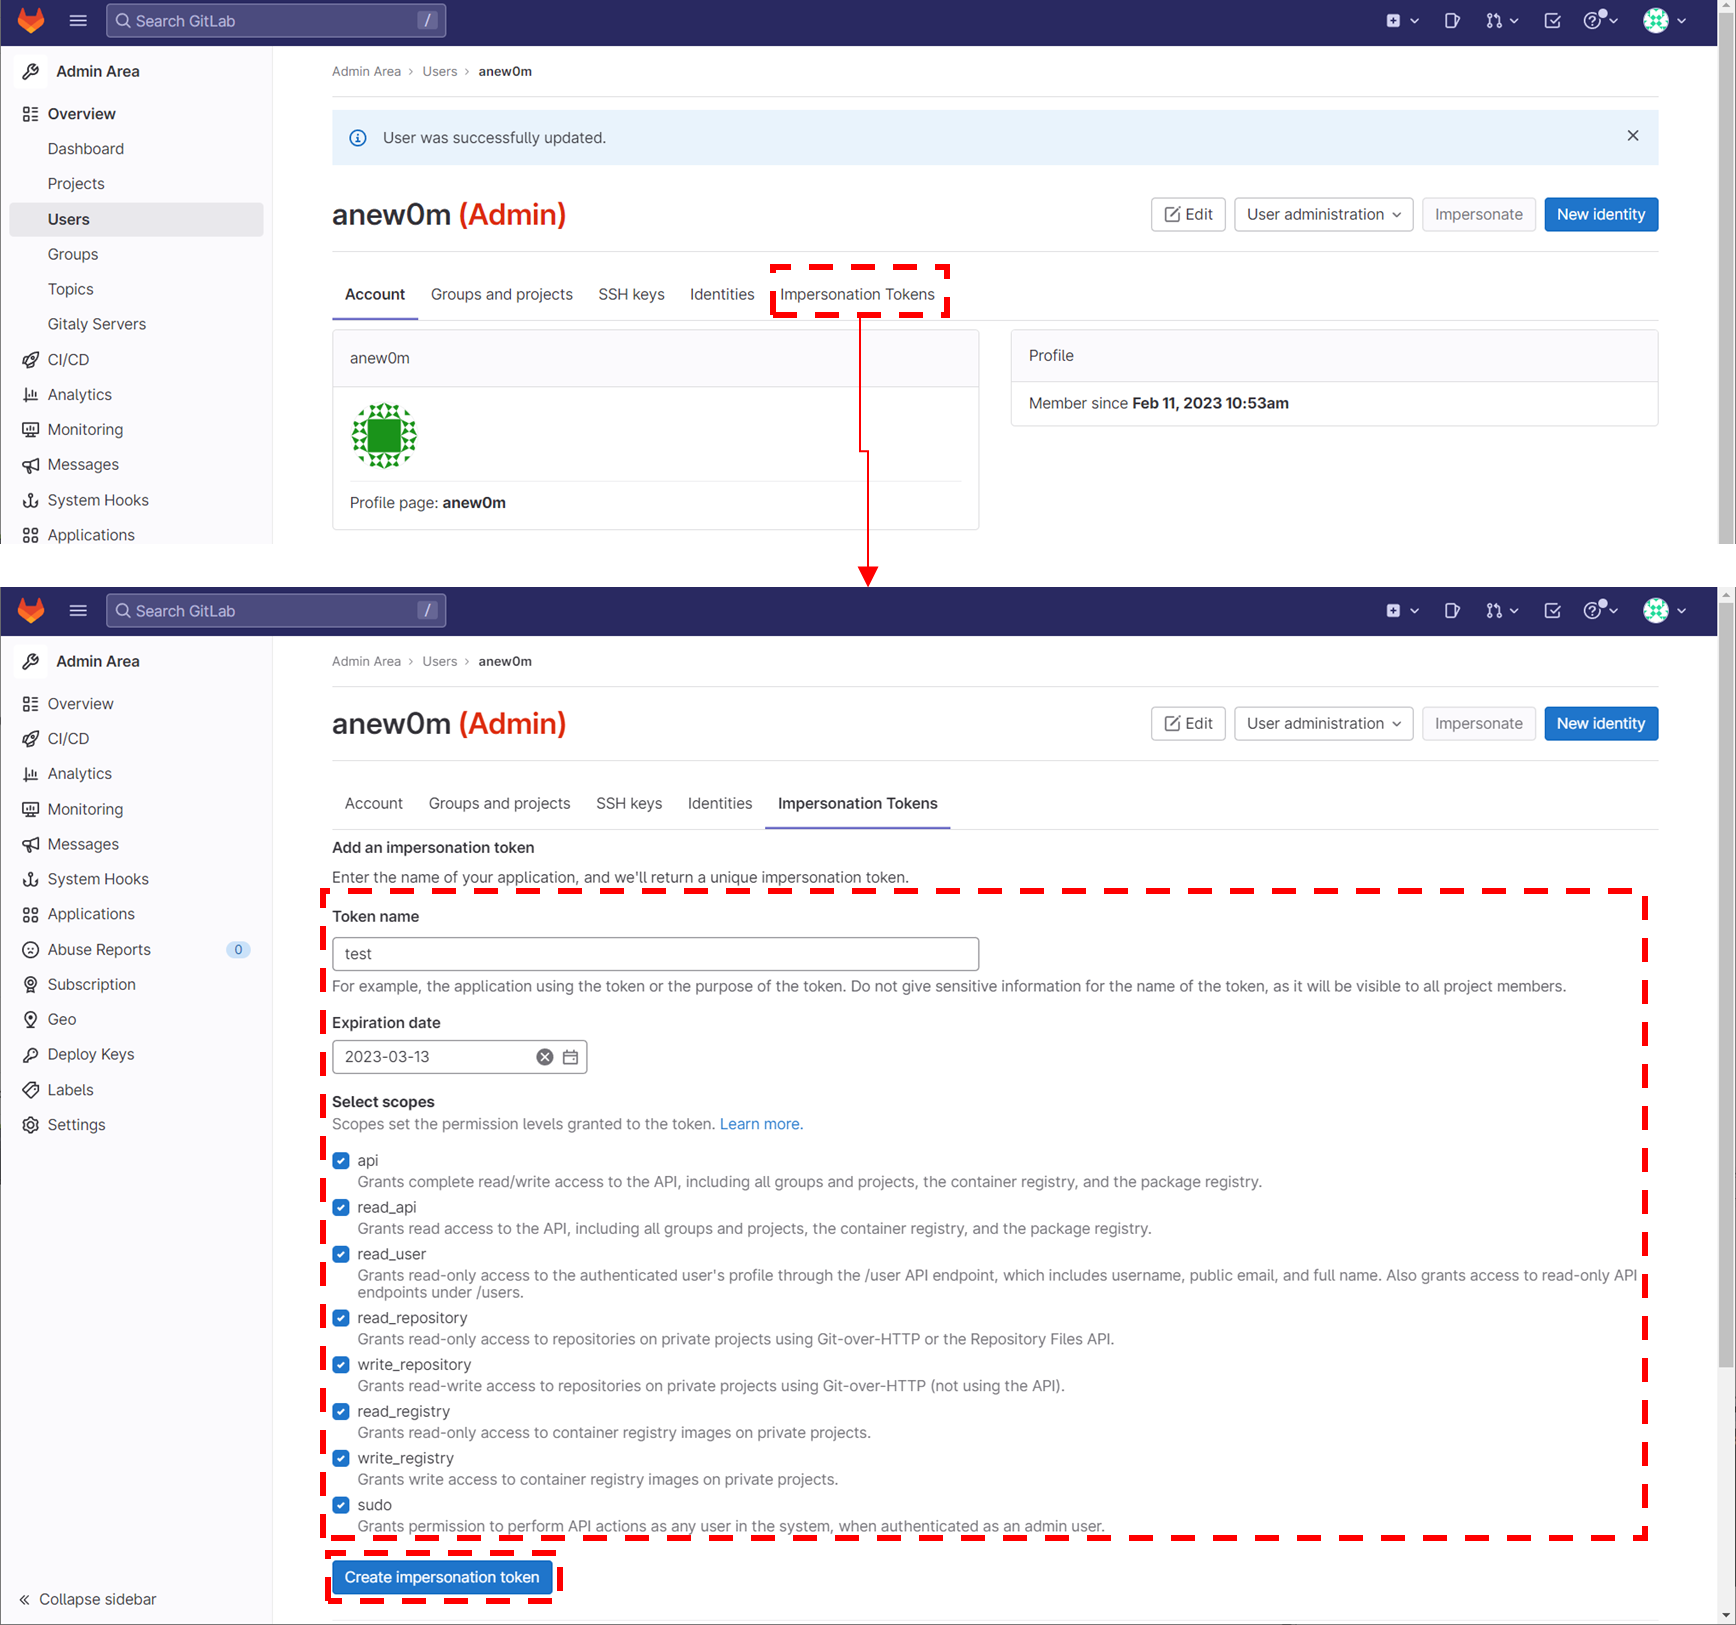
- Impersonation Tokens : Name(test), Scopes(모두 Check) → Create impersonation token 클릭 ⇒ 토큰 값 확인
glpat-1ig7aPN7L2XxfGeqsmEd
- Impersonation Tokens : Name(test), Scopes(모두 Check) → Create impersonation token 클릭 ⇒ 토큰 값 확인
-
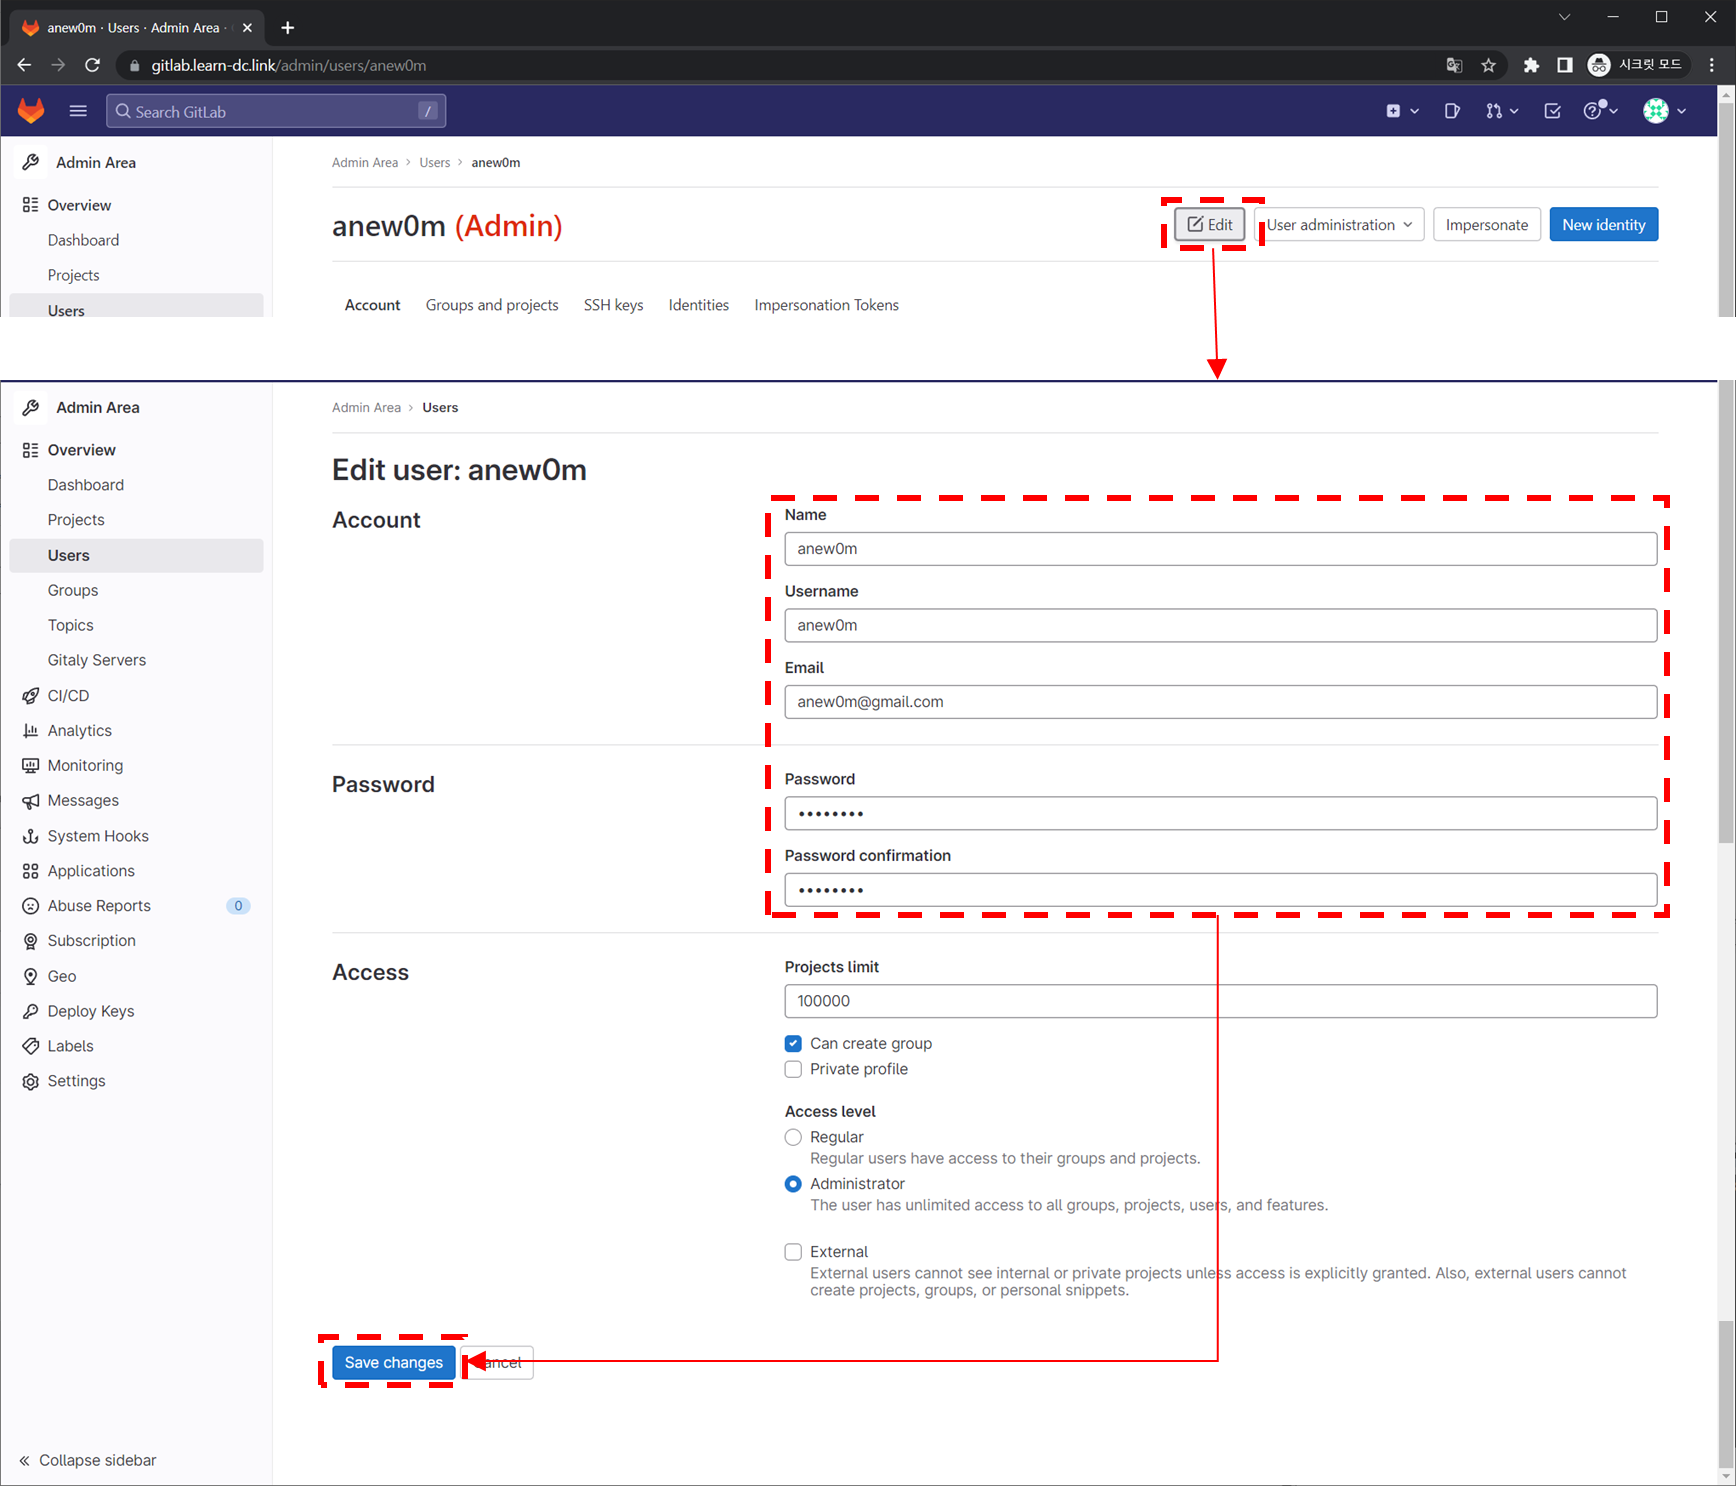
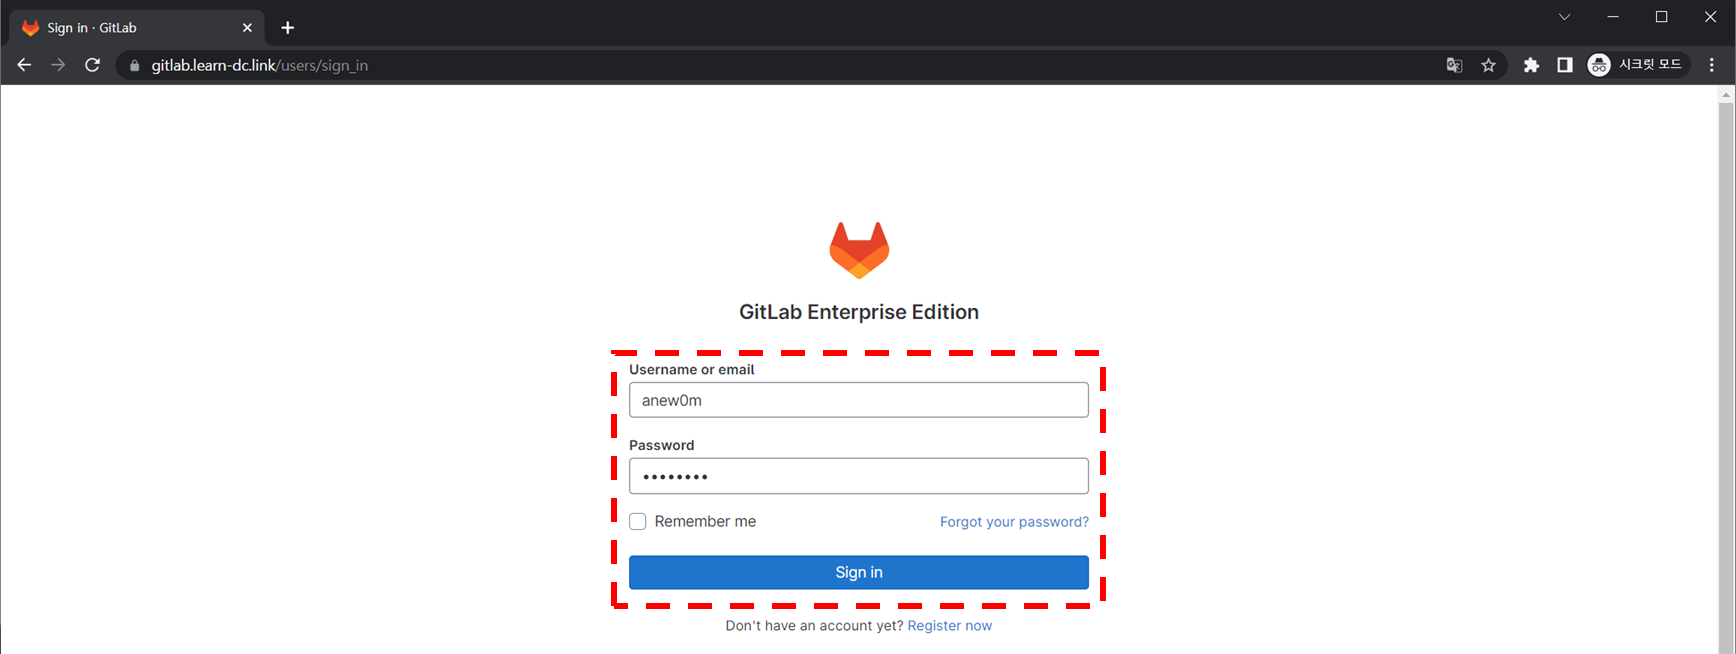
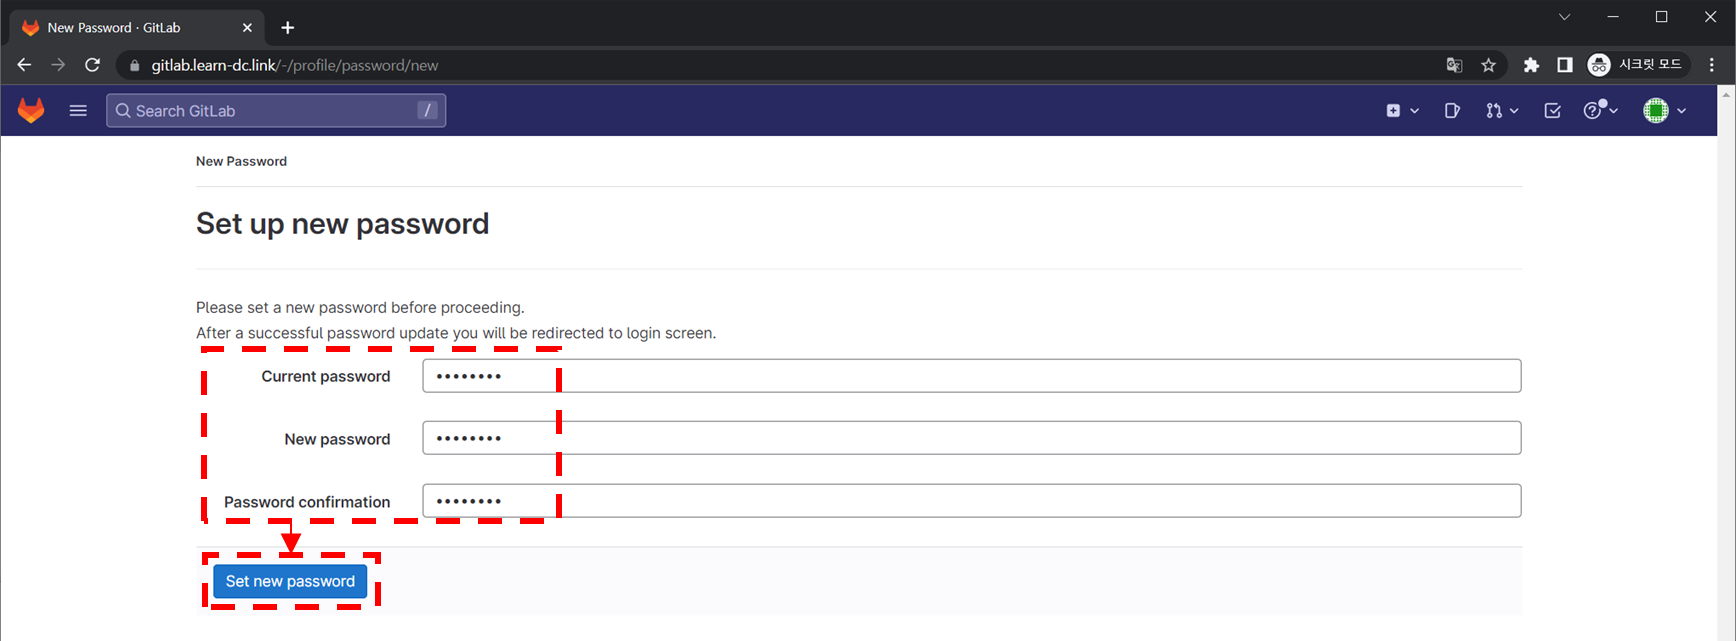
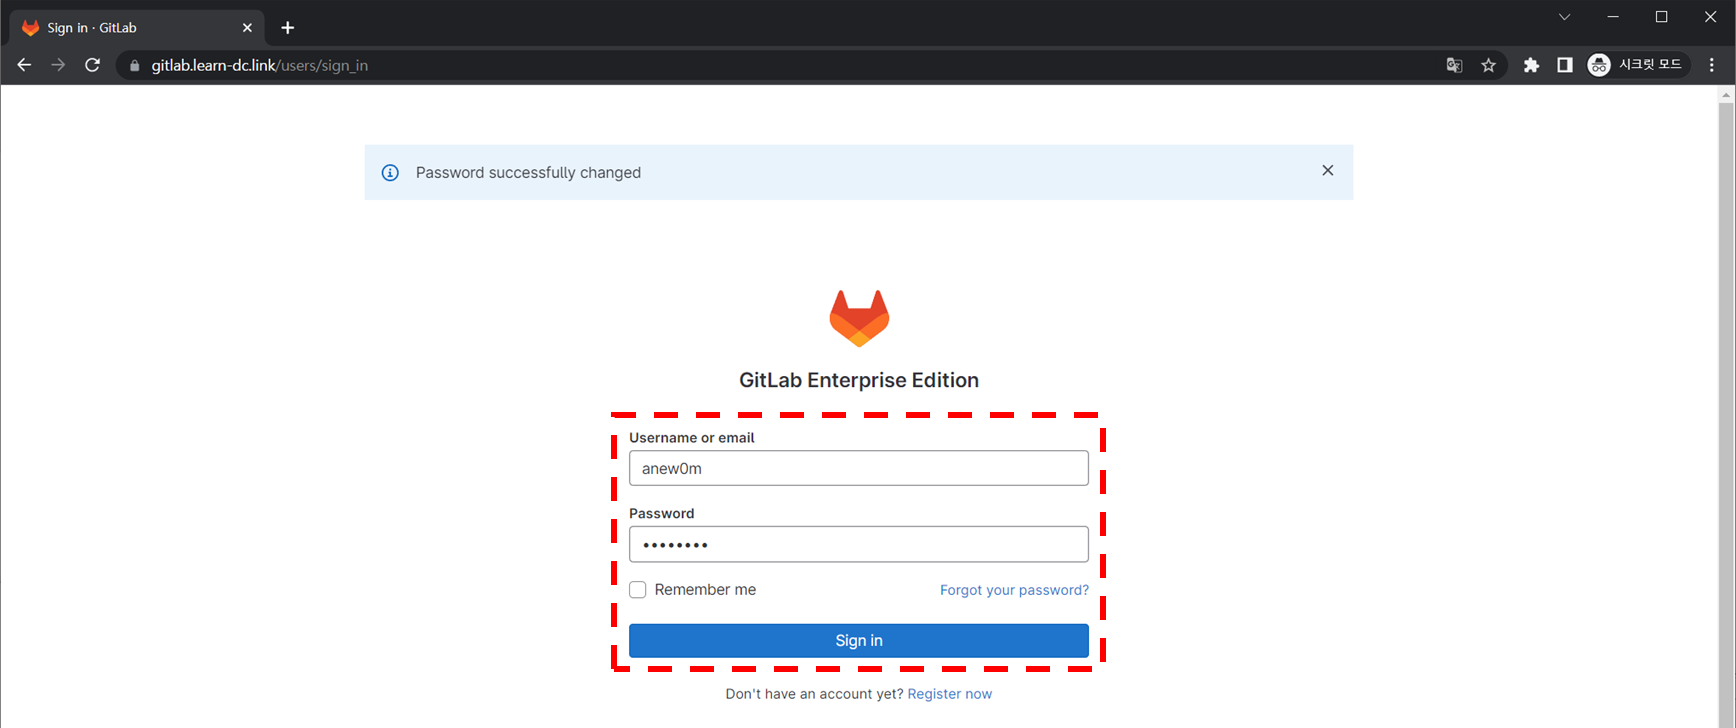
Users : 유저 선택 후 암호 입력(Test1234), admin 권한 체크 ⇒ root 계정 로그아웃 ⇒ learn-dc 계정 로그인 ⇒ 암호 변경(P@ssw0rd)
-
-
(참고) 삭제 시
-
1
2
3
4
5
6
helm uninstall -n gitlab gitlab kubectl delete pvc --all -n gitlab kubectl delete ns gitlab
-
3.2 깃랩 신규 프로젝트 작성
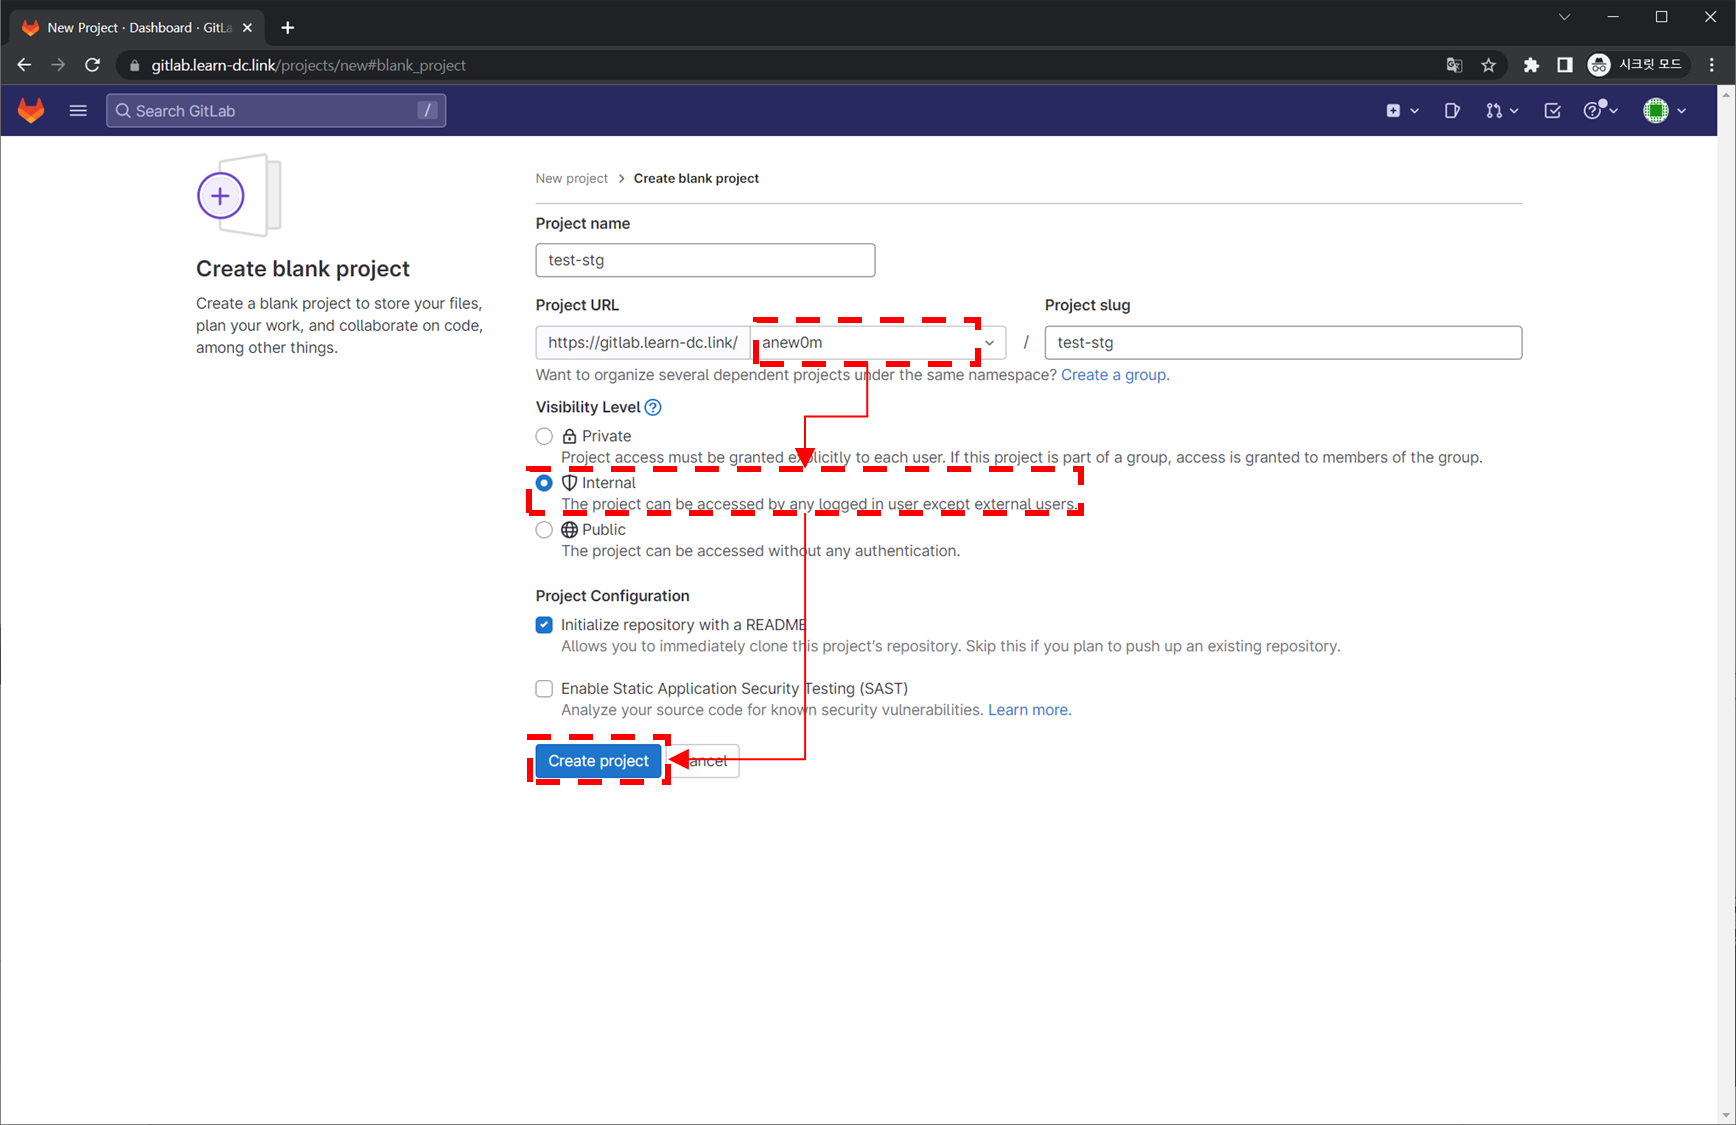
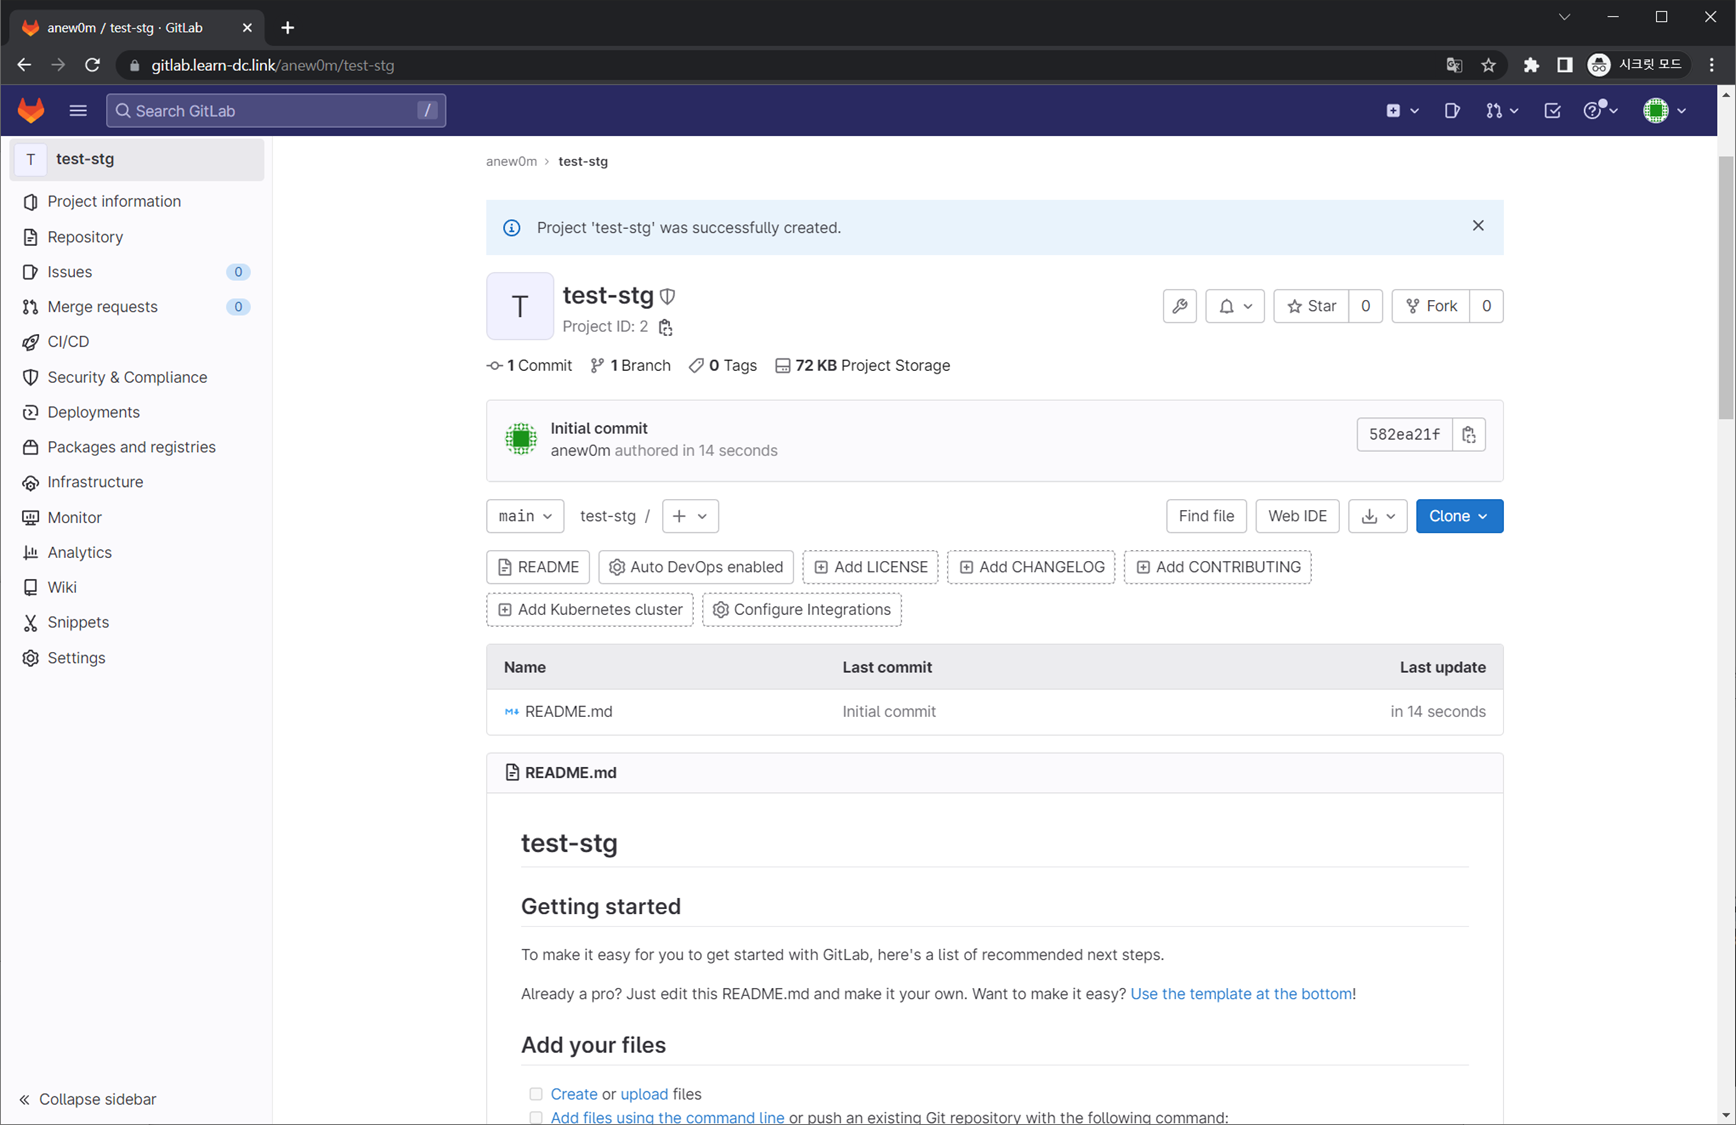
- Project name (test-stg) , Project URL(<각자계정>, /test-stg) , Visibility Level (Intenal) , Initialize repository with a README (체크)
3.3 생성한 깃랩 프로젝트에 쿠버네티스에서 사용하는 YAML 파일을 업로드 ⇒ 토큰 값 확인 glpat-1ig7aPN7L2XxfGeqsmEd
-
gitlab-test 폴더 생성 및 생성된 폴더로 이동
-
1mkdir ~/gitlab-test && cd ~/gitlab-test
-
-
git 계정 초기화 : 토큰 및 로그인 실패 시 매번 실행해주자
-
1
2
git config --system --unset credential.helper git config --global --unset credential.helper
-
-
git 계정 정보 확인 및 global 계정 정보 입력
-
1
2
3
4
5
git config --list # git config --global user.name "<각자 자신의 Gialba 계정>" # git config --global user.email "<각자 자신의 Gialba 계정의 이메일>" git config --global user.name "anew0m" git config --global user.email "anew0m@gmail.com"
-
-
git clone
-
1
2
3
4
5
6
# git clone https://gitlab.$KOPS_CLUSTER_NAME/<각자 자신의 Gialba 계정>/test-stg.git git clone https://gitlab.$KOPS_CLUSTER_NAME/anew0m/test-stg.git # Cloning into 'test-stg'... # Username for 'https://gitlab.learn-dc.link': anew0m # Password for 'https://anew0m@gitlab.learn-dc.link': <토큰 입력> # Password for 'https://anew0m@gitlab.learn-dc.link': glpat-1ig7aPN7L2XxfGeqsmEd
-
-
이동
-
1ls -al test-stg && cd test-stg
-
-
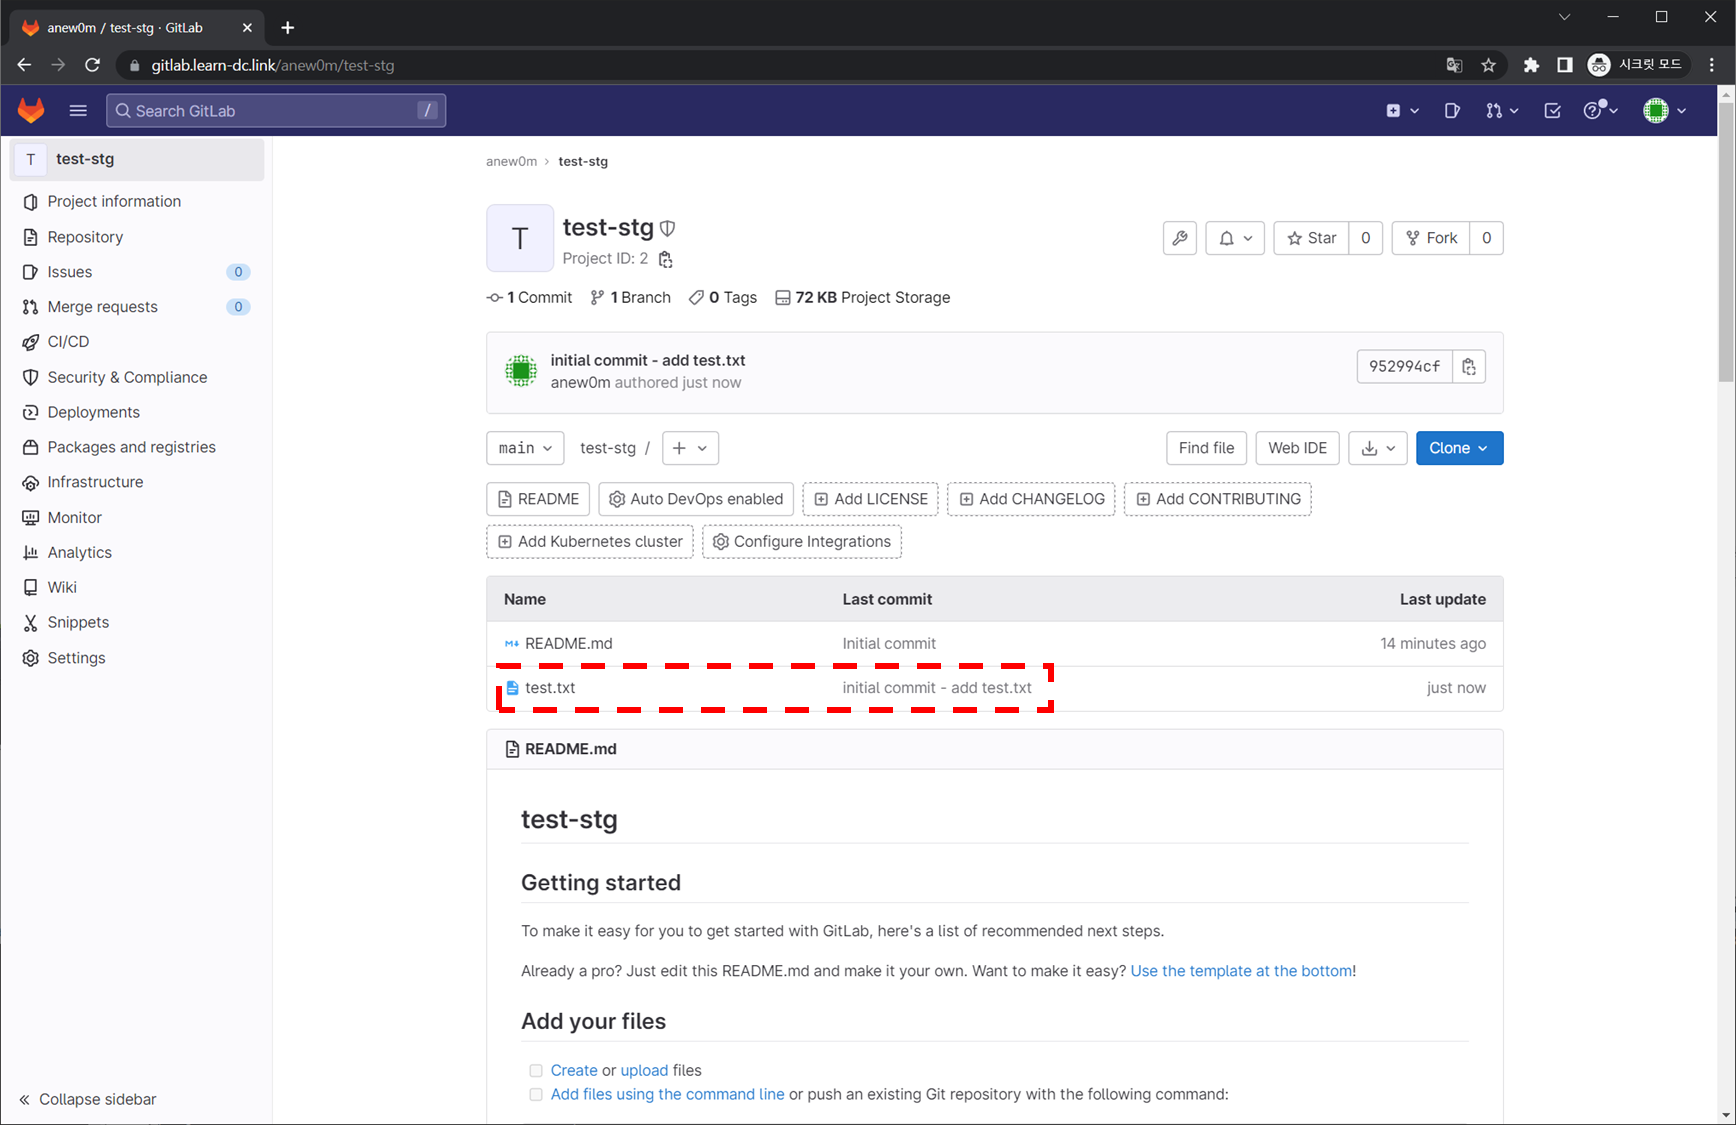
파일 생성 및 깃 업로드(push) : 웹에서 확인
-
1
2
3
4
5
6
echo "gitlab test memo" >> test.txt git add . && git commit -m "initial commit - add test.txt" git push # Username for '<https://gitlab.learn-dc.link>': anew0m # Password for '<https://anew0m@gitlab.learn-dc.link>': <토큰 입력> # Password for '<https://anew0m@gitlab.learn-dc.link>': glpat-1ig7aPN7L2XxfGeqsmEd
-
3.4 책 p250페이지 깃랩에 추가 계정 생성 후 테스트 : Skip
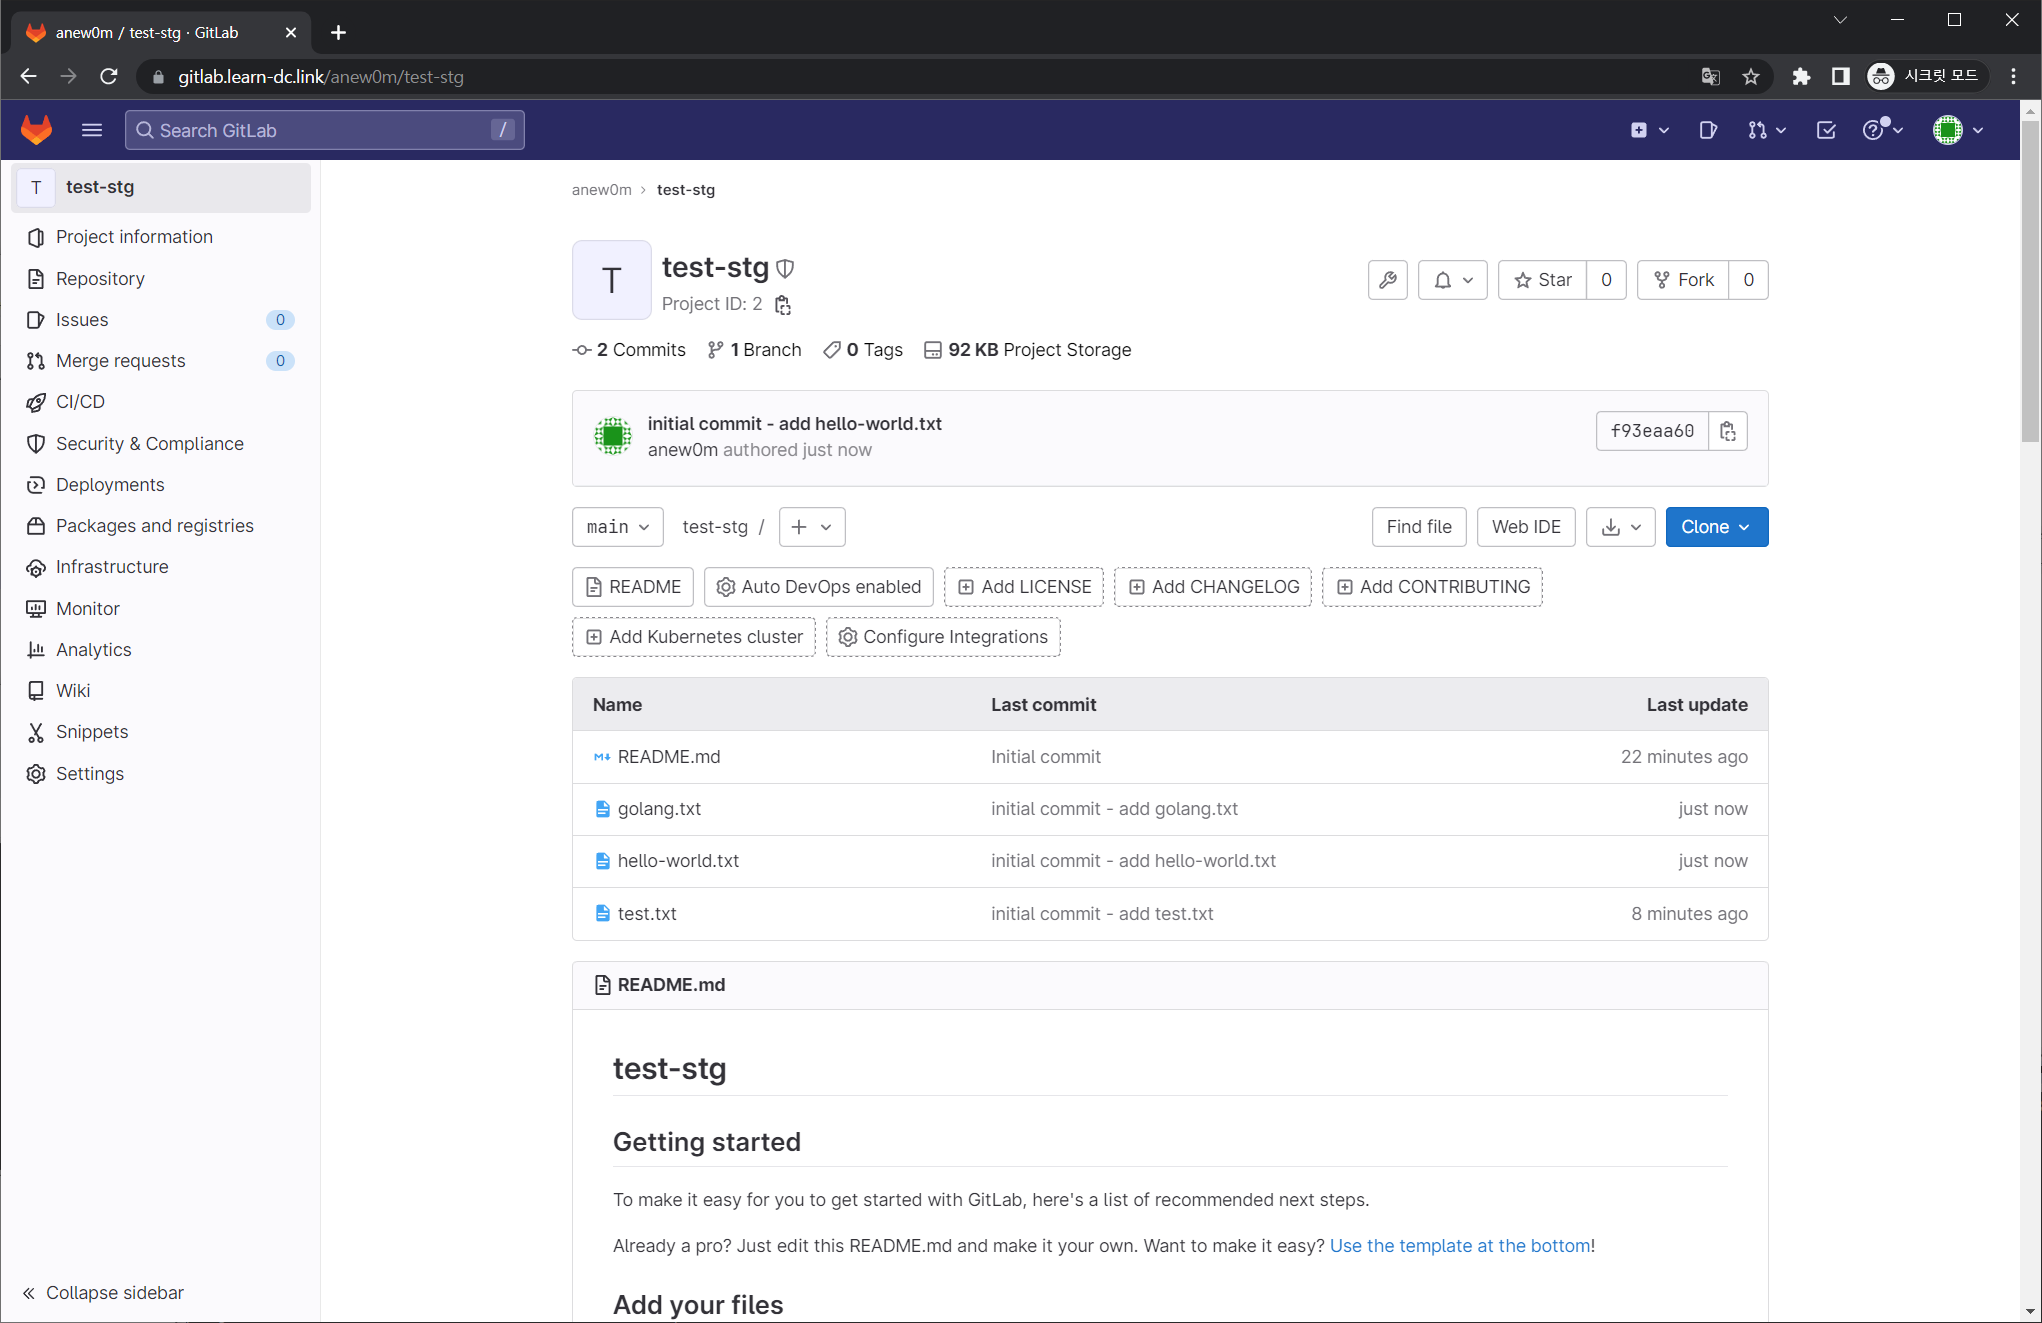
3.5 과제2
-
목표: 자신만의 텍스트 파일을 kops-ec2 로컬에서 Gitlab 에 올려보고, 관련 스샷 올려주세요
-
수행결과 및 과정
-
파일 생성
-
1
2
echo "gitlab memo golang?" >> golang.txt echo "gitlab memo hello world!" >> hello-world.txt
-
-
깃 업로드
-
1
2
3
4
5
6
git add . && git commit -m "initial commit - add golang.txt" git add . && git commit -m "initial commit - add hello-world.txt" git push # Username for '<https://gitlab.learn-dc.link>': anew0m # Password for '<https://anew0m@gitlab.learn-dc.link>': <토큰 입력> # Password for '<https://anew0m@gitlab.learn-dc.link>': glpat-1ig7aPN7L2XxfGeqsmEd
-
-
4. 아르고시디(ArgoCD)를 활용한 깃옵스(GitOps) 시스템 구축
소개: Argo CD is a declarative, GitOps continuous delivery tool for Kubernetes.- 지속적인 배포란 (Continuous Delivery, CD)
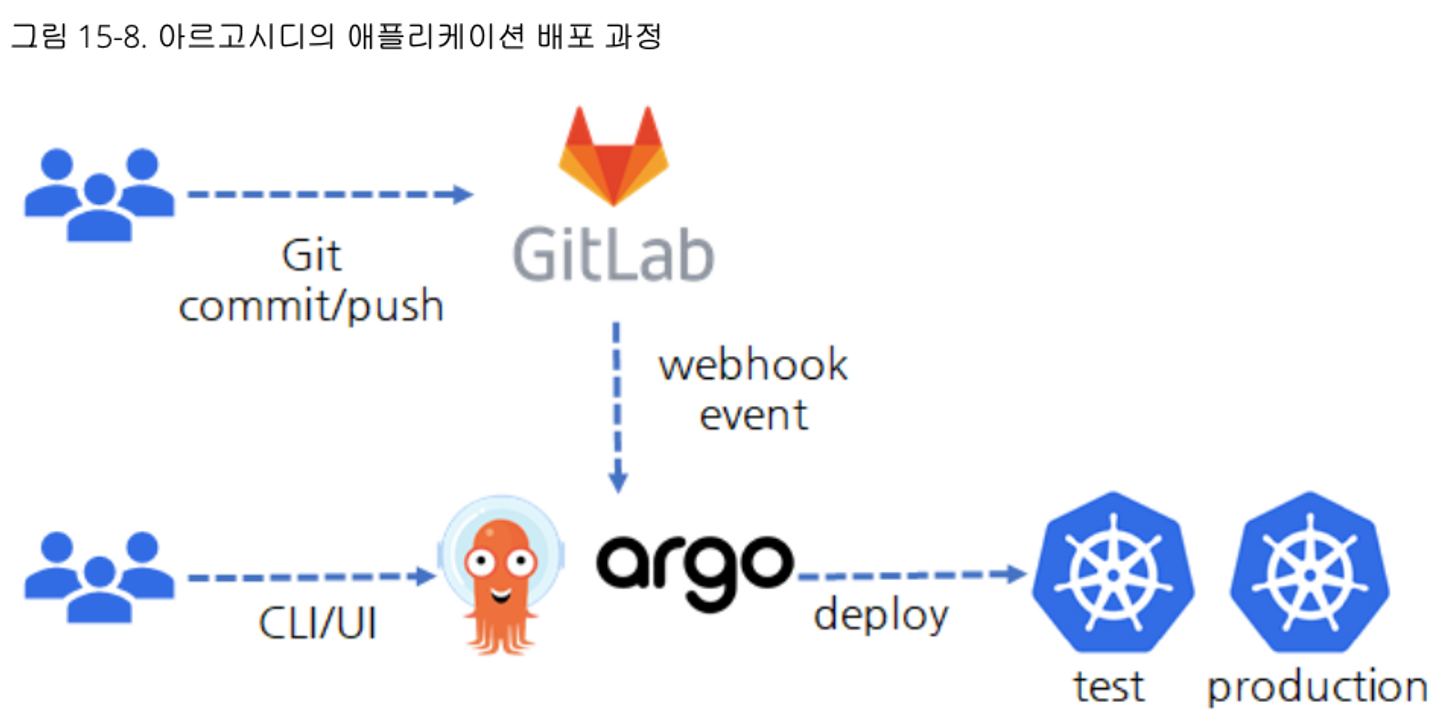
- 개발자가 소스코드를 변경해서 깃 저장소에 푸시하면 해당 변경 사항이 고객이 사용하는 실제 운영환경의 시스템까지 자동으로 반영합니다.
- 개발자의 코드가 원격 저장소에 업로드됐을 때 아르고시디가 자동으로 해당 코드를 클러스터 운영환경에 배포합니다.
- 아르고시티로 배포한 헬름 애플리케이션의 리소스 목록, 각 리소스 간 관계 및 에러 유무를 UI로 보여줍니다.
- 개발자가 소스코드를 변경해서 깃 저장소에 푸시하면 해당 변경 사항이 고객이 사용하는 실제 운영환경의 시스템까지 자동으로 반영합니다.
- 단일 진실 원천(SSOT, Single Source Of Truth)
- 어떠한 진실(결과)의 원인이 하나의 이유(원천)에서 비롯되는 것을 의미합니다.
- 쿠버네티스 환경에서 깃옵스의 의미는 실제 운영 중인 클러스터의 상태를 개발자의 로컬 PC혹은 아무런 기록을 남기지 않고 클러스터에서 임의로 수정하게 하지 않습니다.
- 공용으로 관리하는 깃 저장소에서만 유일하게 변경을 허용함으로써 단일 진실 원천(SSOT)를 구현합니다.
- 아르고시디를 사용하면 쿠버네티스 매니페스트 소스 파일을 여러 개발자의 개인 PC에 보관하지 않고 중앙의 통합된 깃 저장소에 반드시 업로드하고 동기화하도록 정책 관리 가능합니다.
- 어떠한 진실(결과)의 원인이 하나의 이유(원천)에서 비롯되는 것을 의미합니다.
- 지속적인 배포란 (Continuous Delivery, CD)
4.1 헬름 차트로 설치 후 웹 로그인 - HelmChart
-
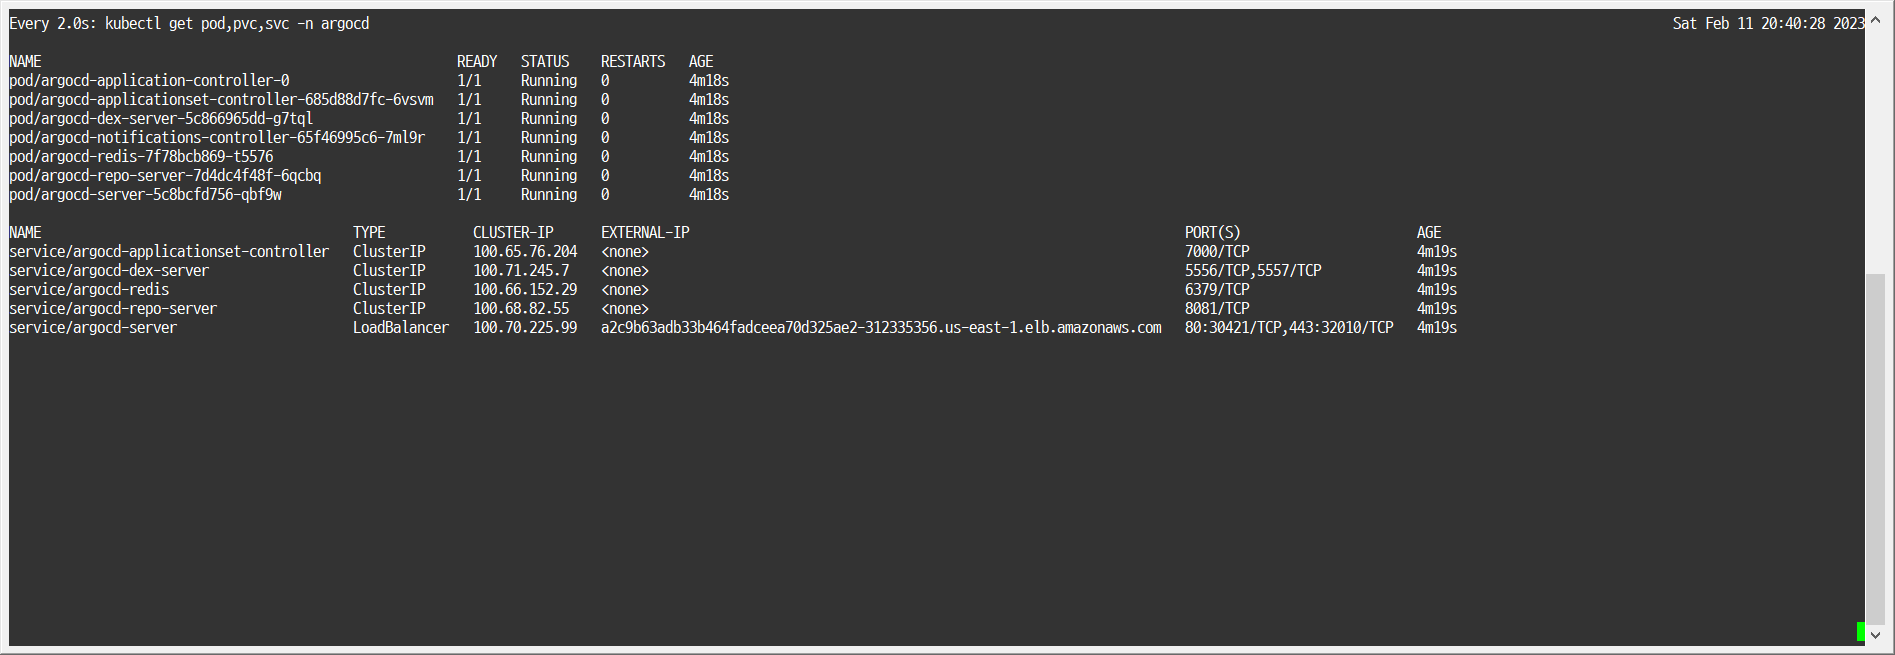
모니터링
-
1
2
kubectl create ns argocd watch kubectl get pod,pvc,svc -n argocd
-
-
설치
-
1
2
3
4
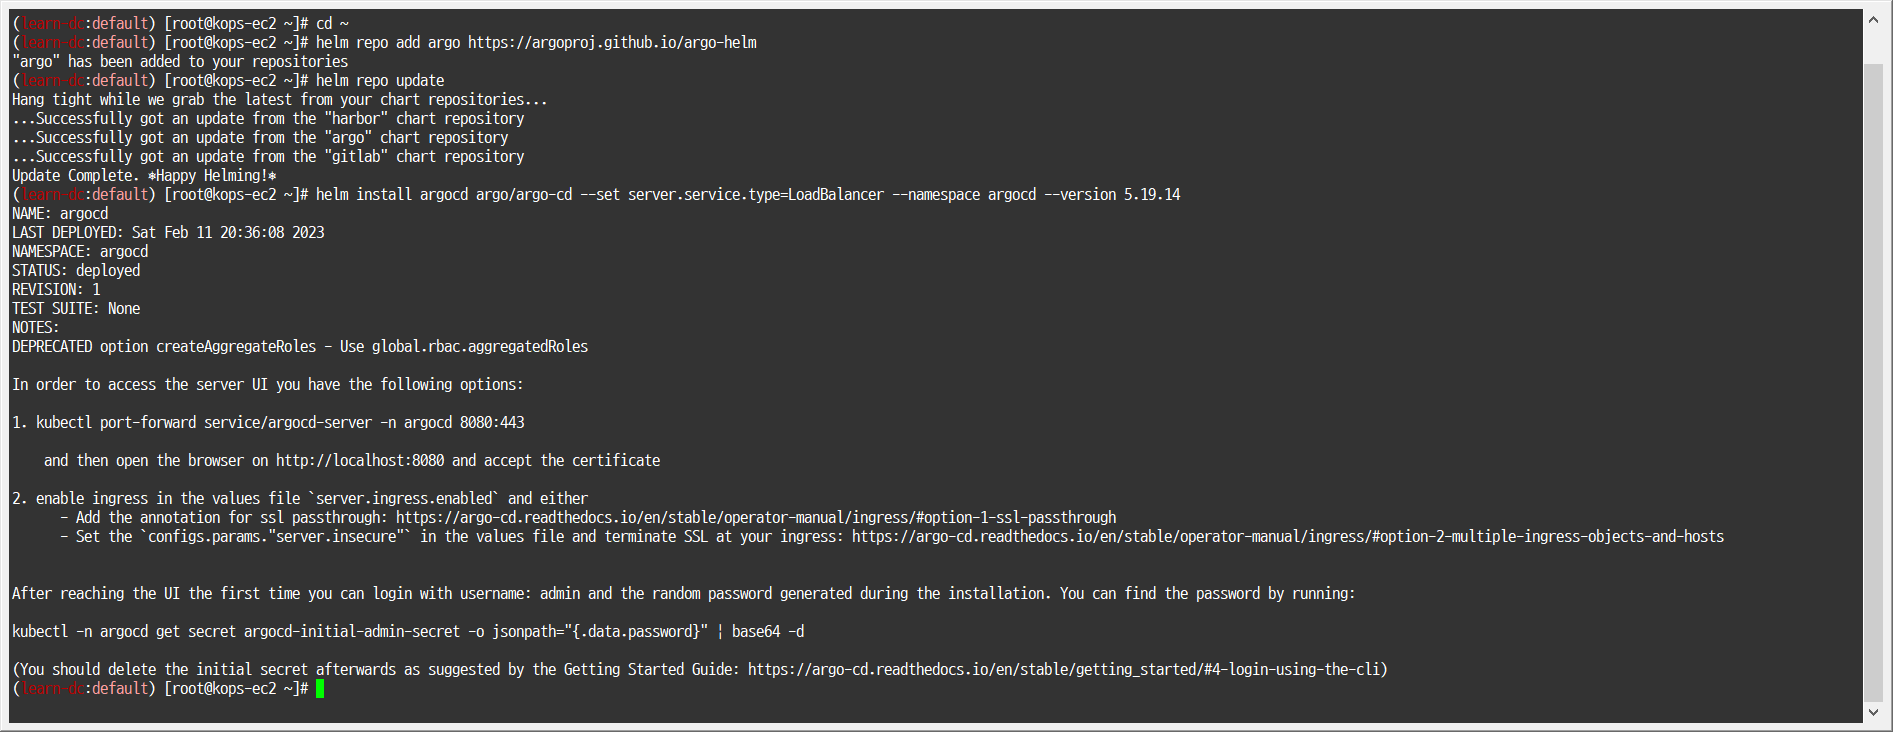
cd ~ helm repo add argo https://argoproj.github.io/argo-helm helm repo update helm install argocd argo/argo-cd --set server.service.type=LoadBalancer --namespace argocd --version 5.19.14
-
-
확인
-
1
2
3
4
5
6
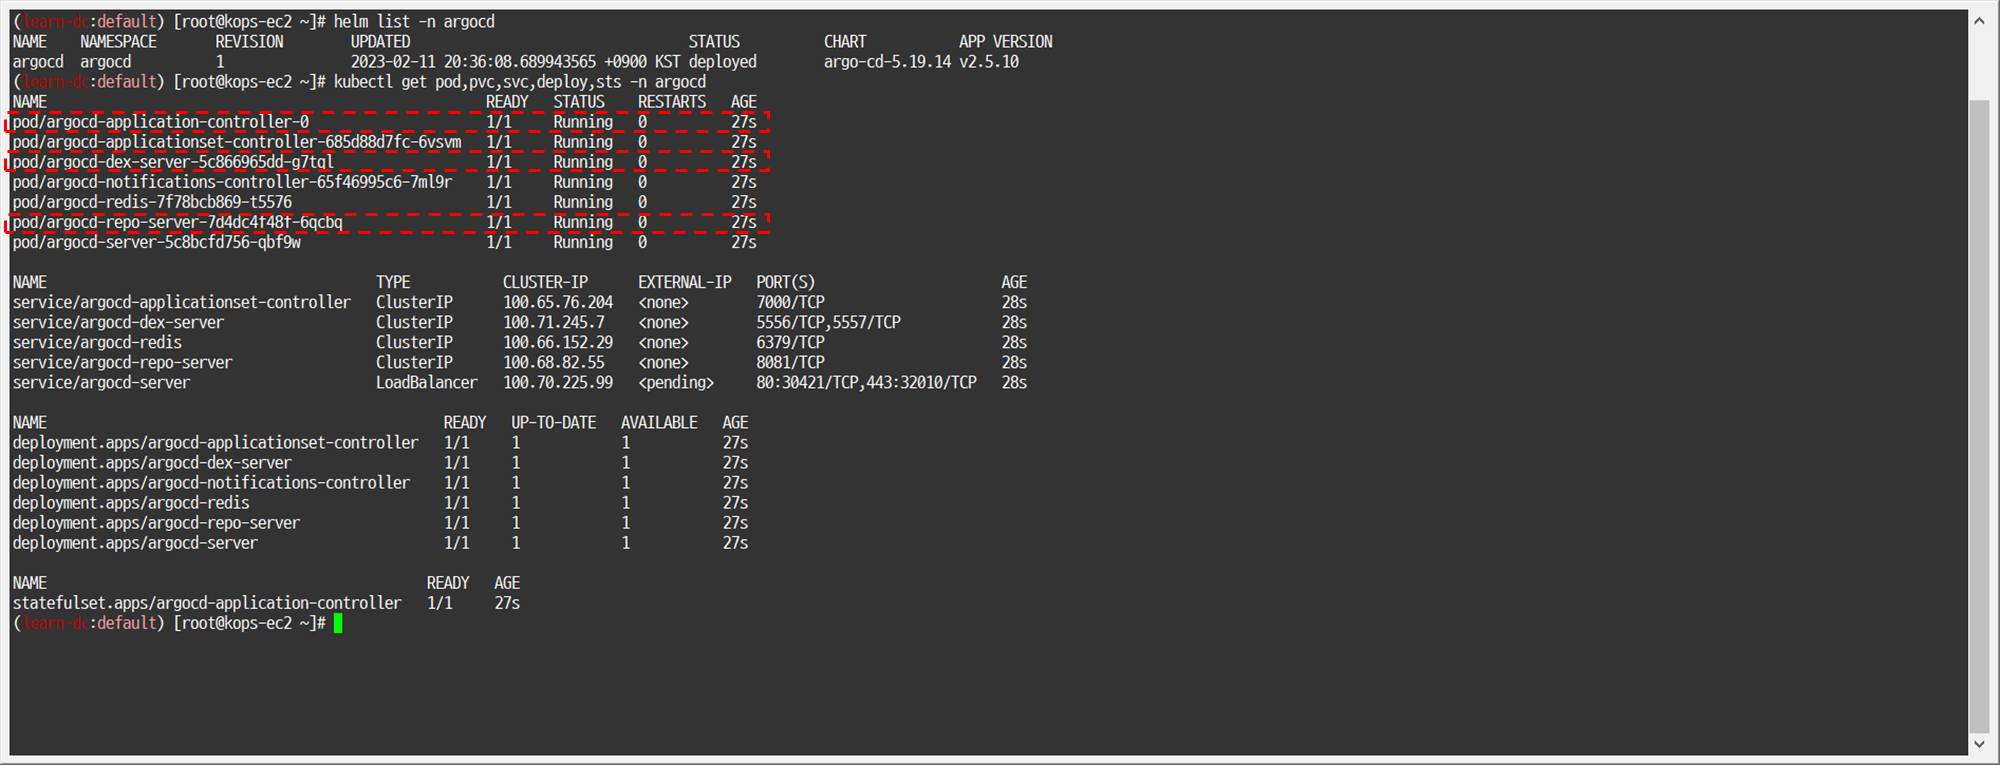
# argocd-application-controller : 실행 중인 k8s 애플리케이션의 설정과 깃 저장소의 소스 파일에 선언된 상태를 서로 비교하는 컨트롤러. 상태와 다르면 ‘OutOfSync’ 에러를 출력. # argocd-dex-server : 외부 사용자의 LDAP 인증에 Dex 서버를 사용할 수 있음 # argocd-repo-server : 원격 깃 저장소의 소스 코드를 아르고시디 내부 캐시 서버에 저장합니다. 디렉토리 경로, 소스, 헬름 차트 등이 저장. helm list -n argocd kubectl get pod,pvc,svc,deploy,sts -n argocd kubectl get-all -n argocd
-
-
admin 계정의 암호 확인
-
1 2 3ARGOPW=$(kubectl -n argocd get secret argocd-initial-admin-secret -o jsonpath="{.data.password}" | base64 -d) echo $ARGOPW # uF1Ull5XlSjcyeVv
-
-
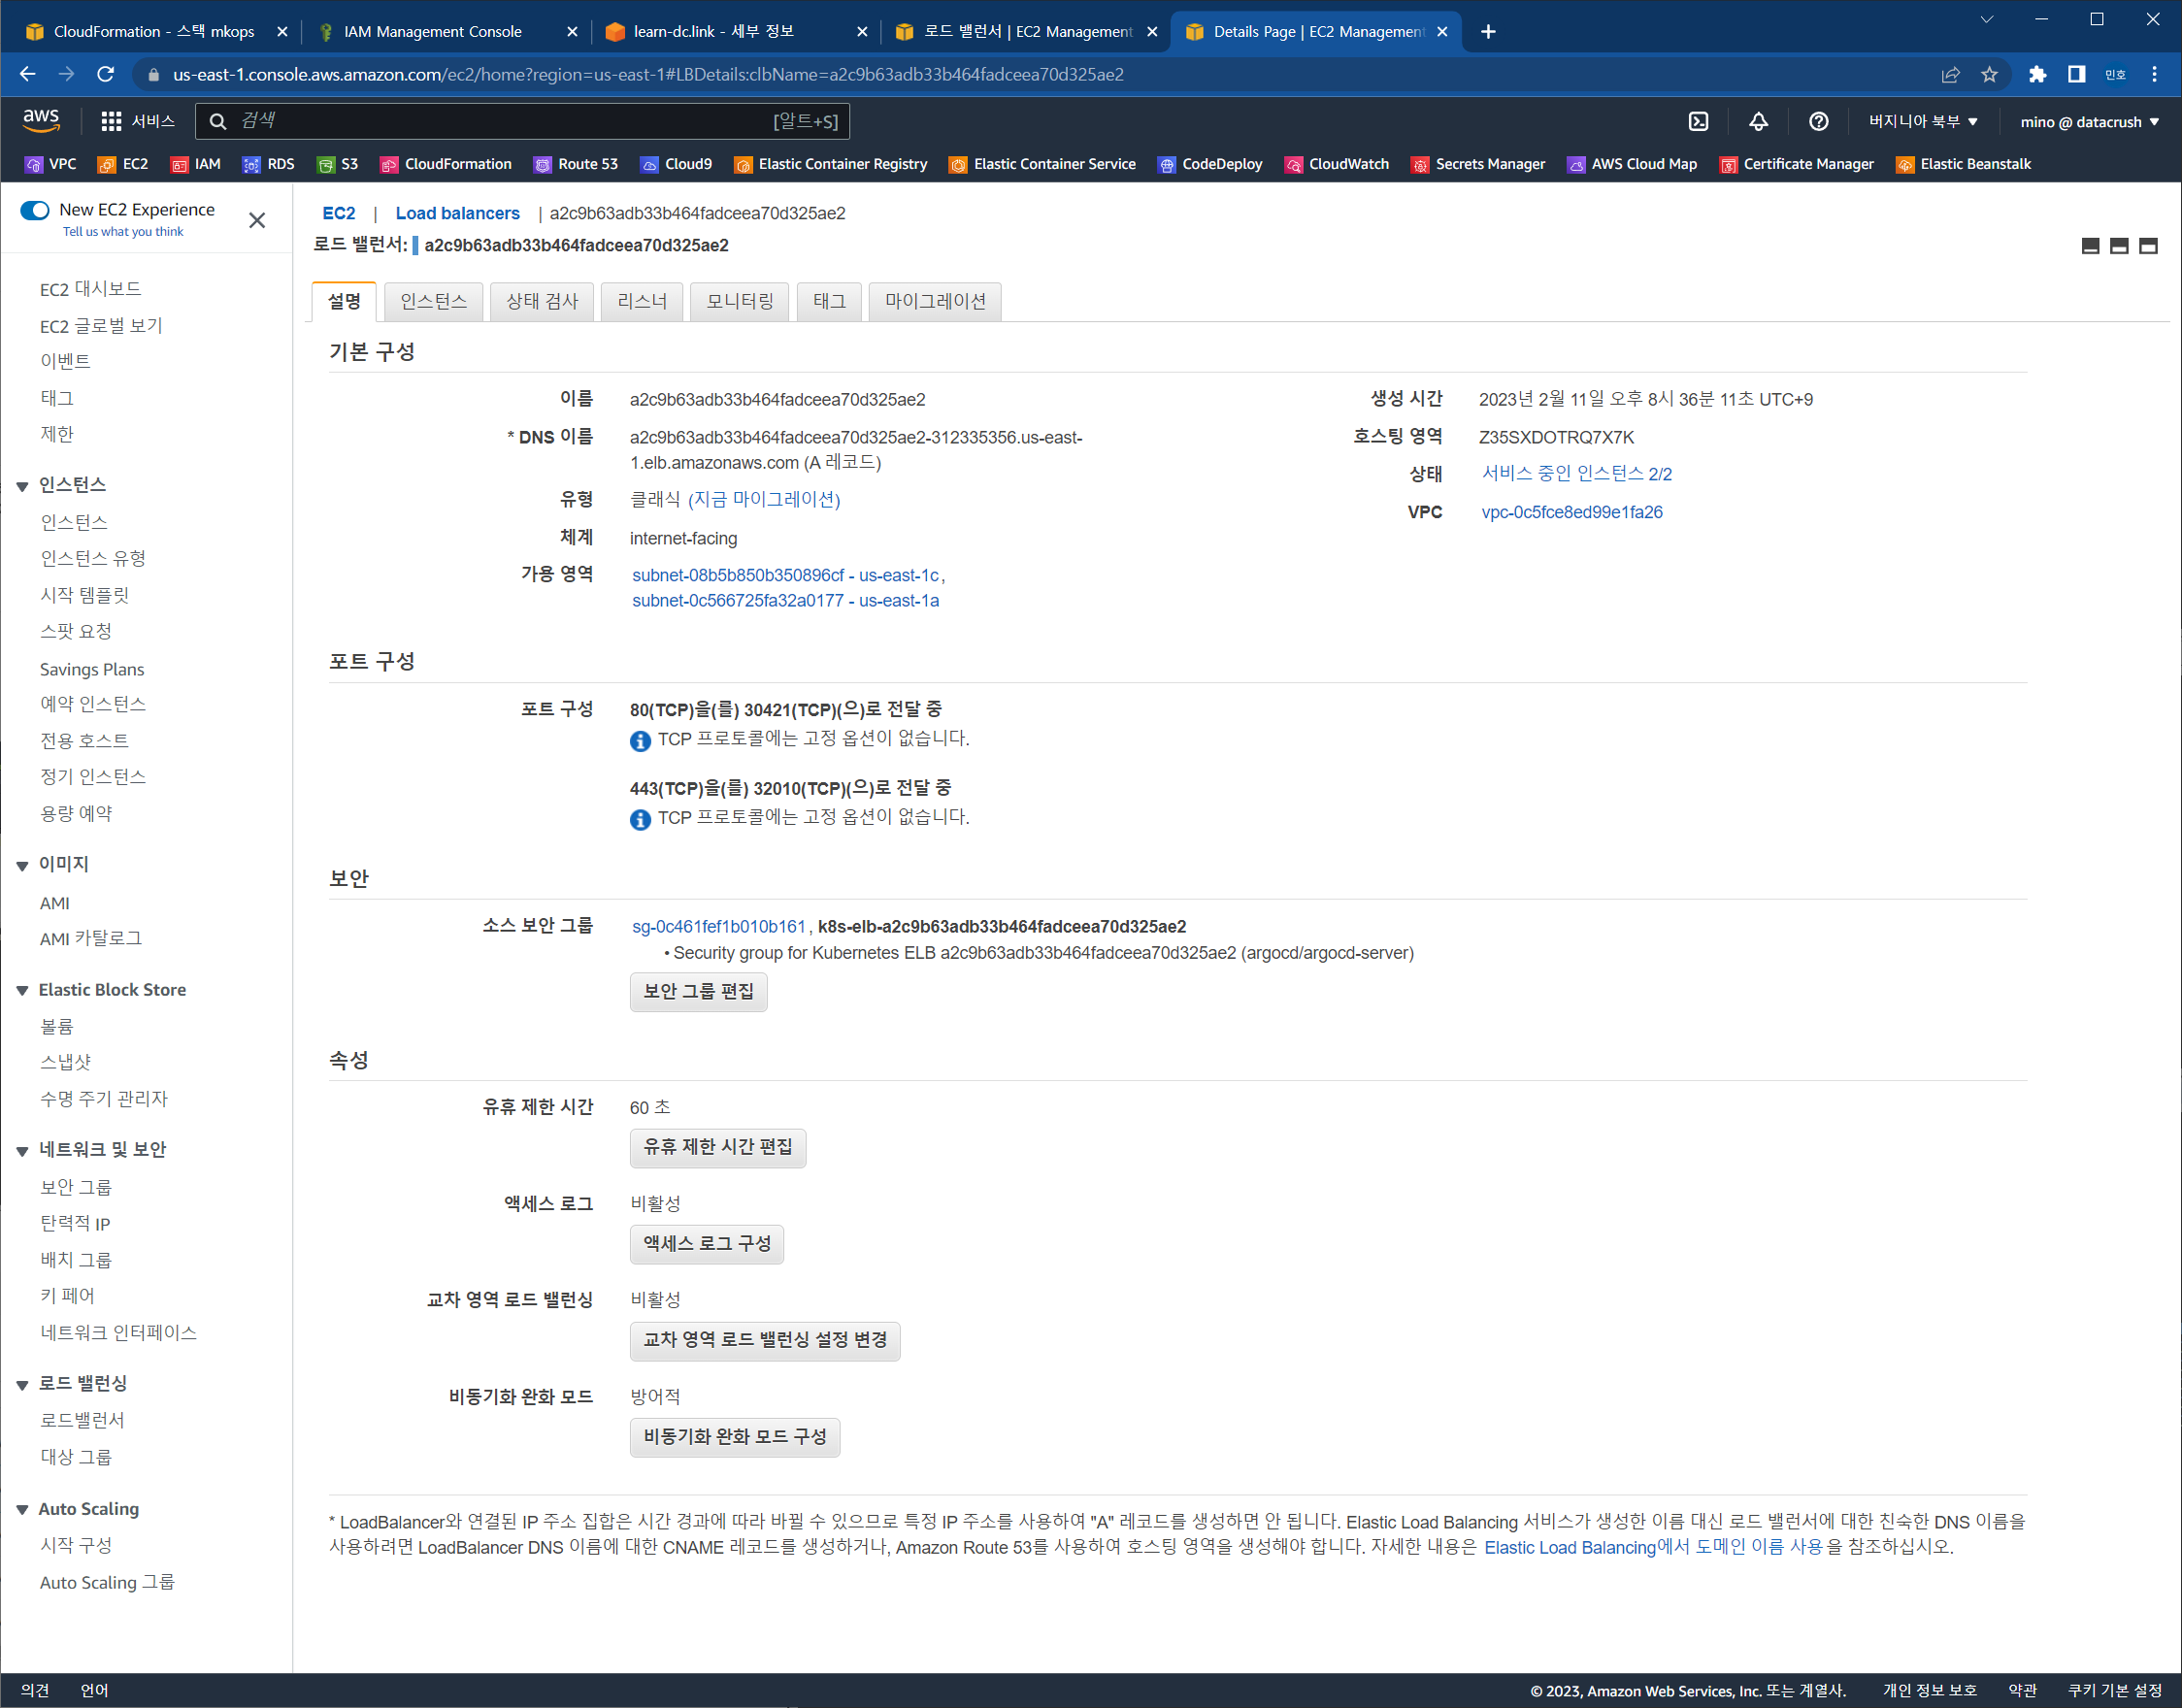
aws 자원 확인
-
-
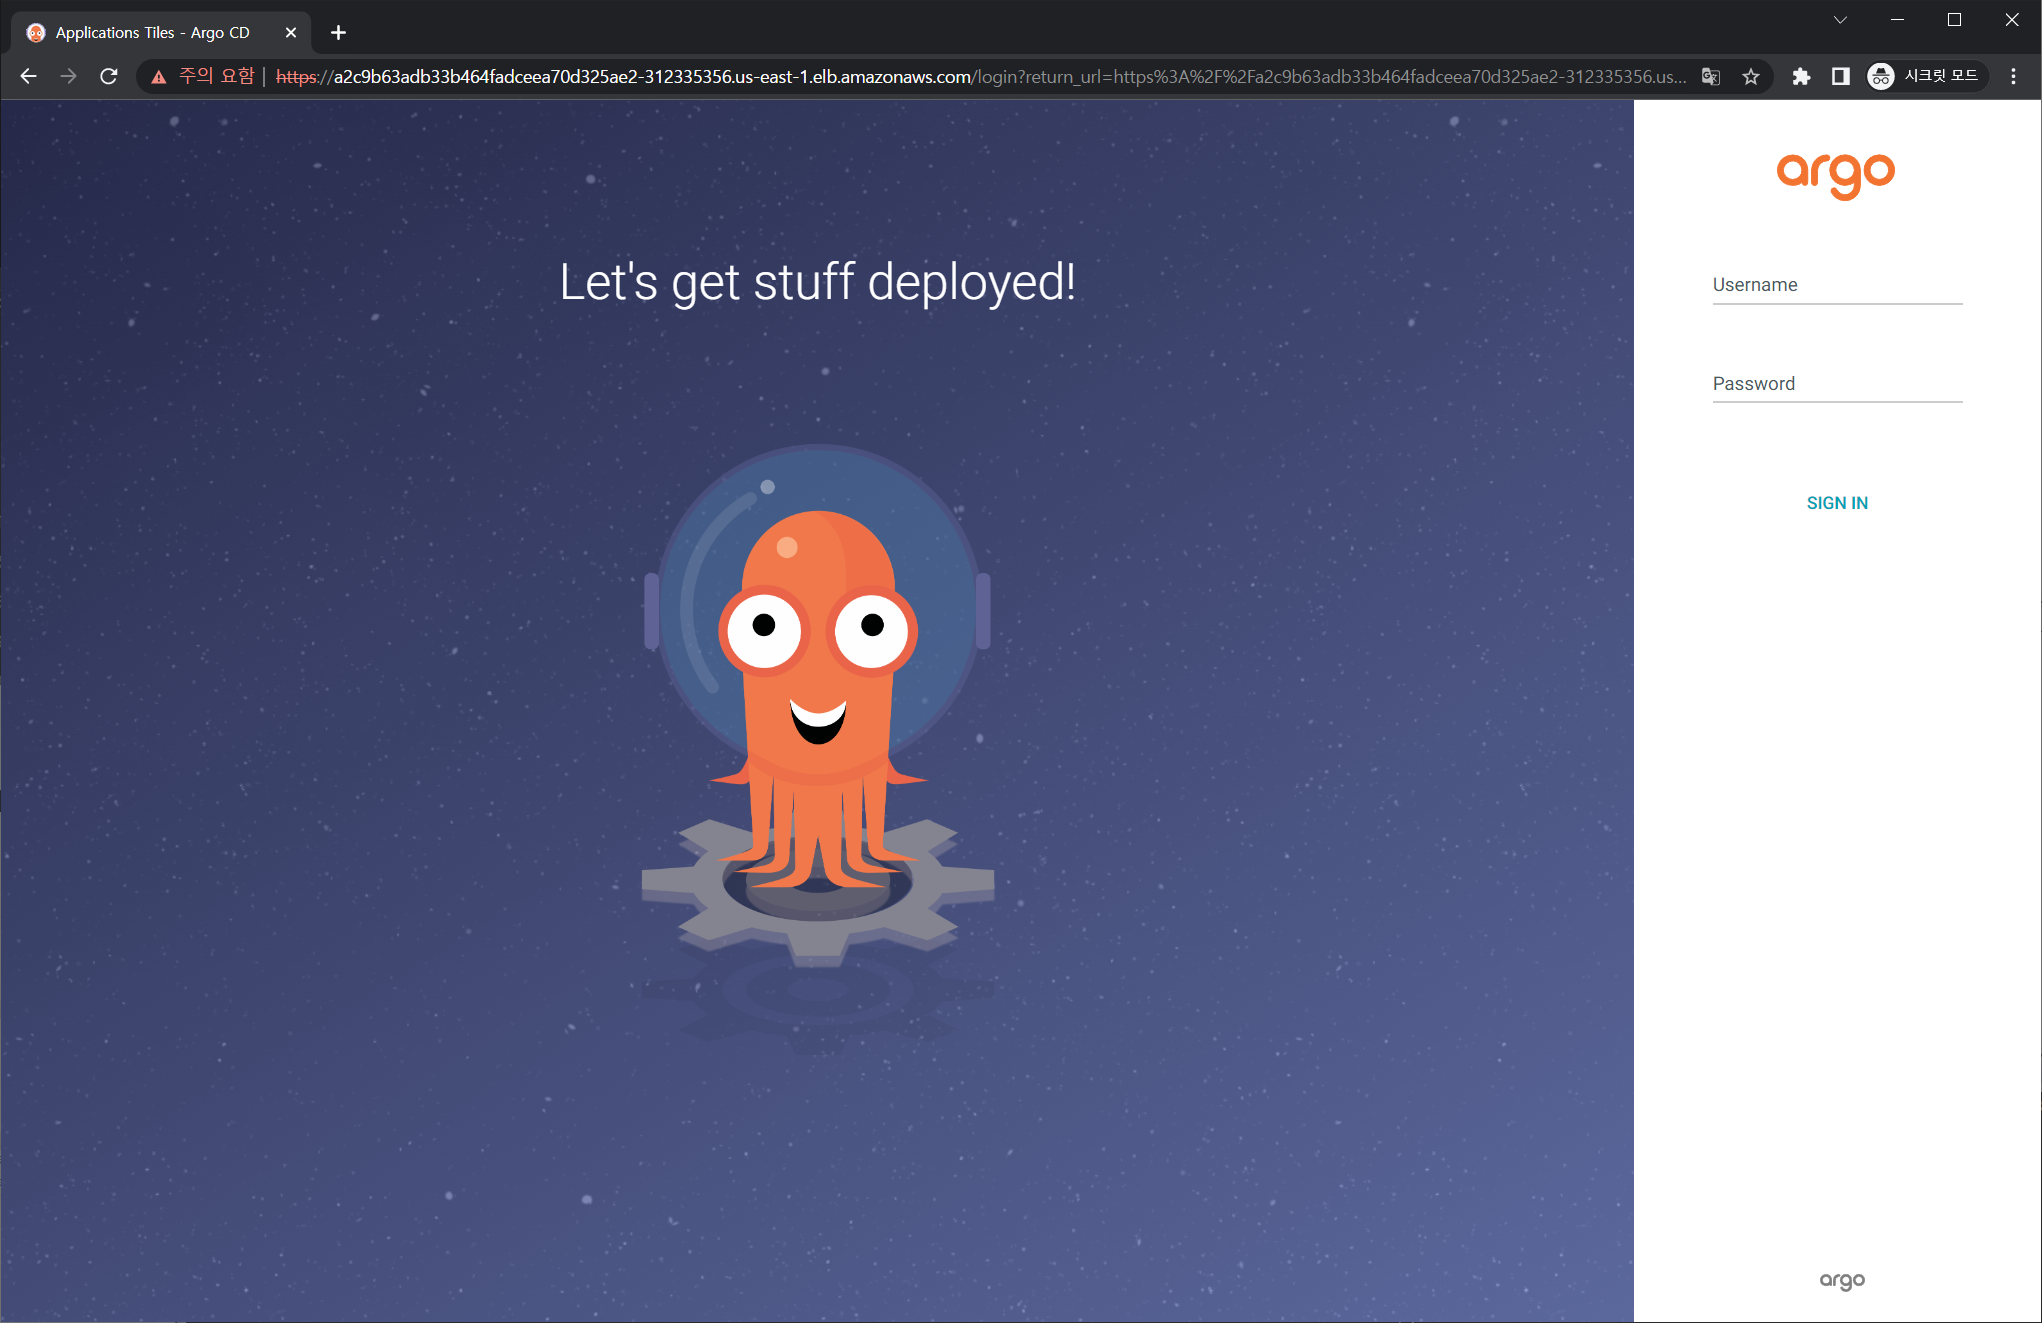
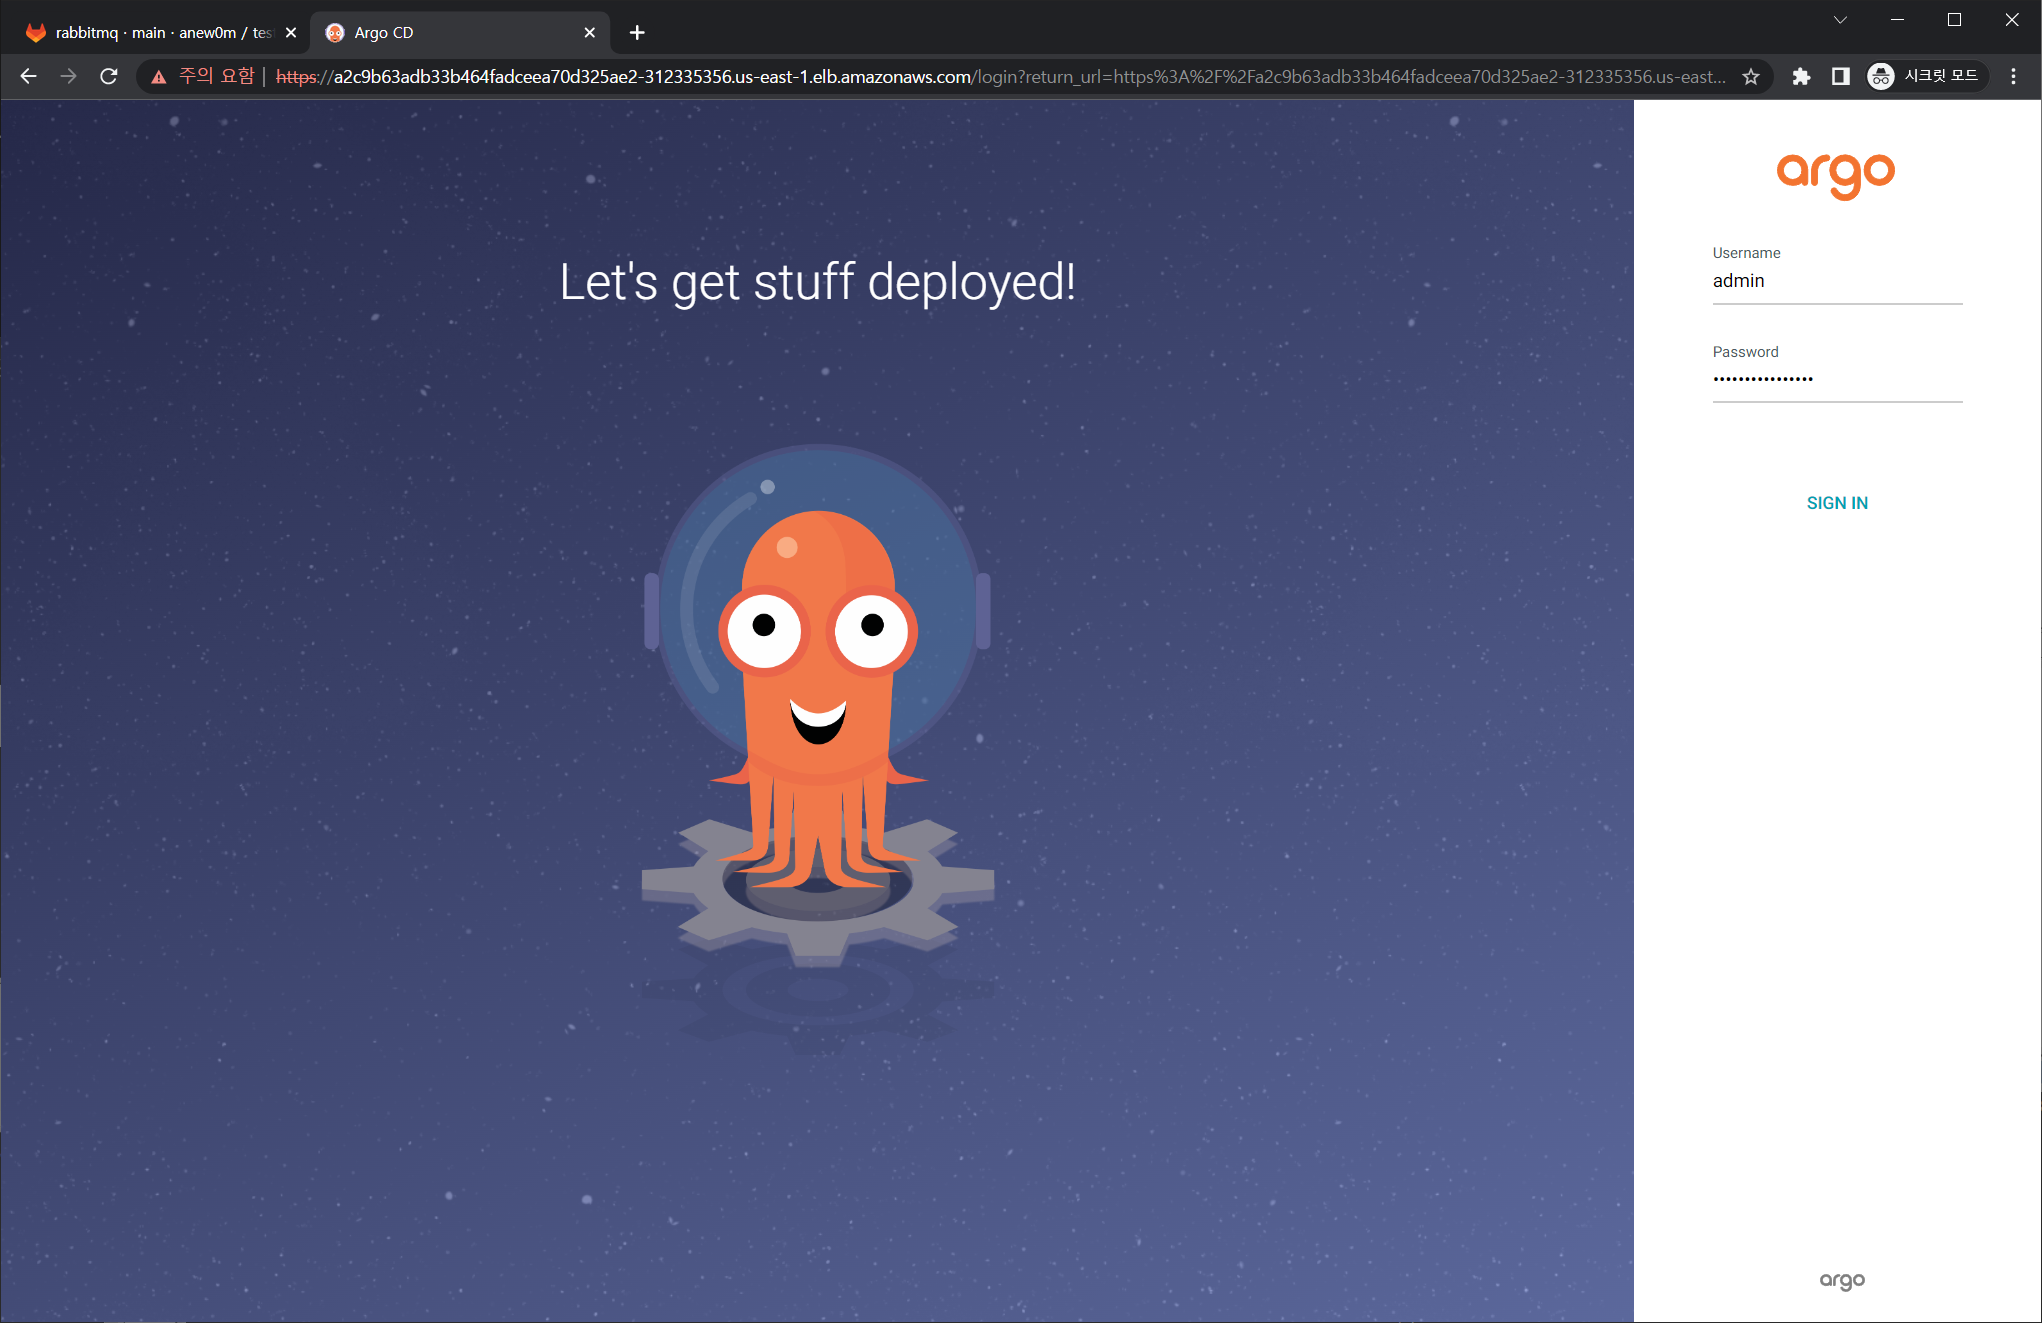
웹 접속 로그인 (admin) CLB의 DNS 주소로 접속 http, https
- a2c9b63adb33b464fadceea70d325ae2-312335356.us-east-1.elb.amazonaws.com
- a2c9b63adb33b464fadceea70d325ae2-312335356.us-east-1.elb.amazonaws.com
-
(참고) 삭제 시
-
1
2
helm uninstall -n argocd argocd kubectl delete ns argocd
-
4.2 아르고시디로 애플리케이션 배포에 사용할 깃 저장소와 쿠버네티스 클러스터 정보를 등록을 위해, argocd CLI 도구 설치 - 링크 악분일상
-
최신버전 설치
-
1
2
3
curl -sSL -o argocd-linux-amd64 https://github.com/argoproj/argo-cd/releases/latest/download/argocd-linux-amd64 install -m 555 argocd-linux-amd64 /usr/local/bin/argocd chmod +x /usr/local/bin/argocd
-
-
버전 확인
-
1argocd version --short
-
-
Help
-
1
2
3
4
5
# argocd app : 쿠버네티스 애플리케이션 동기화 상태 확인 # argocd context : 복수의 쿠버네티스 클러스터 등록 및 선택 # argocd login : 아르고시디 서버에 로그인 # argocd repo : 원격 깃 저장소를 등록하고 현황 파악 argocd
-
-
CLB 도메인 변수 지정
-
1
2
3
# CLB=<각자 자신의 argocd 서비스의 CLB 도메인 주소> CLB=a2c9b63adb33b464fadceea70d325ae2-312335356.us-east-1.elb.amazonaws.com echo $CLB
-
-
argocd 서버 로그인
-
1
2
3
argocd login $CLB --username admin --password $ARGOPW echo $CLB echo $ARGOPW
-
-
기 설치한 깃랩의 프로젝트 URL 을 argocd 깃 리포지토리(argocd repo)로 등록. 깃랩은 프로젝트 단위로 소스 코드를 보관.
-
1
2
# argocd repo add https://gitlab.$KOPS_CLUSTER_NAME/<깃랩 계정명>/test-stg.git --username <깃랩 계정명> --password <깃랩 계정 암호> argocd repo add https://gitlab.$KOPS_CLUSTER_NAME/anew0m/test-stg.git --username anew0m --password P@ssw0rd
-
-
등록 확인 : 기본적으로 아르고시디가 설치된 쿠버네티스 클러스터는 타깃 클러스터로 등록됨
-
1argocd repo list
-
-
기본적으로 아르고시디가 설치된 쿠버네티스 클러스터는 타깃 클러스터로 등록됨
-
1argocd cluster list
-
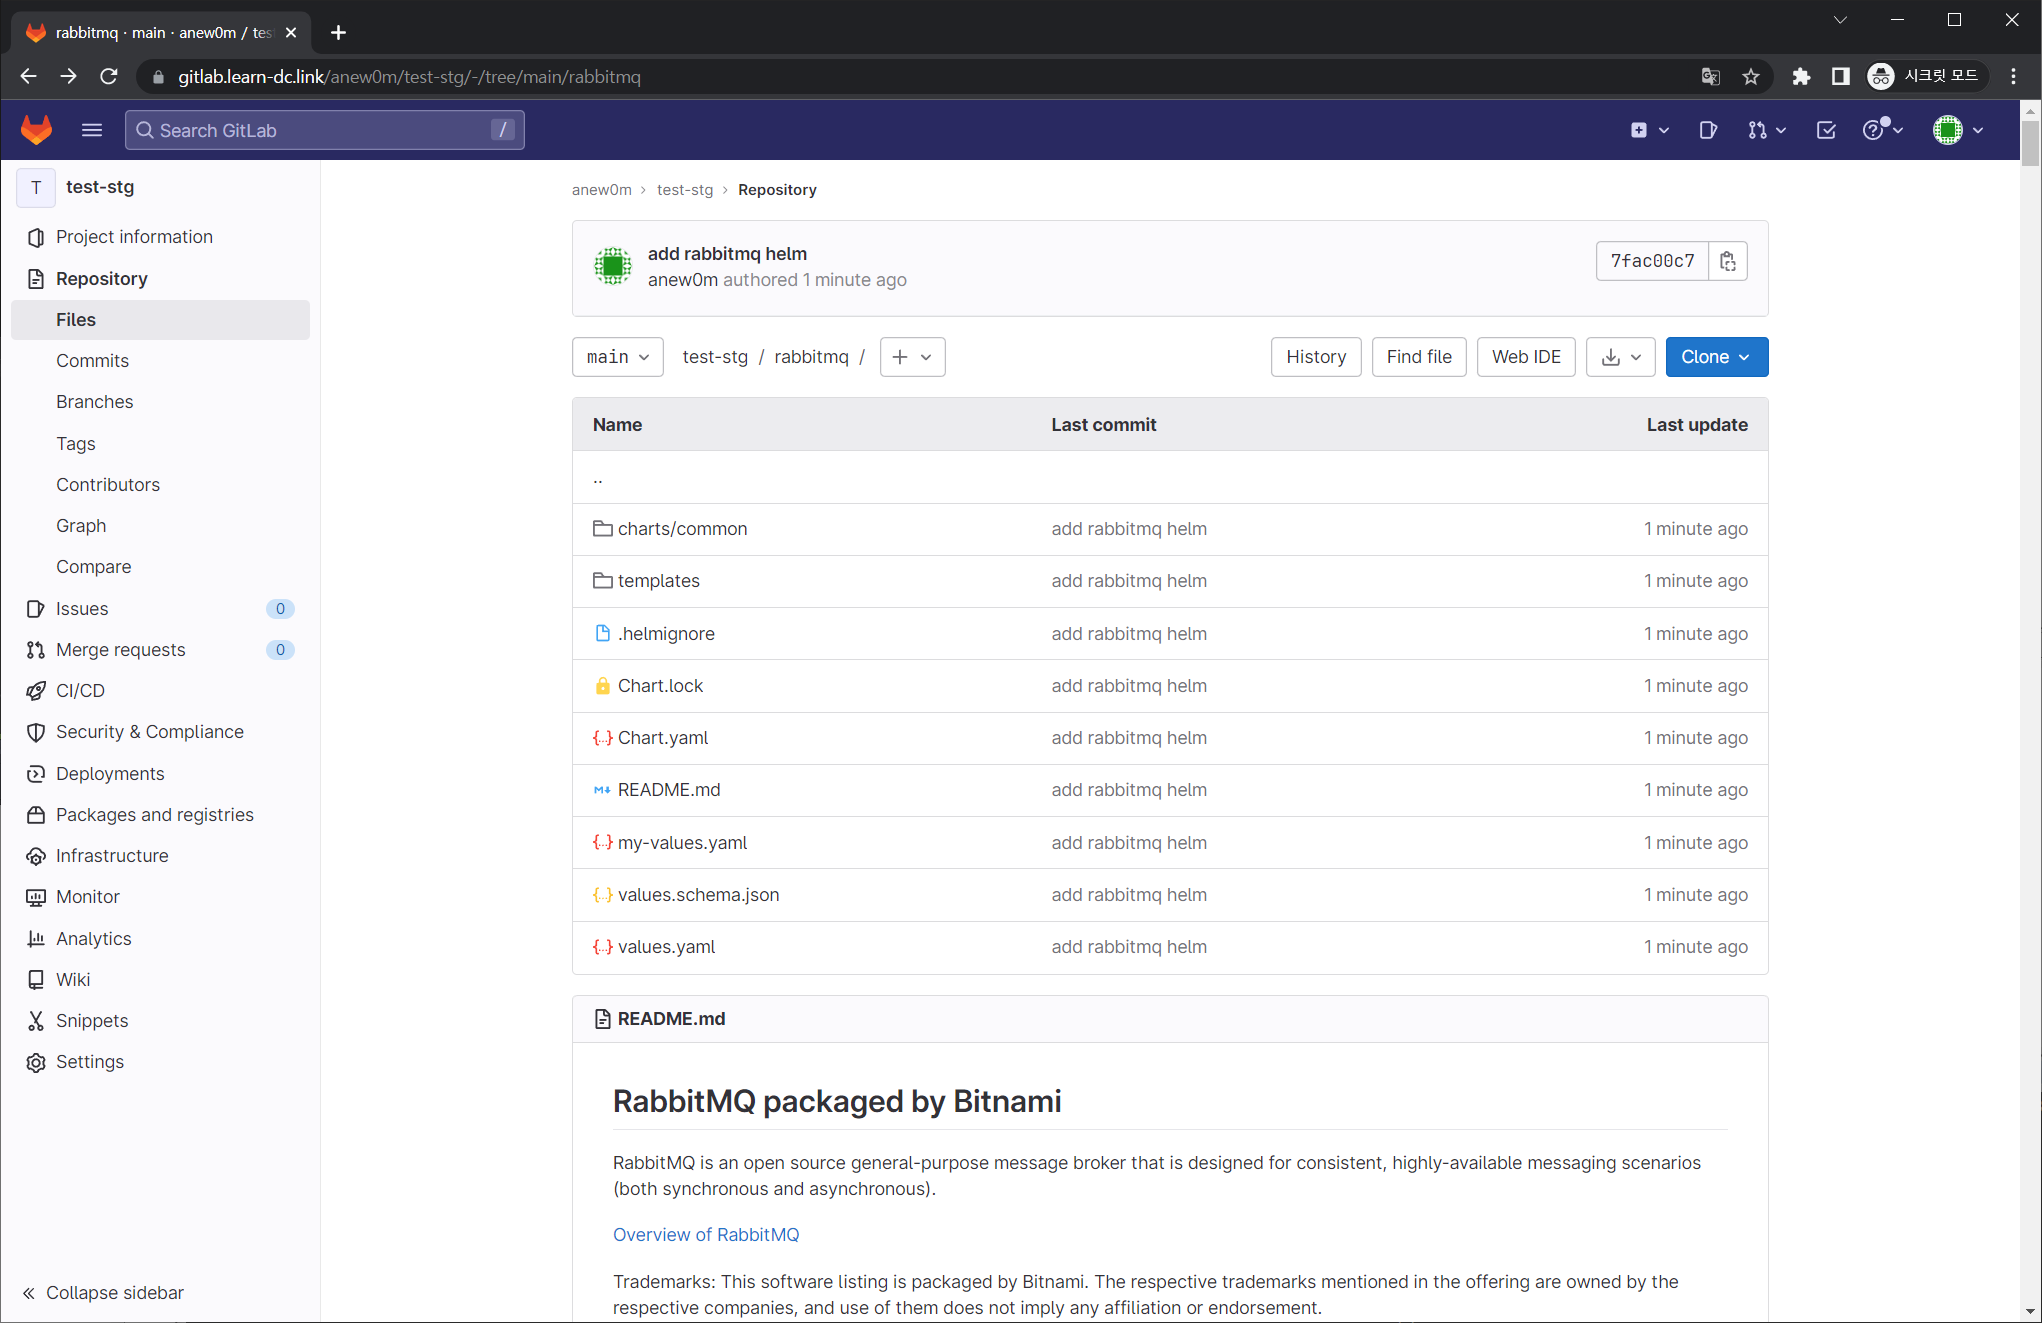
4.3 ArgoCD를 이용하여 RabbitMQ 헬름 애플리케이션 배포하기 : RabbitMQ Helm 깃랩 업로드 - HelmChart
-
test-stg 깃 디렉터리에서 아래 실행
-
1cd ~/gitlab-test/test-stg
-
-
깃 원격 오리진 주소 확인
-
1
2
git config -l | grep remote.origin.url # remote.origin.url=https://gitlab.learn-dc.link/anew0m/test-stg.git
-
-
RabbitMQ 헬름 차트 설치
-
1
2
3
4
5
6
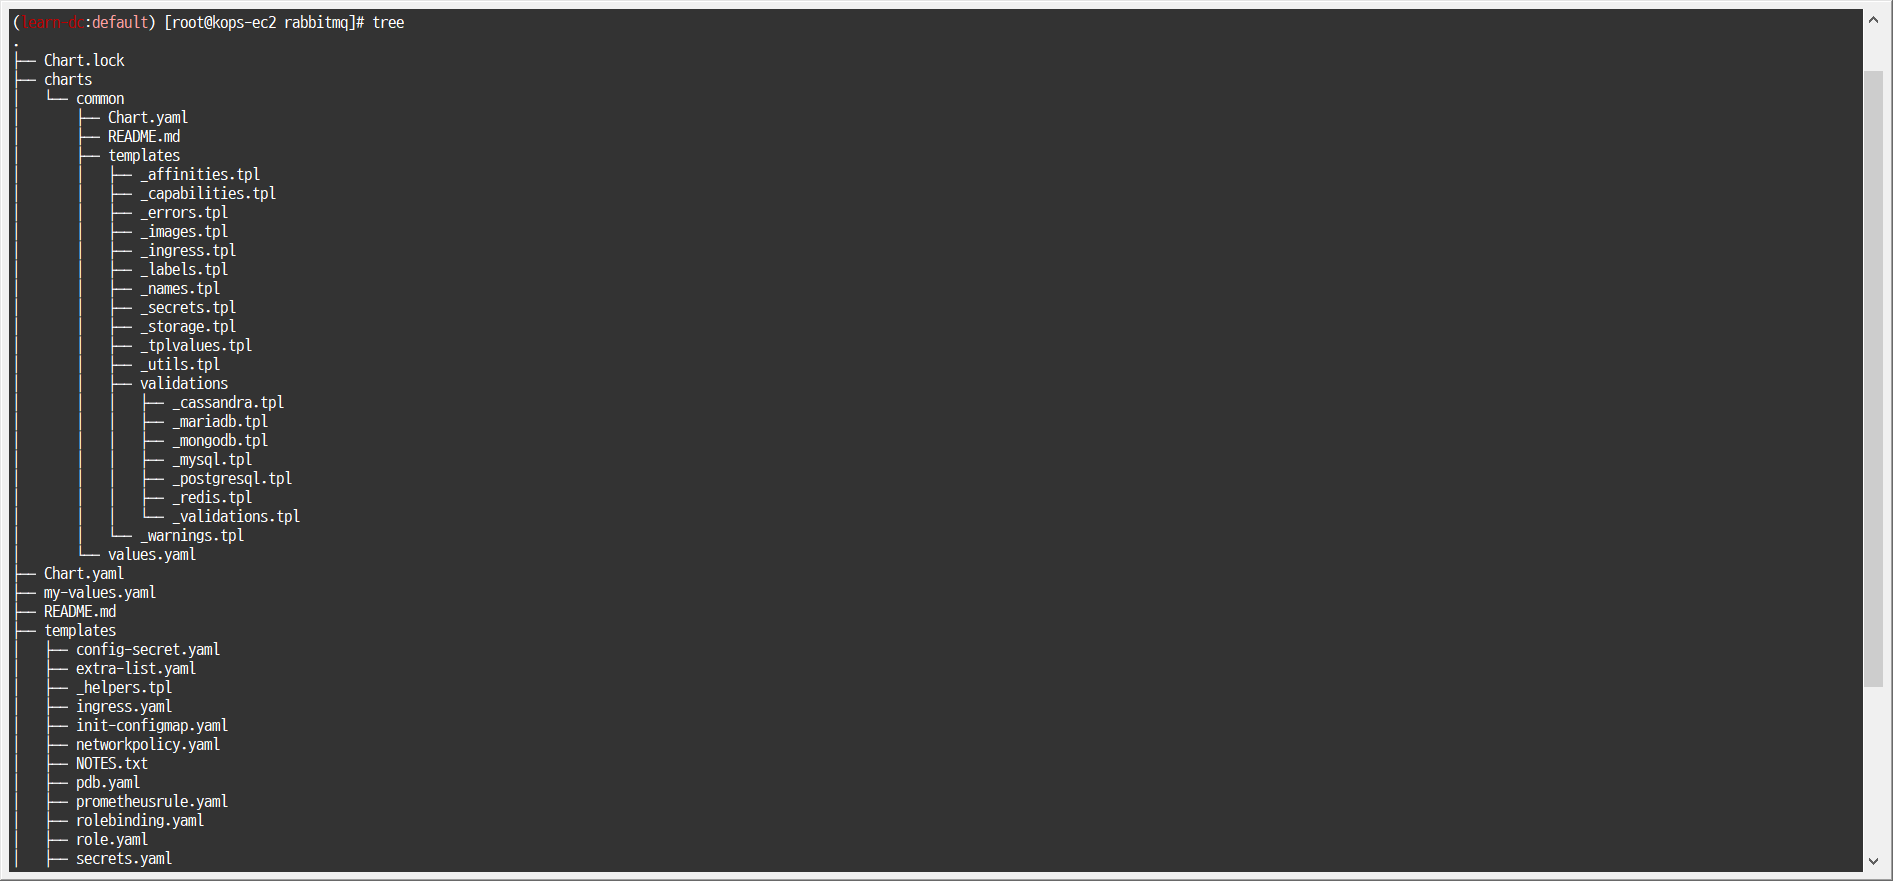
helm repo add bitnami https://charts.bitnami.com/bitnami helm repo update helm fetch bitnami/rabbitmq --untar cd rabbitmq/ cp values.yaml my-values.yaml tree
-
-
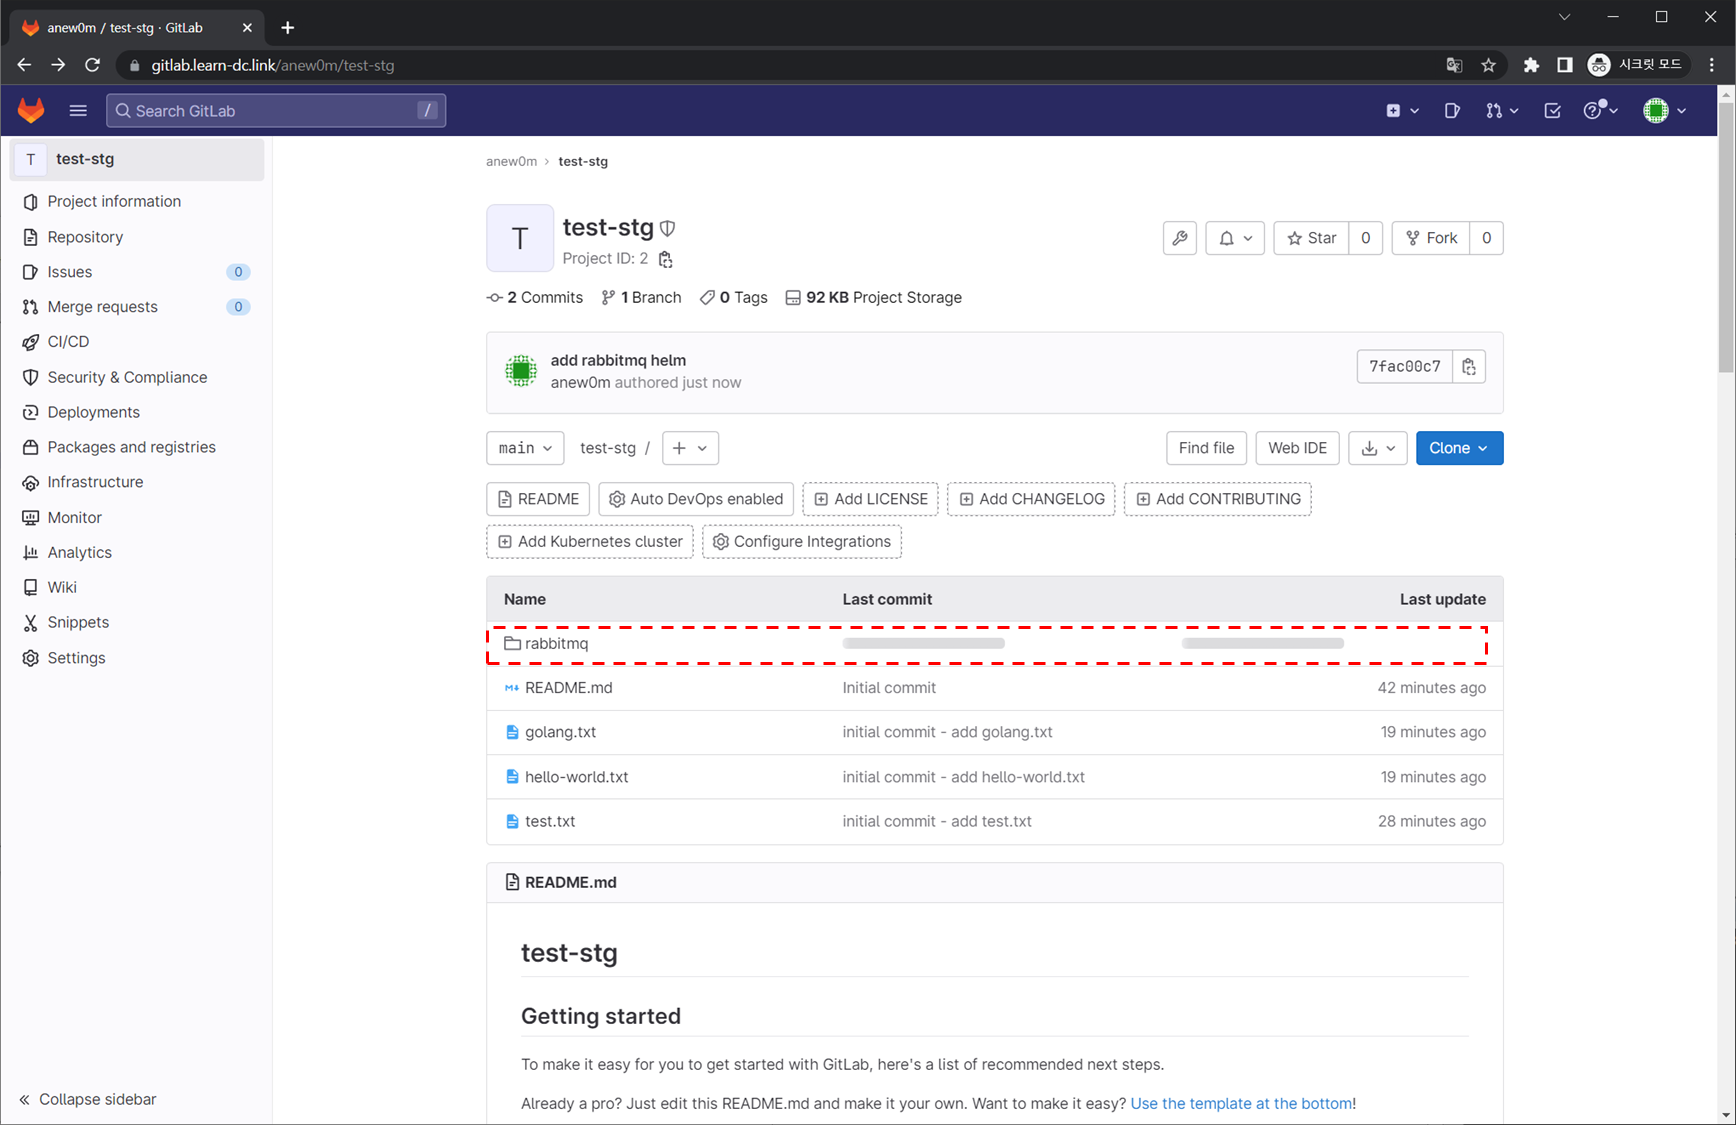
헬름 차트를 깃랩 저장소에 업로드
-
1
2
git add . && git commit -m "add rabbitmq helm" git push
-
-
argocd CRD 확인
-
1
2
3
4
5
kubectl get crd | grep argo # applications.argoproj.io 2023-02-11T11:36:09Z # 배포 앱 현재 실행 상태와 깃 저장소의 의도한 상태를 계속 비교 # applicationsets.argoproj.io 2023-02-11T11:36:09Z # 프로젝트 단위 구분 # appprojects.argoproj.io 2023-02-11T11:36:09Z
-
-
-
 1
 2
 3
 4
 5
 6
 7
 8
 9
10
11
12
13
14
15
16
17
18
19
20
21
22
23
24
25
26
27
28
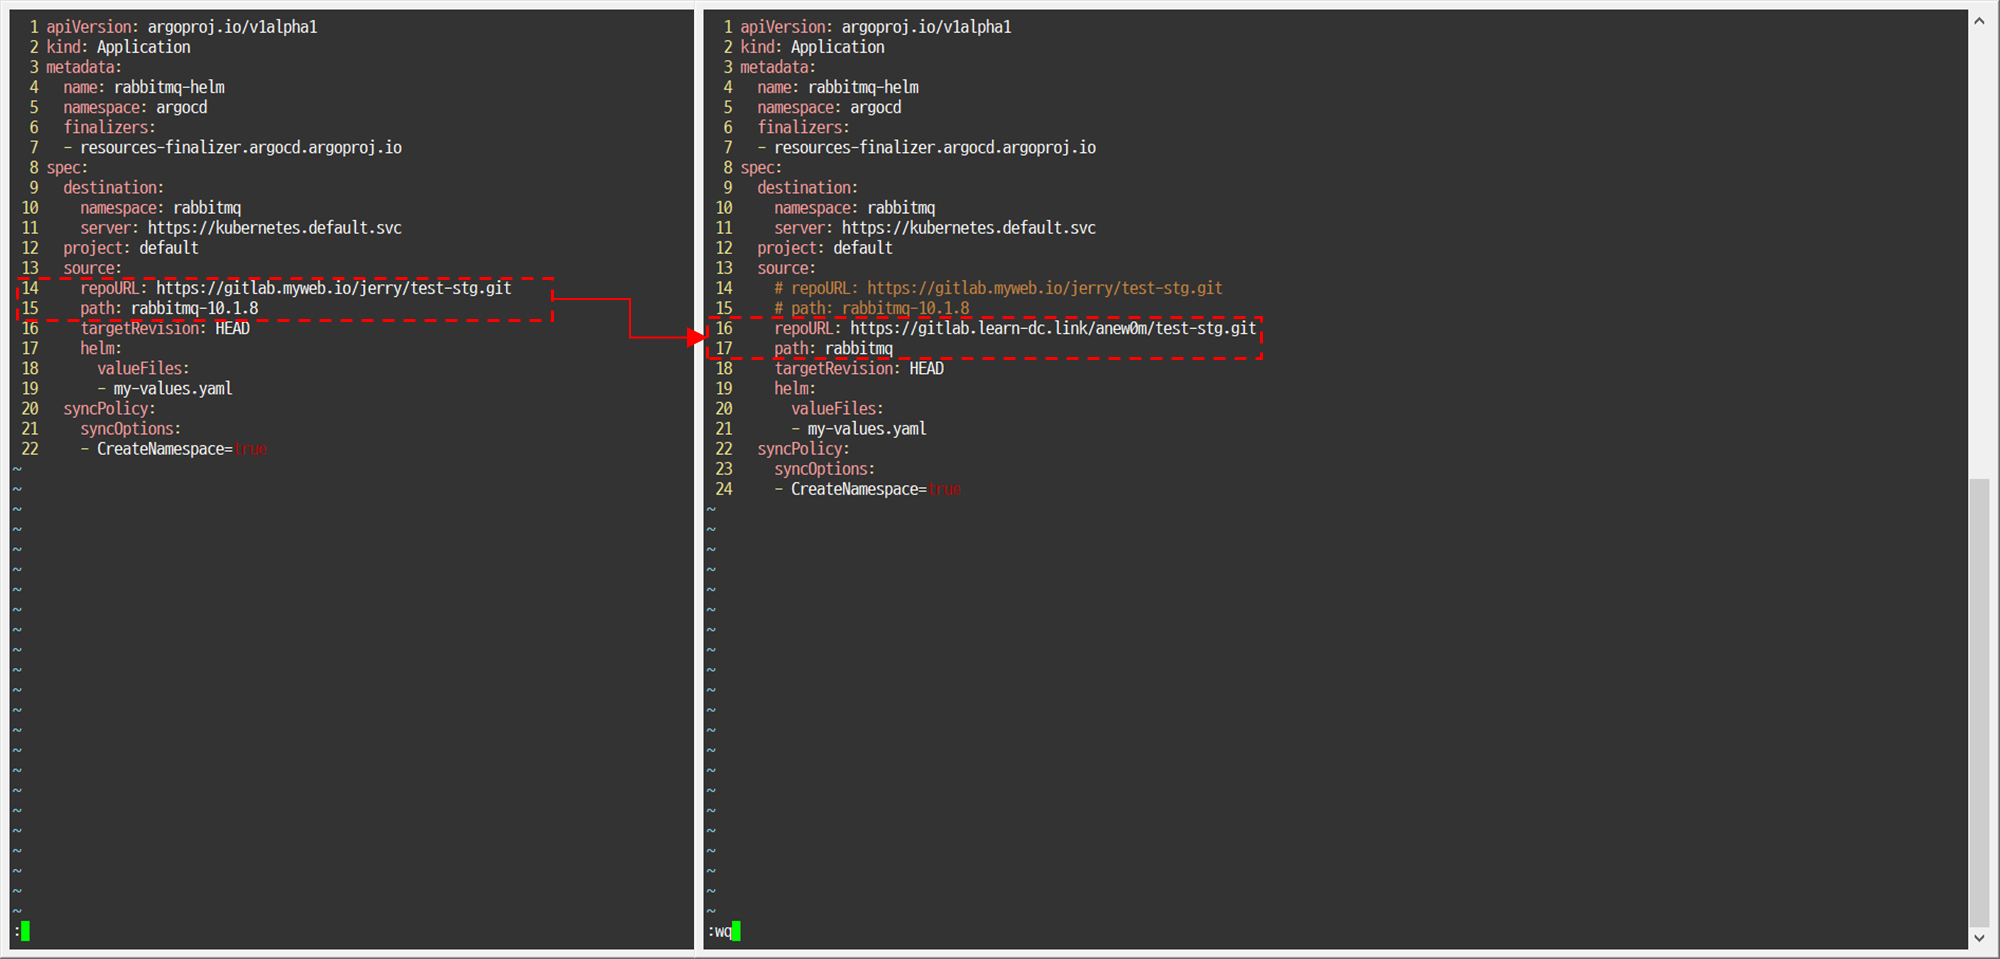
cd ~/ curl -s -O https://raw.githubusercontent.com/wikibook/kubepractice/main/ch15/rabbitmq-helm-argo-application.yml vim rabbitmq-helm-argo-application.yml # ... # apiVersion: argoproj.io/v1alpha1 # kind: Application # metadata: # name: rabbitmq-helm # namespace: argocd # finalizers: # - resources-finalizer.argocd.argoproj.io # spec: # destination: # namespace: rabbitmq # server: https://kubernetes.default.svc # project: default # source: # repoURL: https://gitlab.learn-dc.link/learn-dc/test-stg.git # path: rabbitmq # targetRevision: HEAD # helm: # valueFiles: # - my-values.yaml # syncPolicy: # syncOptions: # - CreateNamespace=true # ...
-
-
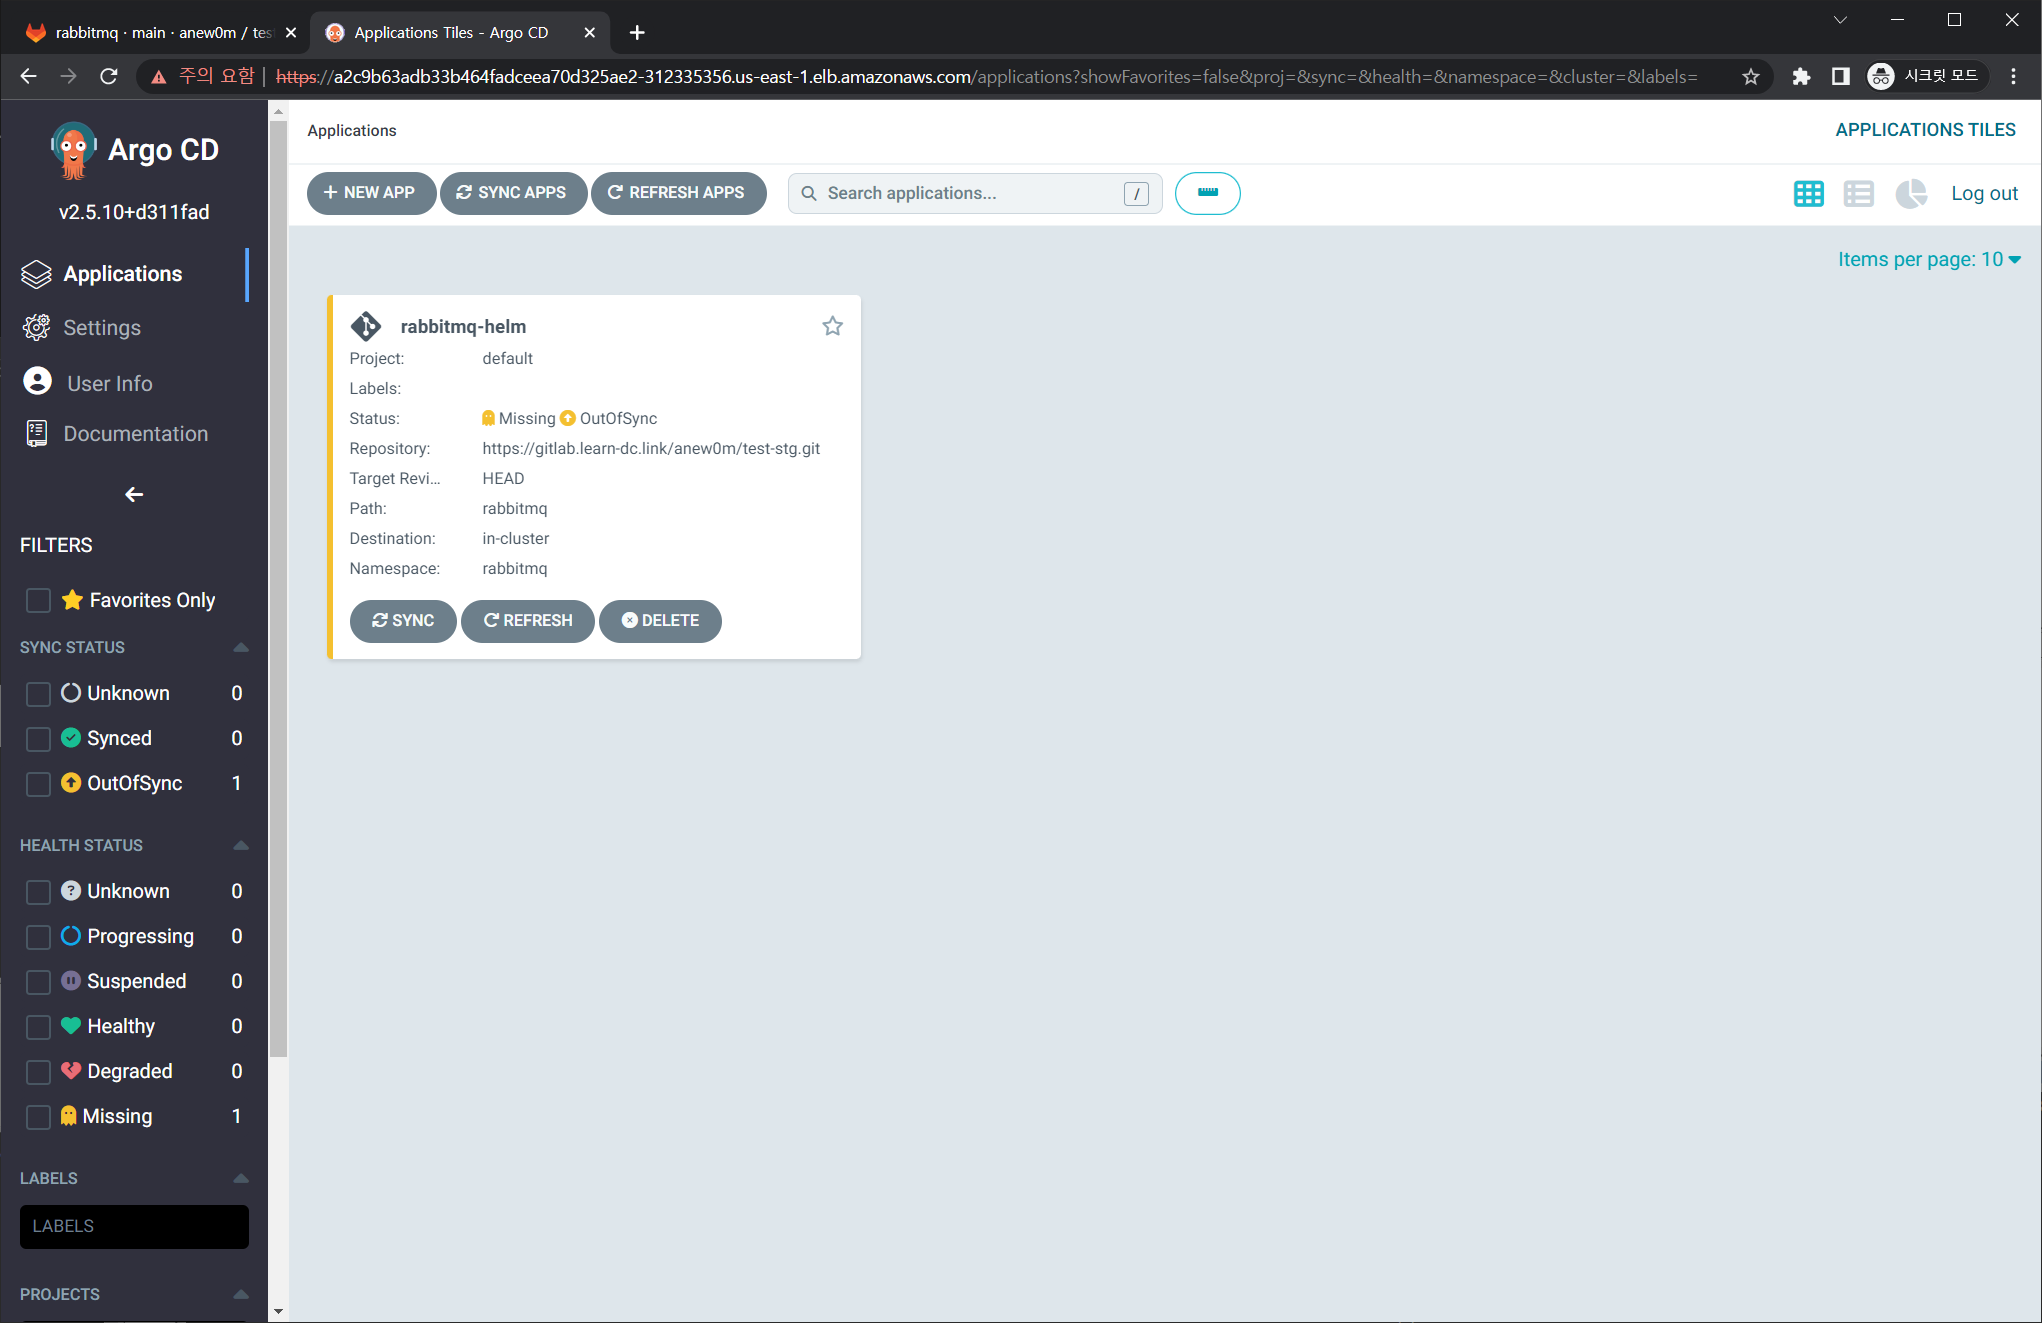
모니터링 : argocd 웹 화면 보고 있기!
-
배포
-
1kubectl apply -f rabbitmq-helm-argo-application.yml
-
-
YAML 파일을 적용(apply)하여 아르고시디 ‘Application’ CRD를 생성
-
1kubectl get applications.argoproj.io -n argocd
-
-
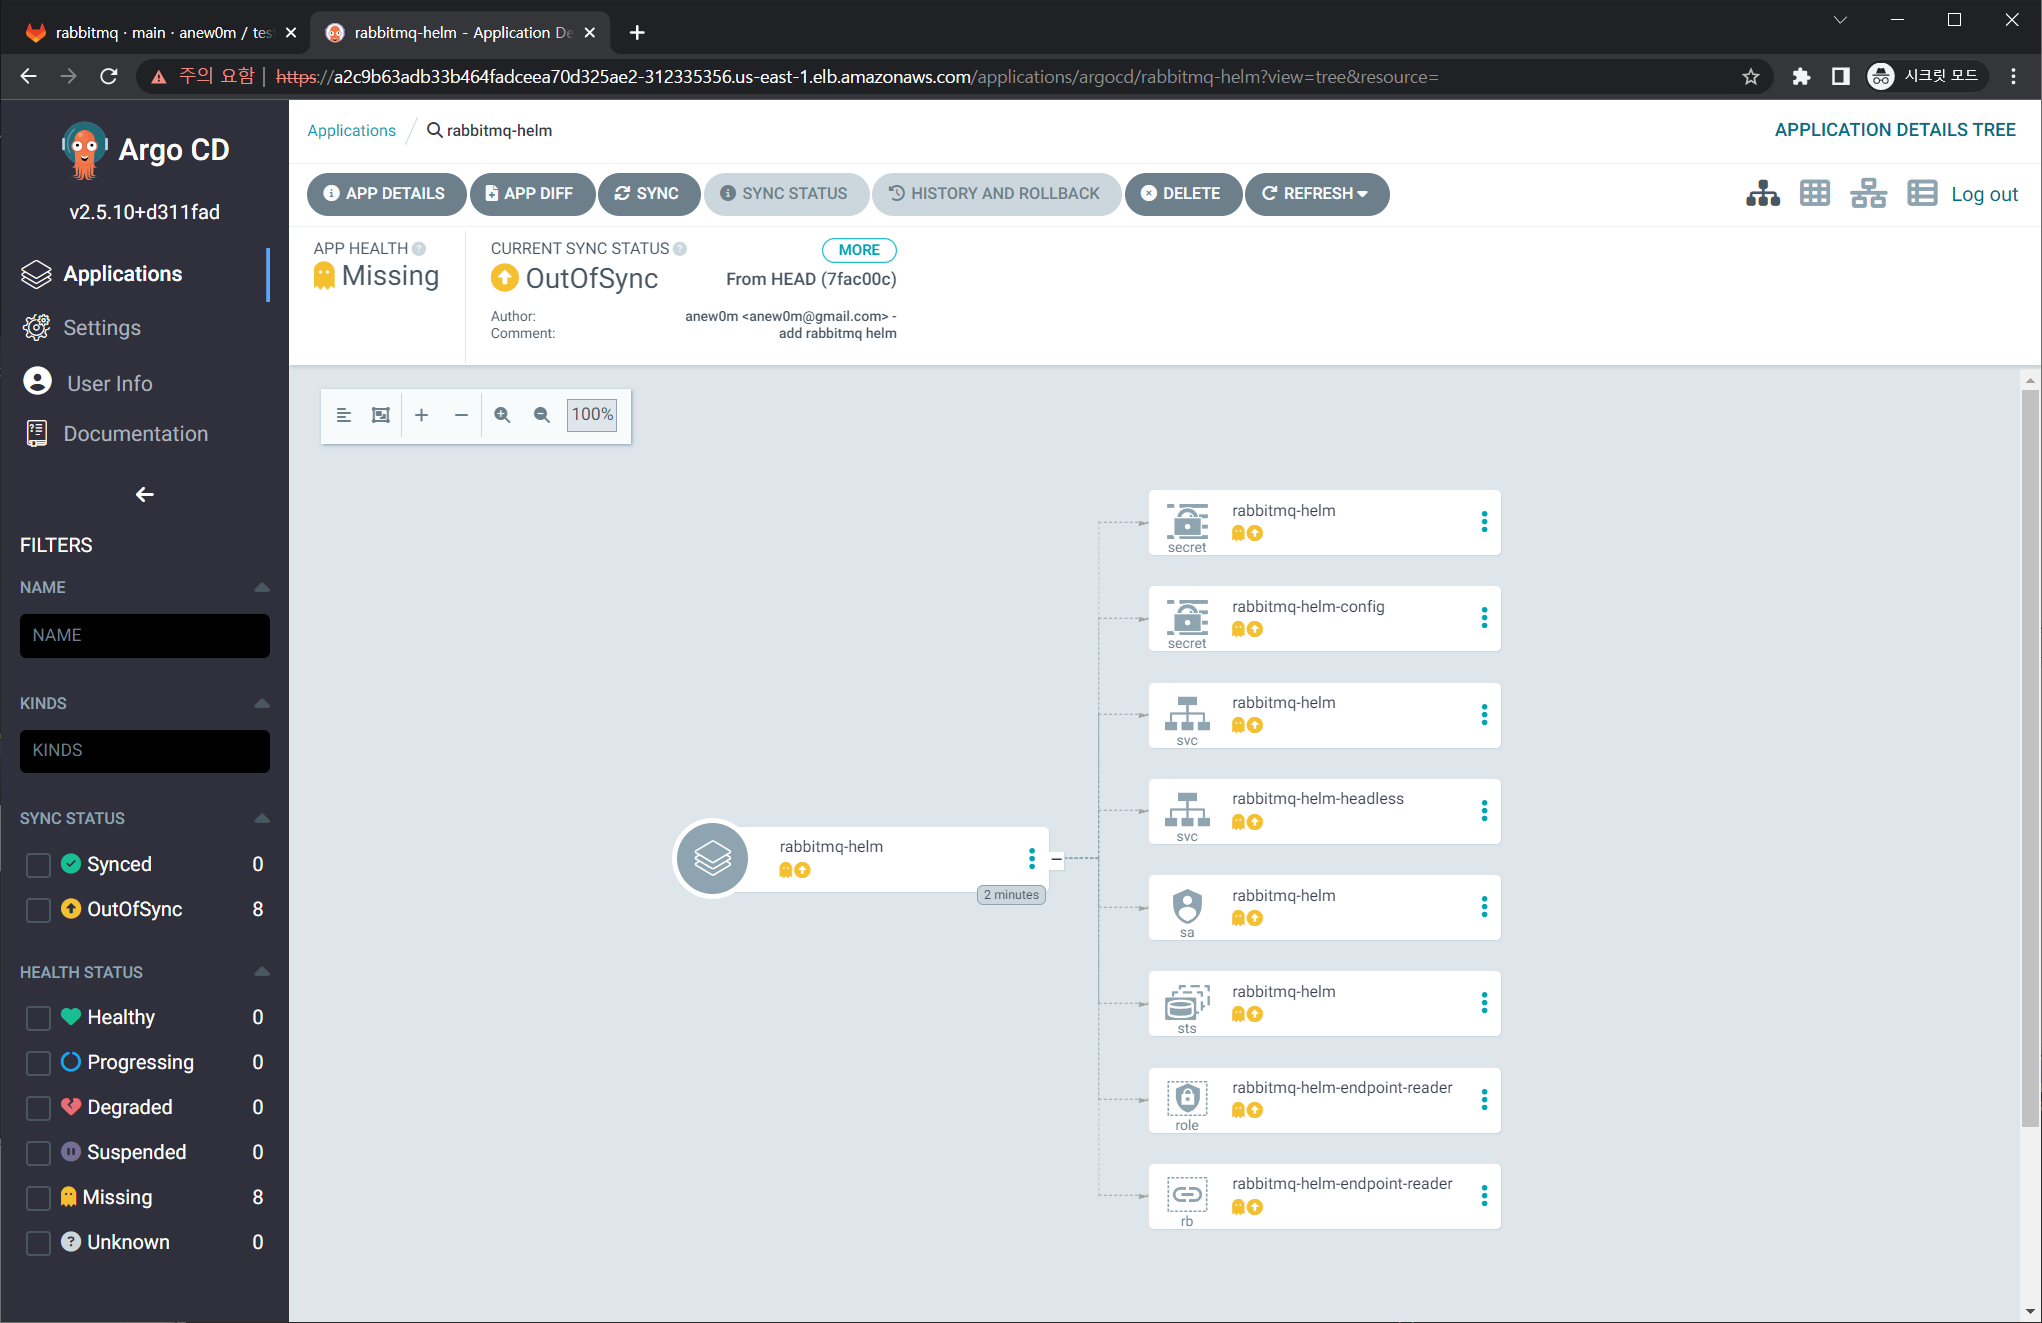
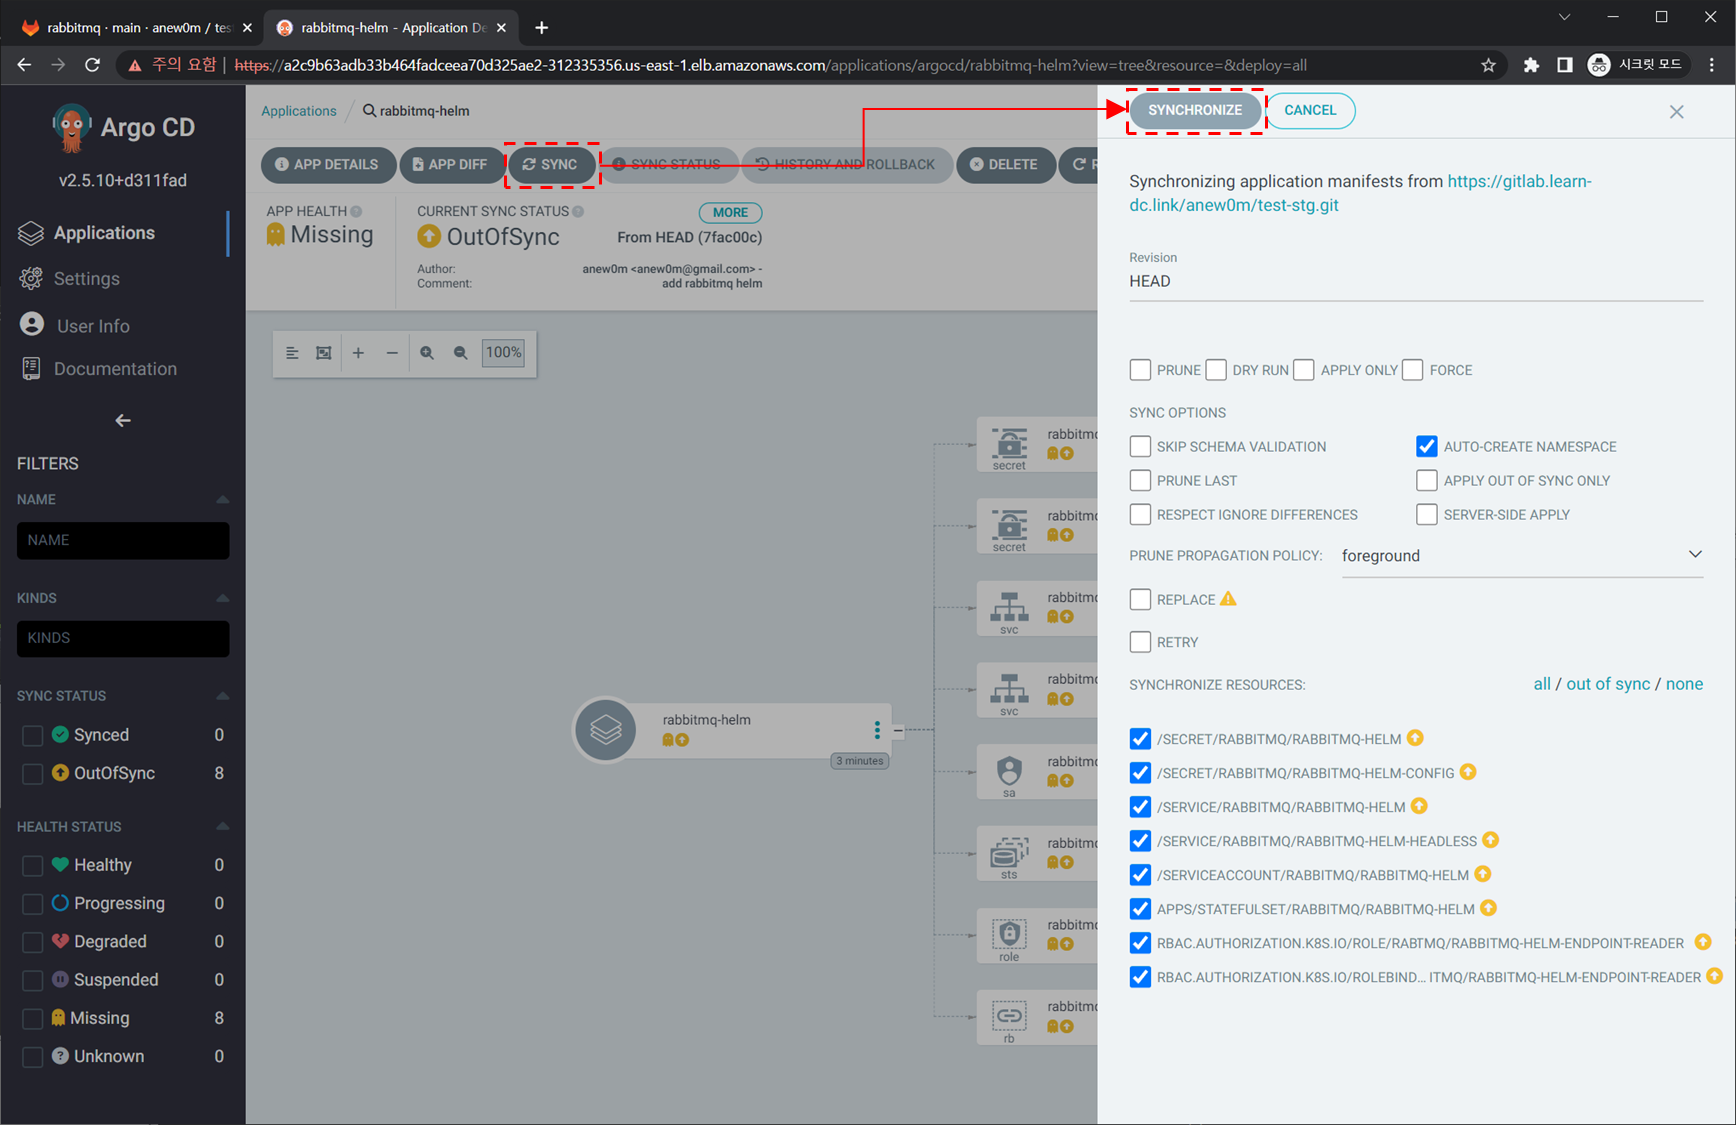
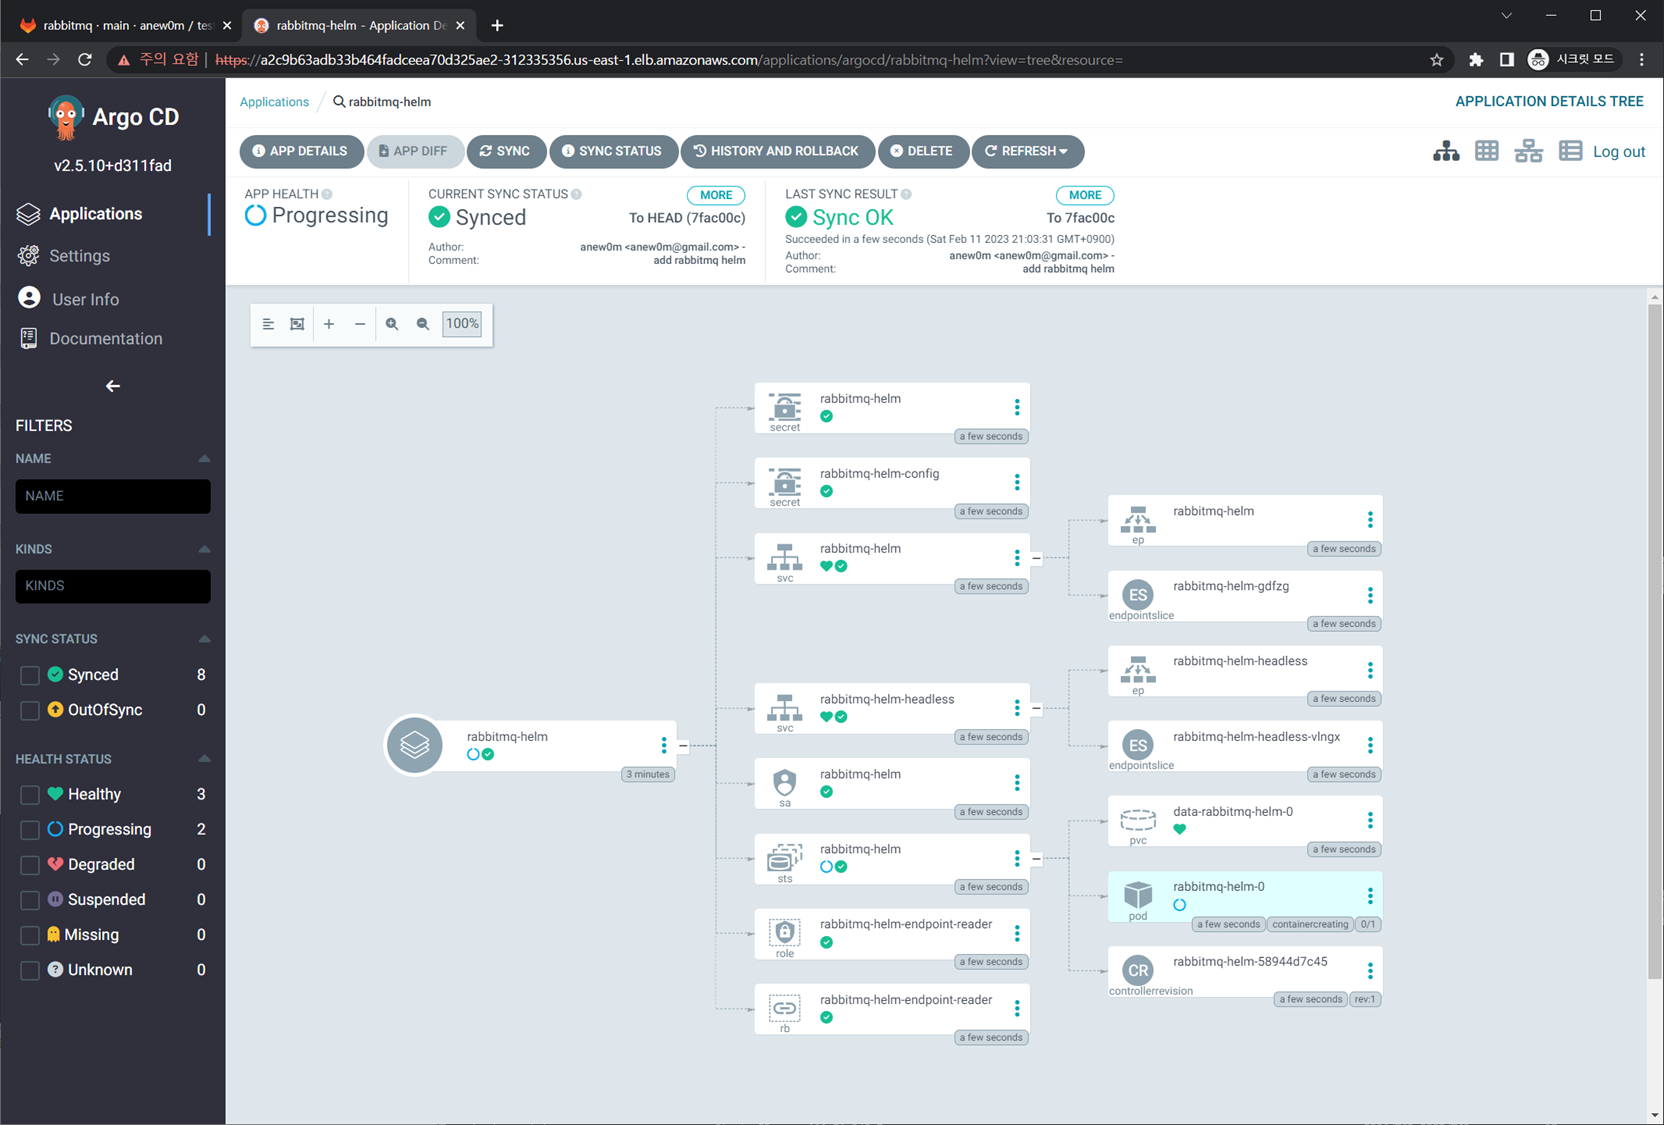
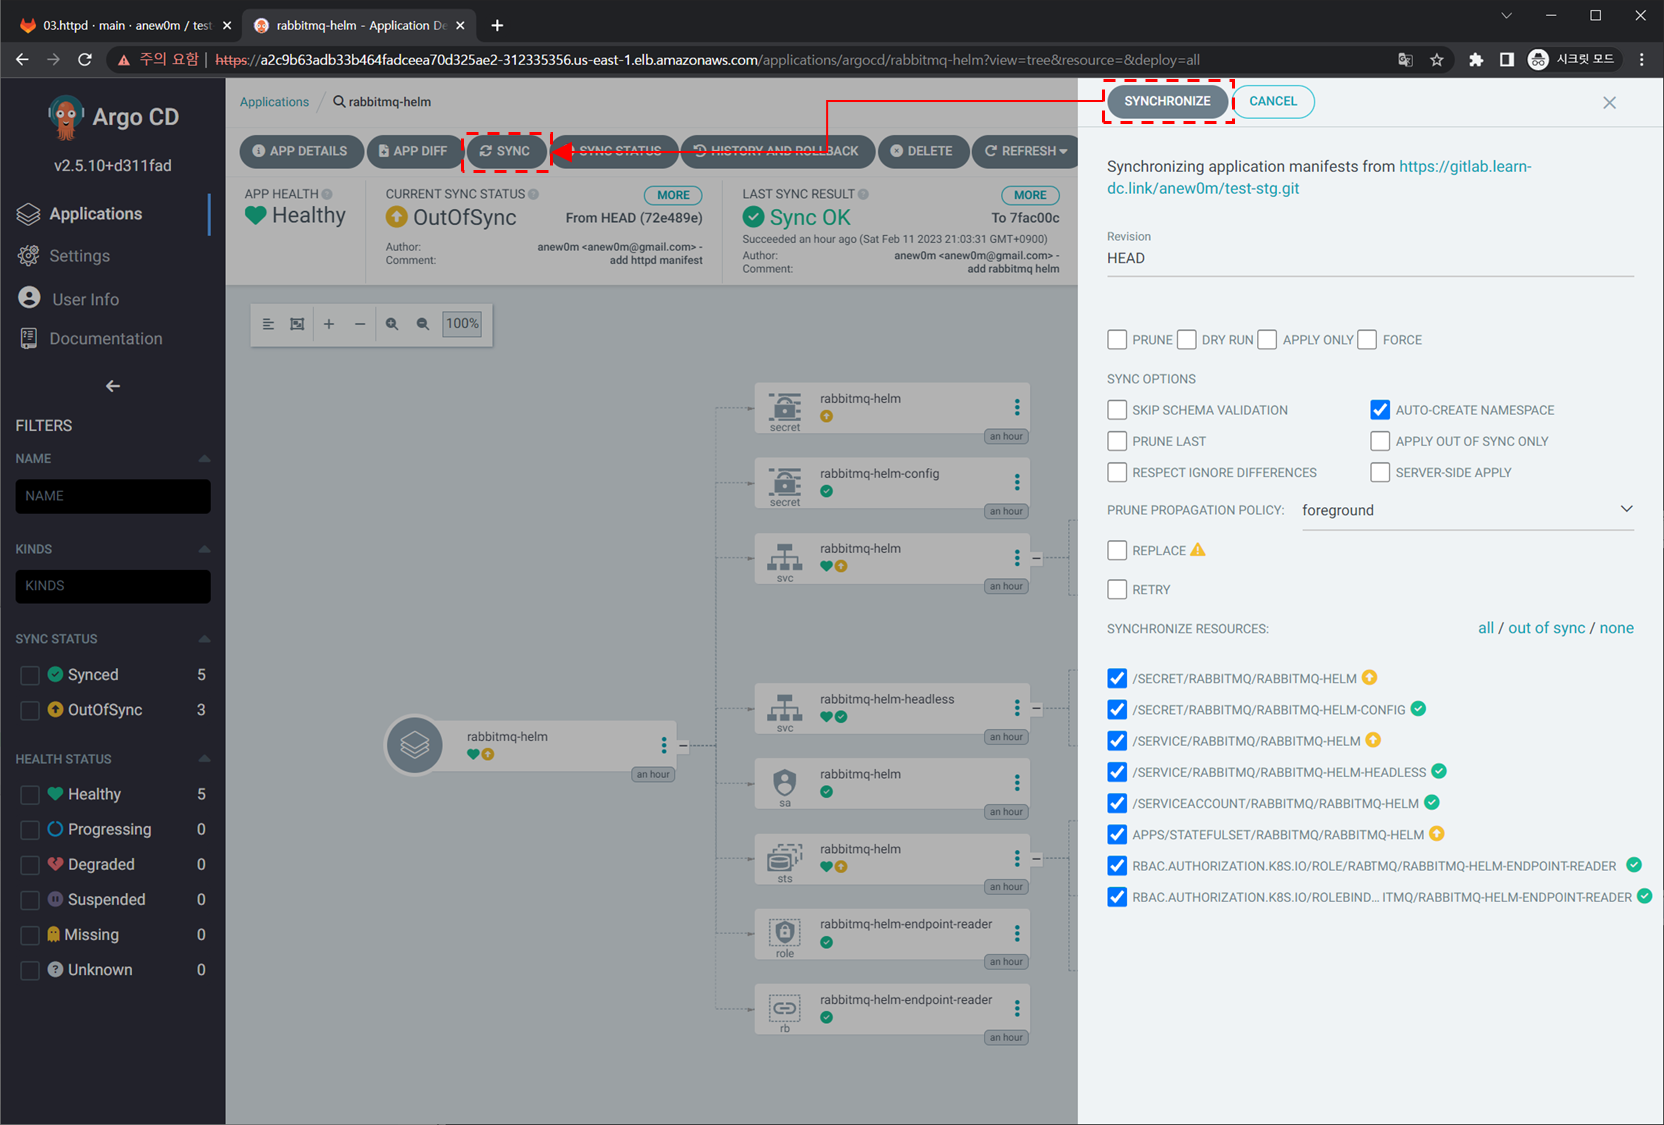
argocd 웹 화면 rabbitmq 클릭 → 헬름 차트 상세 내역 확인 ⇒ 화면 상단 SYNC 클릭해 동기화 실행 : helm install 을 실행하지 않아도 됨!
-
배포 확인
-
1kubectl get all,svc,cm -n rabbitmq
-
-
삭제 : argocd 웹 화면에서 DELETE 클릭
4.4 과제3
-
목표: ArgoCD 챕터인, 책 273페이지의 ‘Gitops 실습: 클러스터 설정 내역 변경과 깃 저장소 자동 반영’을 직접 스스로 실습해보고, 관련 스샷 올려주세요
-
수행결과 및 과정
-
교재 참고자료 clone
-
1git clone https://github.com/wikibook/kubepractice.git
-
-
로컬 깃랩 리포지토리와 연동된 디렉터리로 이동
-
1cd ~/gitlab-test/test-stg/
-
-
httpd 매니페스트 파일 관리를 위해 03.httpd 디렉터리를 생성
-
1
2
mkdir 03.httpd cd 03.httpd/
-
-
해당 디렉터리에 앞에서 만든 httpd-deploy.yml, httpd-nodeport-svc.yml 파일을 복사
-
1
2
cp ~/kubepractice/ch15/httpd-deploy.yml . cp ~/kubepractice/ch15/httpd-nodeport-svc.yml .-

-
 1
 2
 3
 4
 5
 6
 7
 8
 9
10
11
12
13
14
15
16
17
18
19
20
21
22
# ~/kubepractice/ch15/httpd-deploy.yml apiVersion: apps/v1 kind: Deployment metadata: name: httpd namespace: httpd labels: app: httpd #service가 바라보는 label이 아님. 주의. spec: replicas: 3 selector: matchLabels: app: httpd template: metadata: labels: app: httpd # Service가 바라보는 label 지정 spec: containers: - name: httpd image: httpd -
 1
 2
 3
 4
 5
 6
 7
 8
 9
10
11
12
13
14
15
16
17
# ~/kubepractice/ch15/httpd-nodeport-svc.yml apiVersion: v1 kind: Service metadata: name: httpd-svc namespace: httpd spec: ports: - name: http port: 80 protocol: TCP targetPort: 80 nodePort: 30180 selector: app: httpd type: NodePort
-
-
-
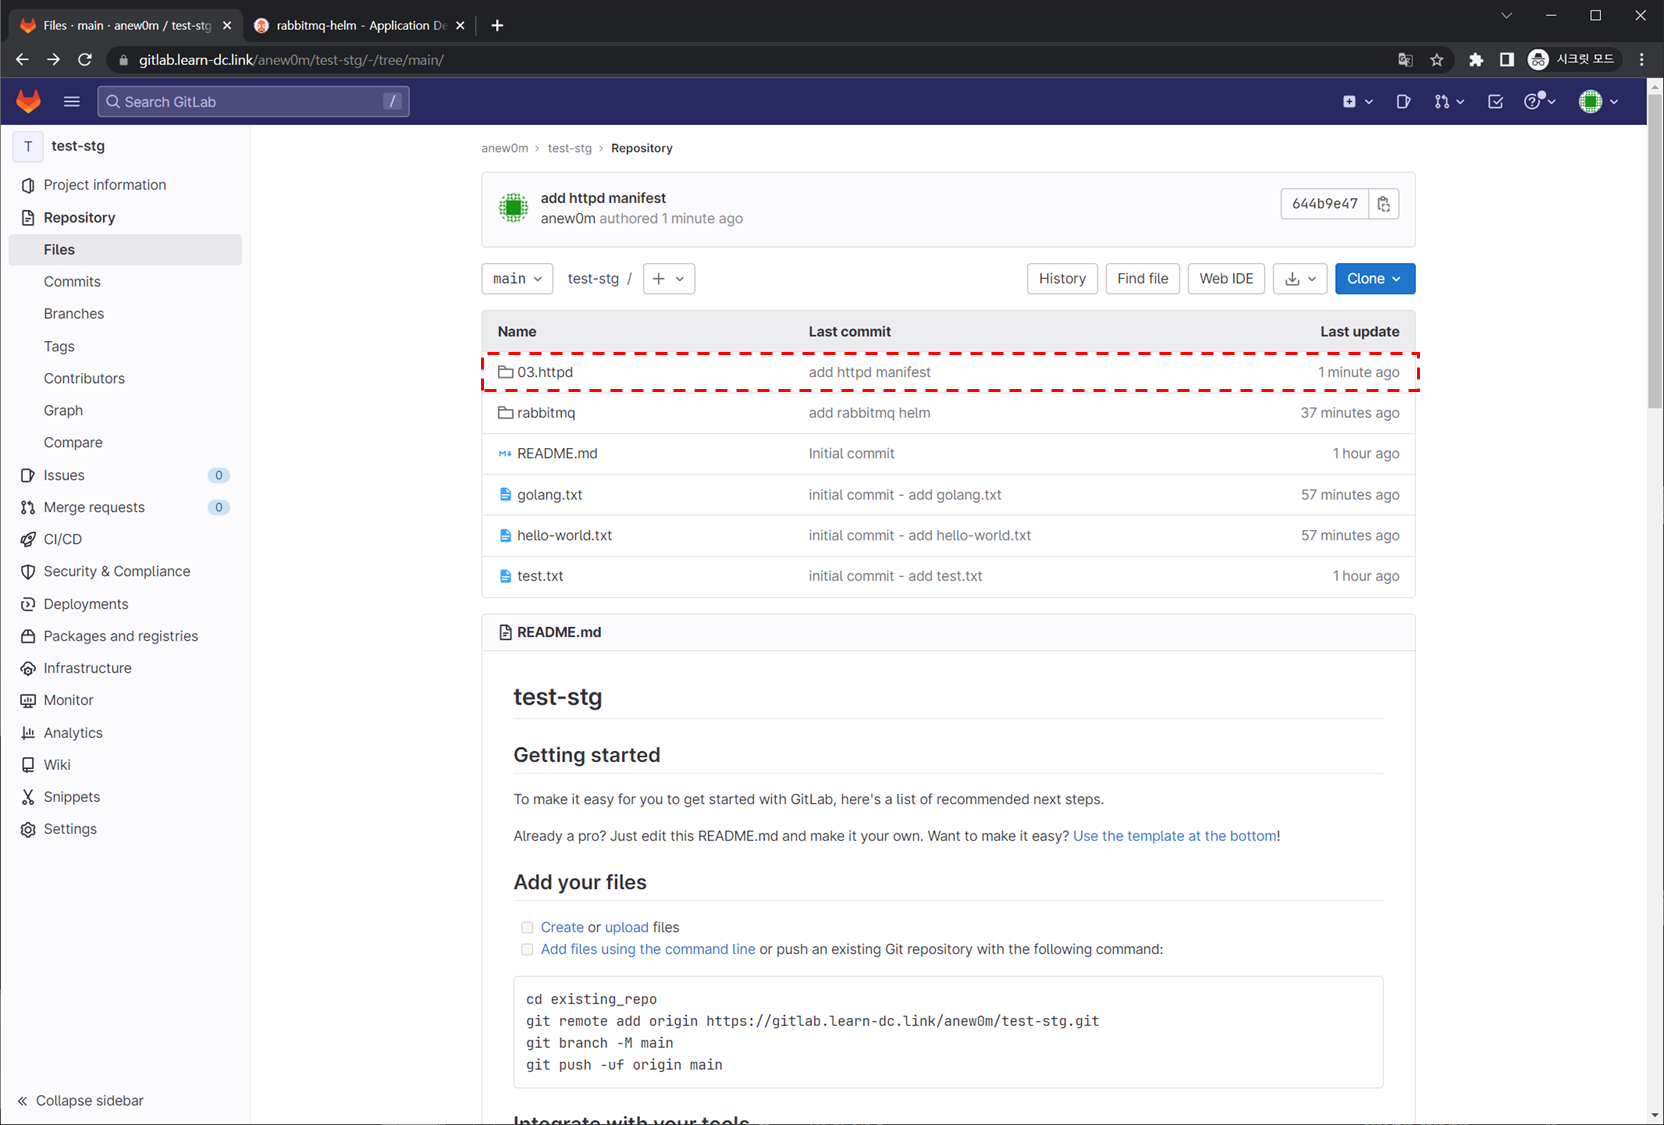
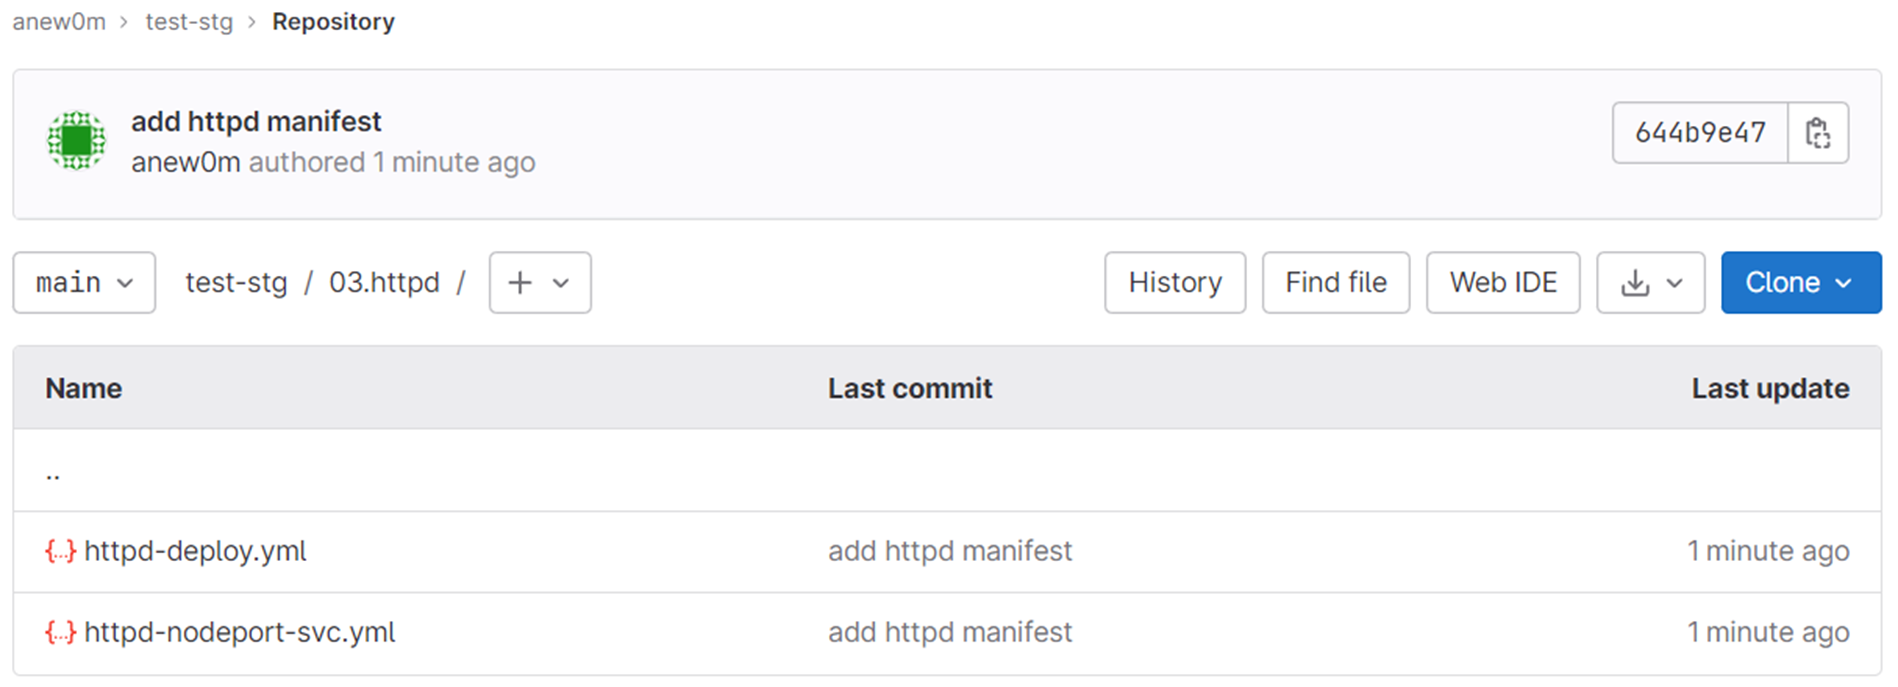
깃랩 저장소에 위 파일을 업로드
-
1
2
3
4
git add . && git commit -m "add httpd manifest" git push # Username for 'https://gitlab.learn-dc.link': anew0m # Password for 'https://anew0m@gitlab.learn-dc.link': glpat-1ig7aPN7L2XxfGeqsmEd
-
-
책의 소스코드가 저장된 디렉터리로 이동
-
1
2
3
4
5
6
7
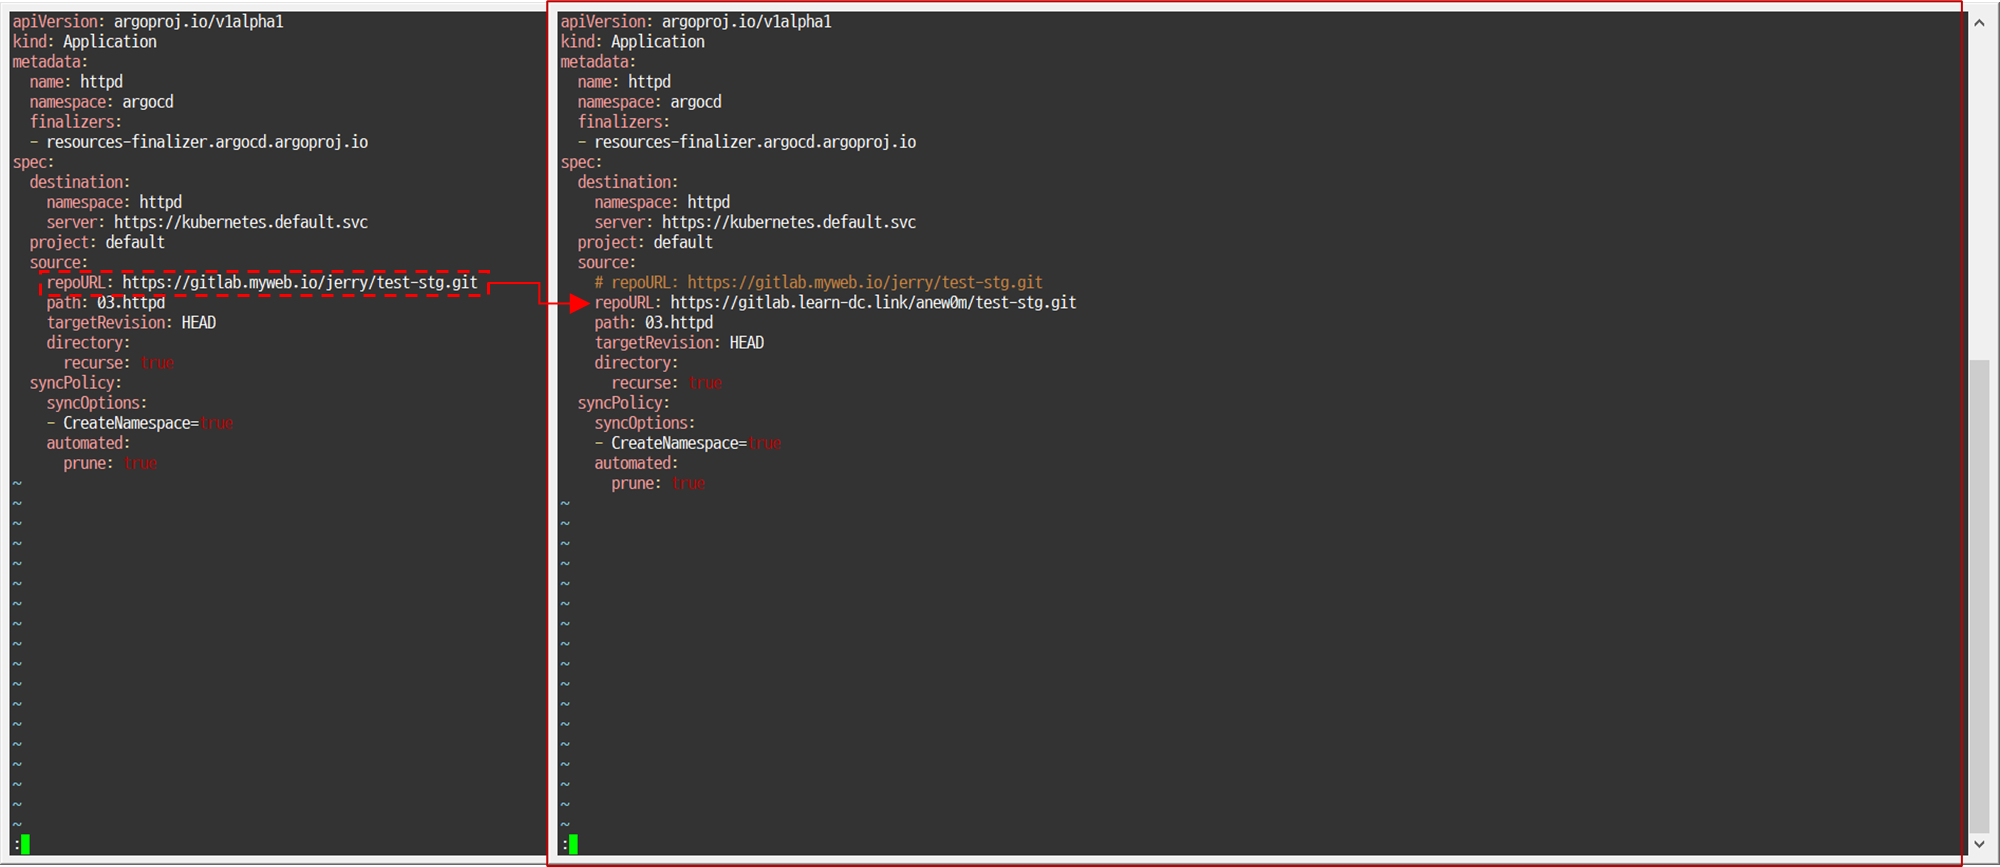
cd ~/kubepractice/ch15 vim httpd-directory-argo-application.yml # ... # repoURL: https://gitlab.learn-dc.link/anew0m/test-stg.git # ... k apply -f httpd-directory-argo-application.yml-

-

-
 1
 2
 3
 4
 5
 6
 7
 8
 9
10
11
12
13
14
15
16
17
18
19
20
21
22
23
24
25
26
# httpd-directory-argo-application.yml apiVersion: argoproj.io/v1alpha1 kind: Application metadata: name: httpd namespace: argocd finalizers: - resources-finalizer.argocd.argoproj.io spec: destination: namespace: httpd server: https://kubernetes.default.svc project: default source: # repoURL: https://gitlab.myweb.io/jerry/test-stg.git repoURL: https://gitlab.learn-dc.link/anew0m/test-stg.git path: 03.httpd targetRevision: HEAD directory: recurse: true syncPolicy: syncOptions: - CreateNamespace=true automated: prune: true
-
-
-
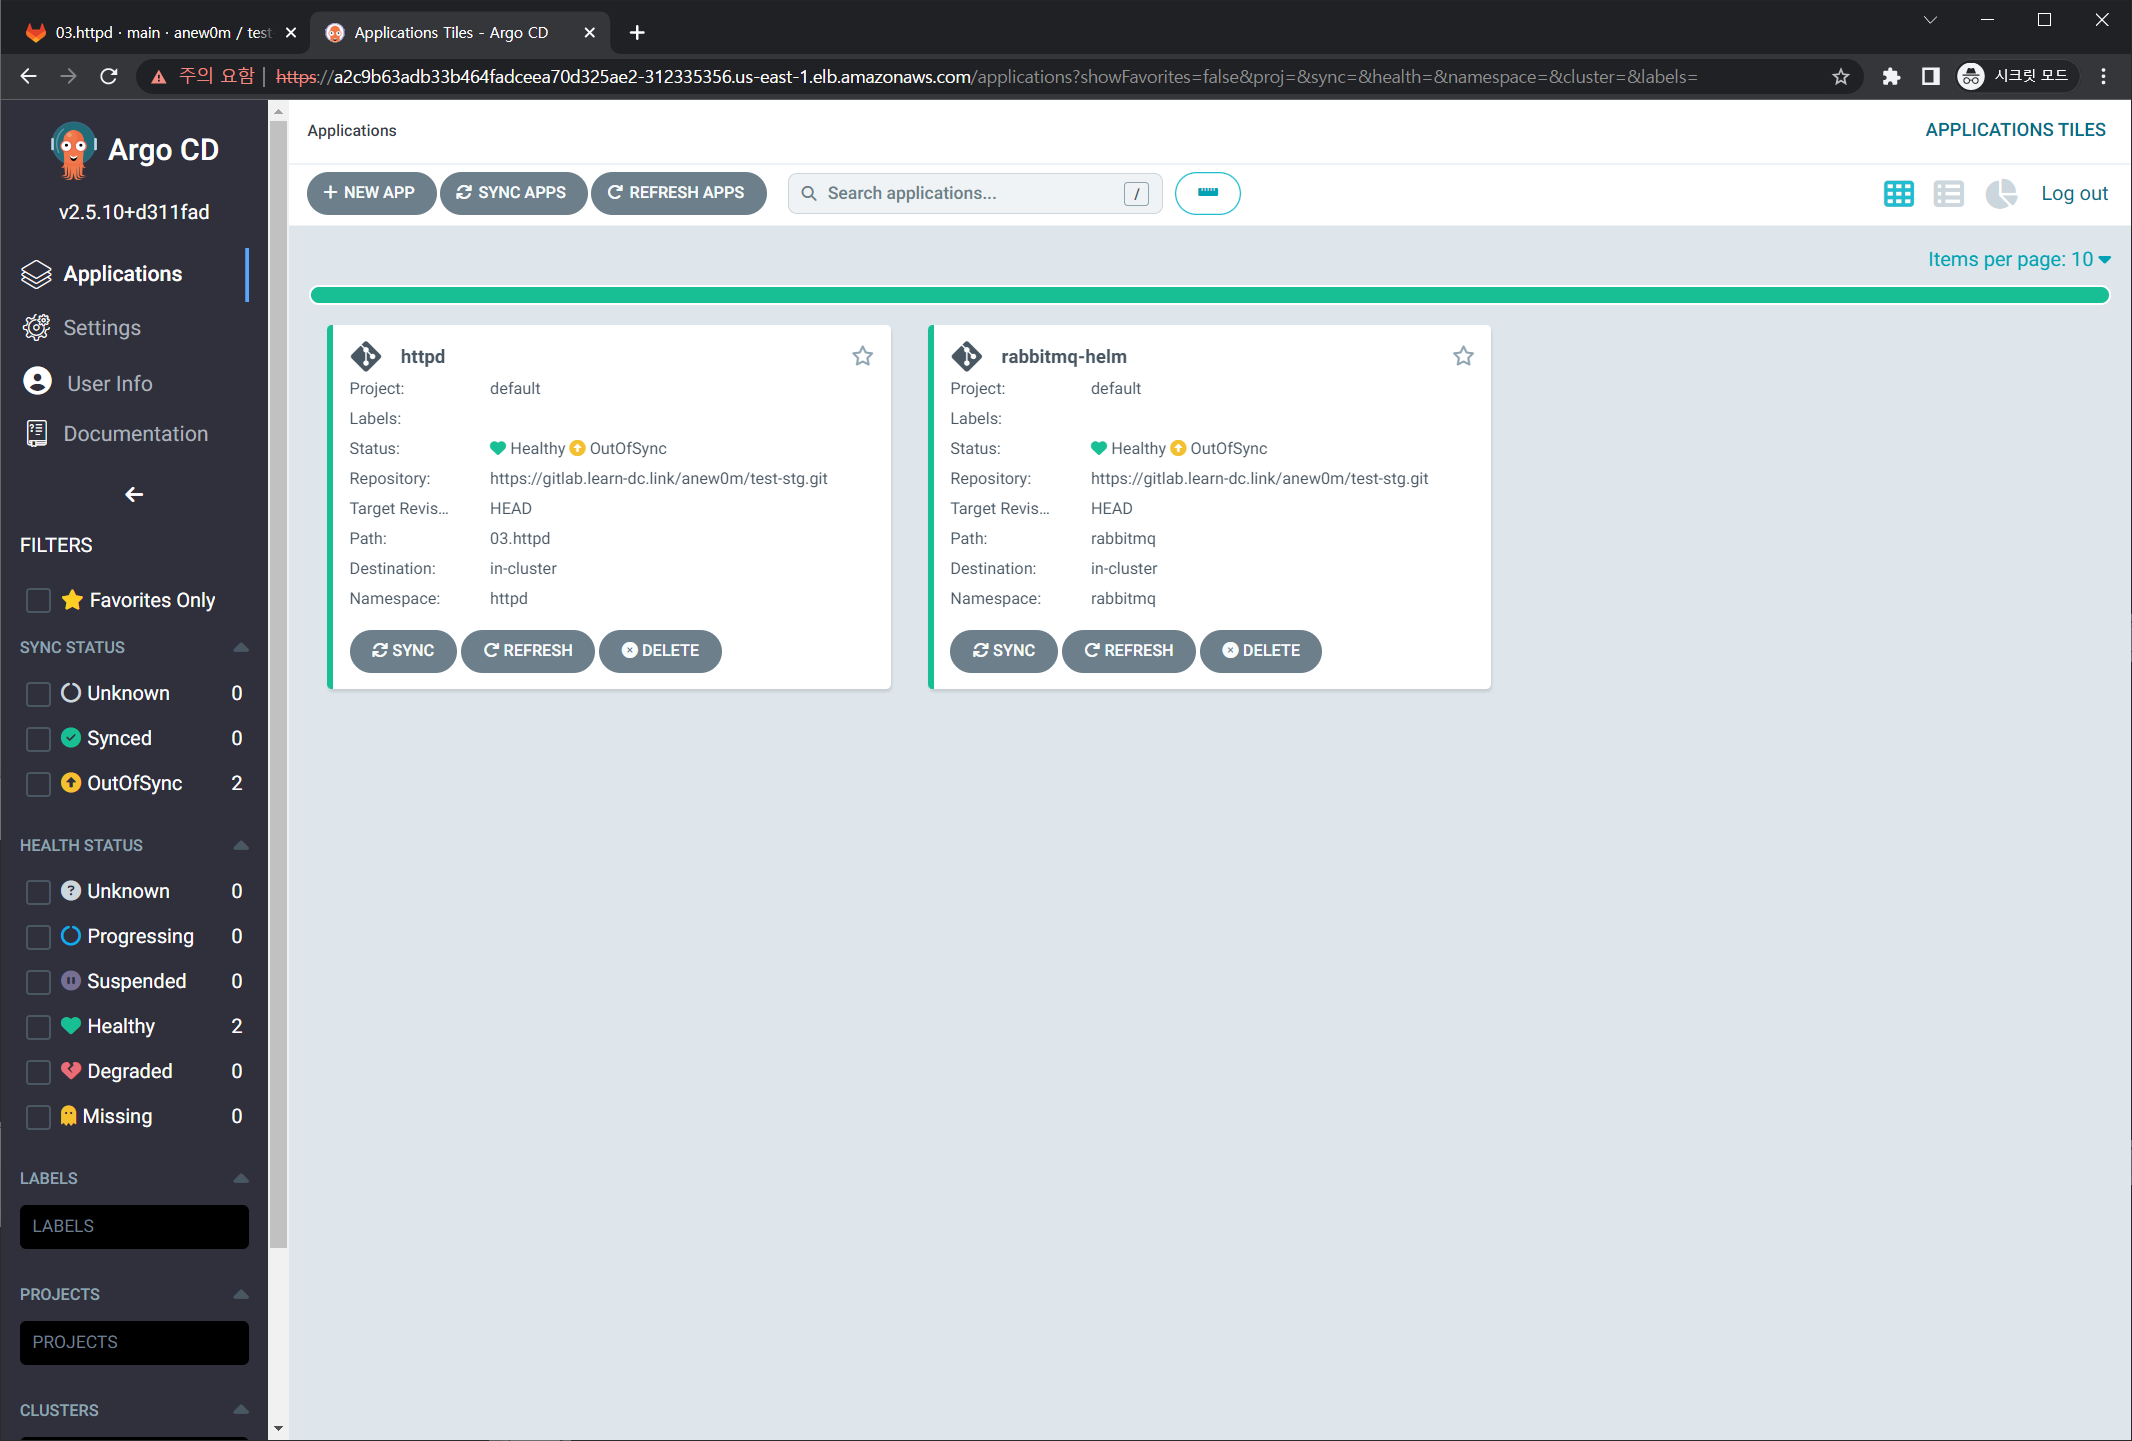
applications CRD로 상태 확인이 가능하며, 처음에는 ‘Progressing’ 상태에서 ‘Healthy’ 상태로 바로 변경됨
-
1k get applications -n argocd
-
-
httpd 네임스페이스 생성 및 모니터링
-
1
2
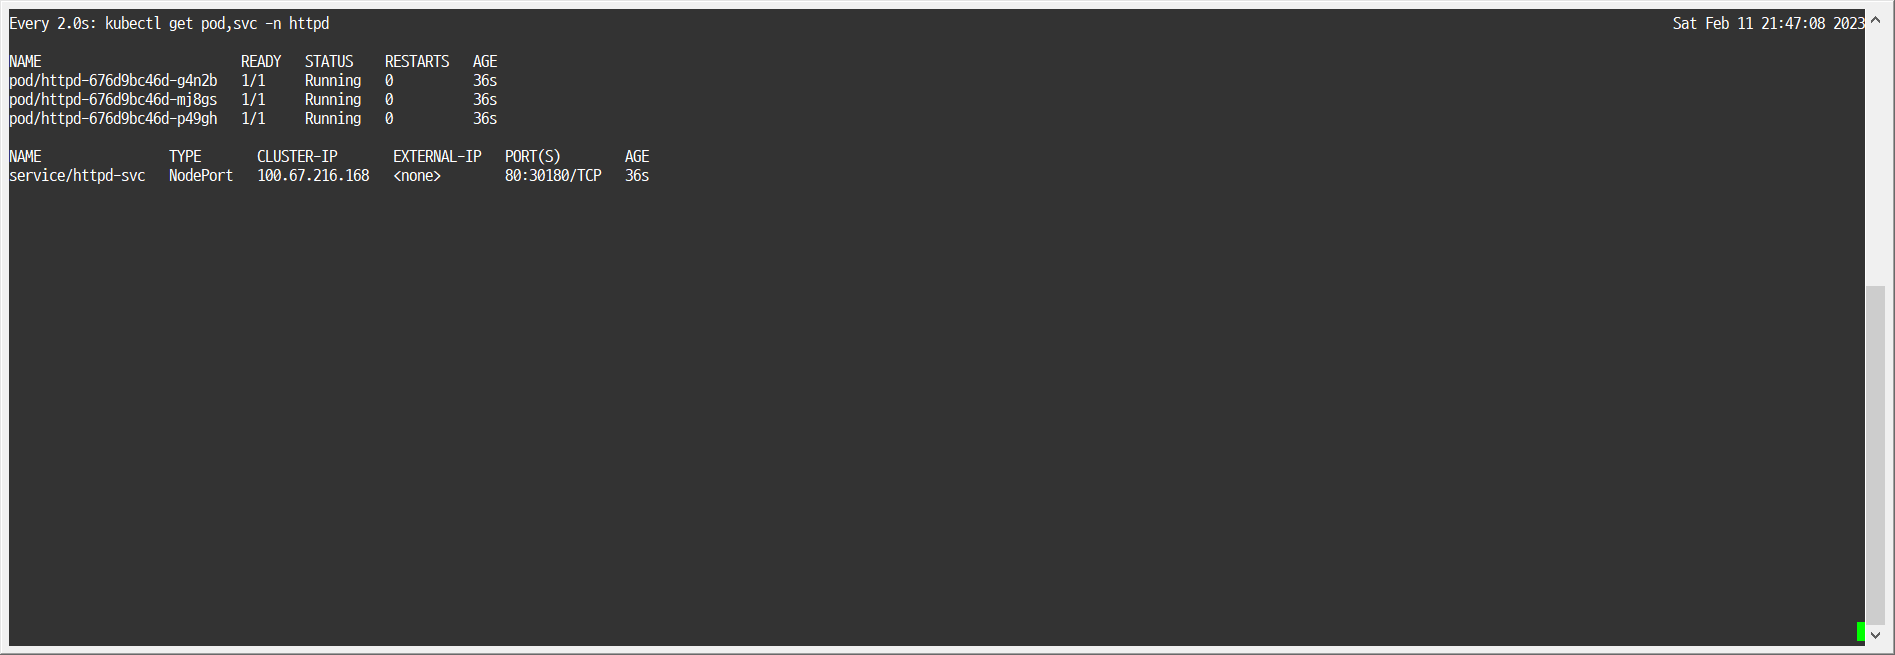
kubectl create ns httpd watch kubectl get pod,svc -n httpd
-
-
httpd 네임스페이스로 변경
-
1k ns httpd
-
-
이미지 버전 변경을 위해 deployment 리소스를 수정
-
1
2
3
4
5
6
7
k edit deployments.apps httpd # ... # spec: # containers: # - image: httpd:alpine # name: httpd # ...
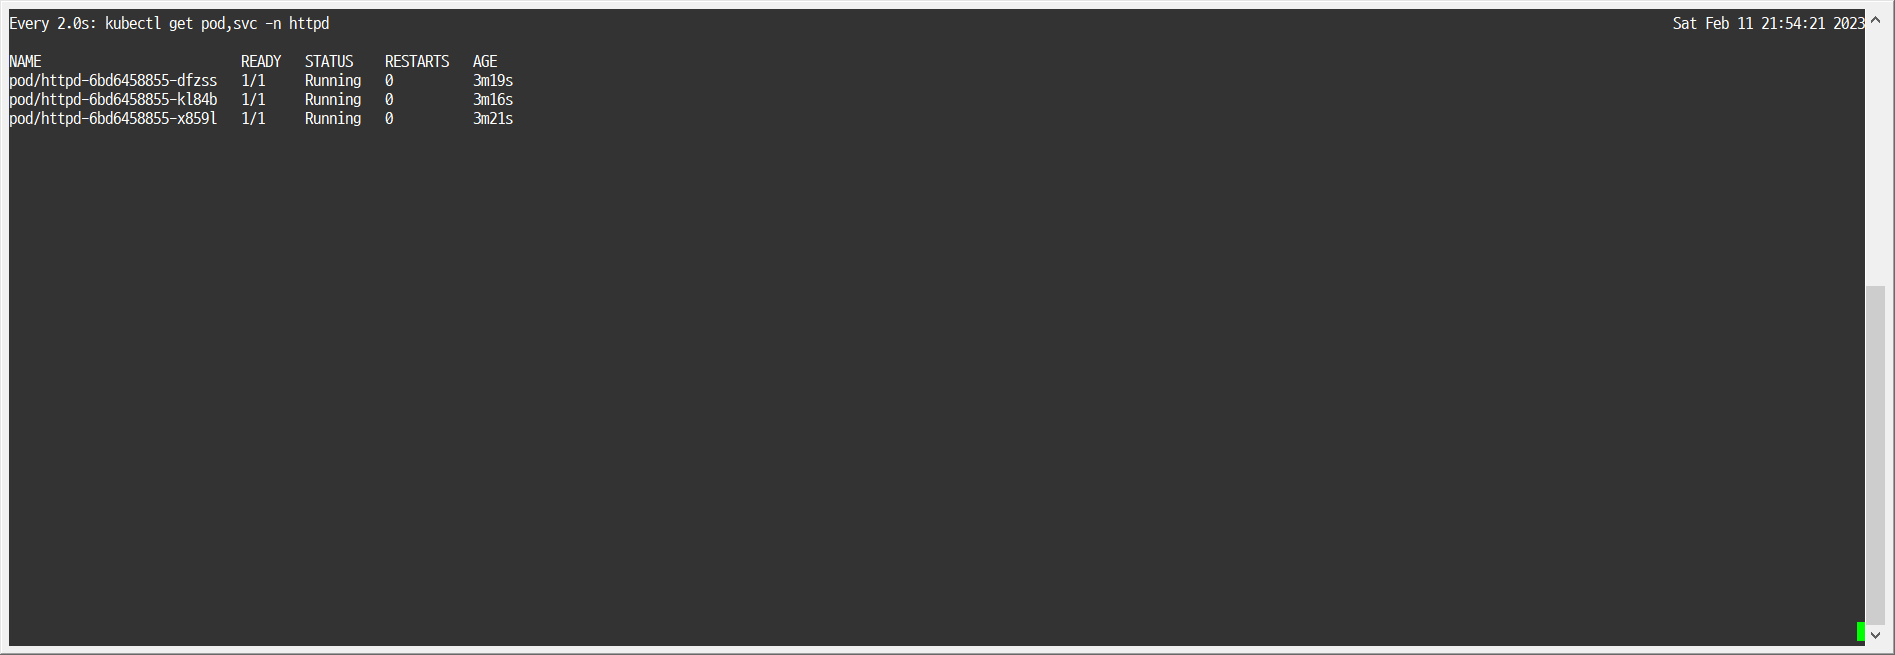
-
-
파드 상세 정보 확인
-
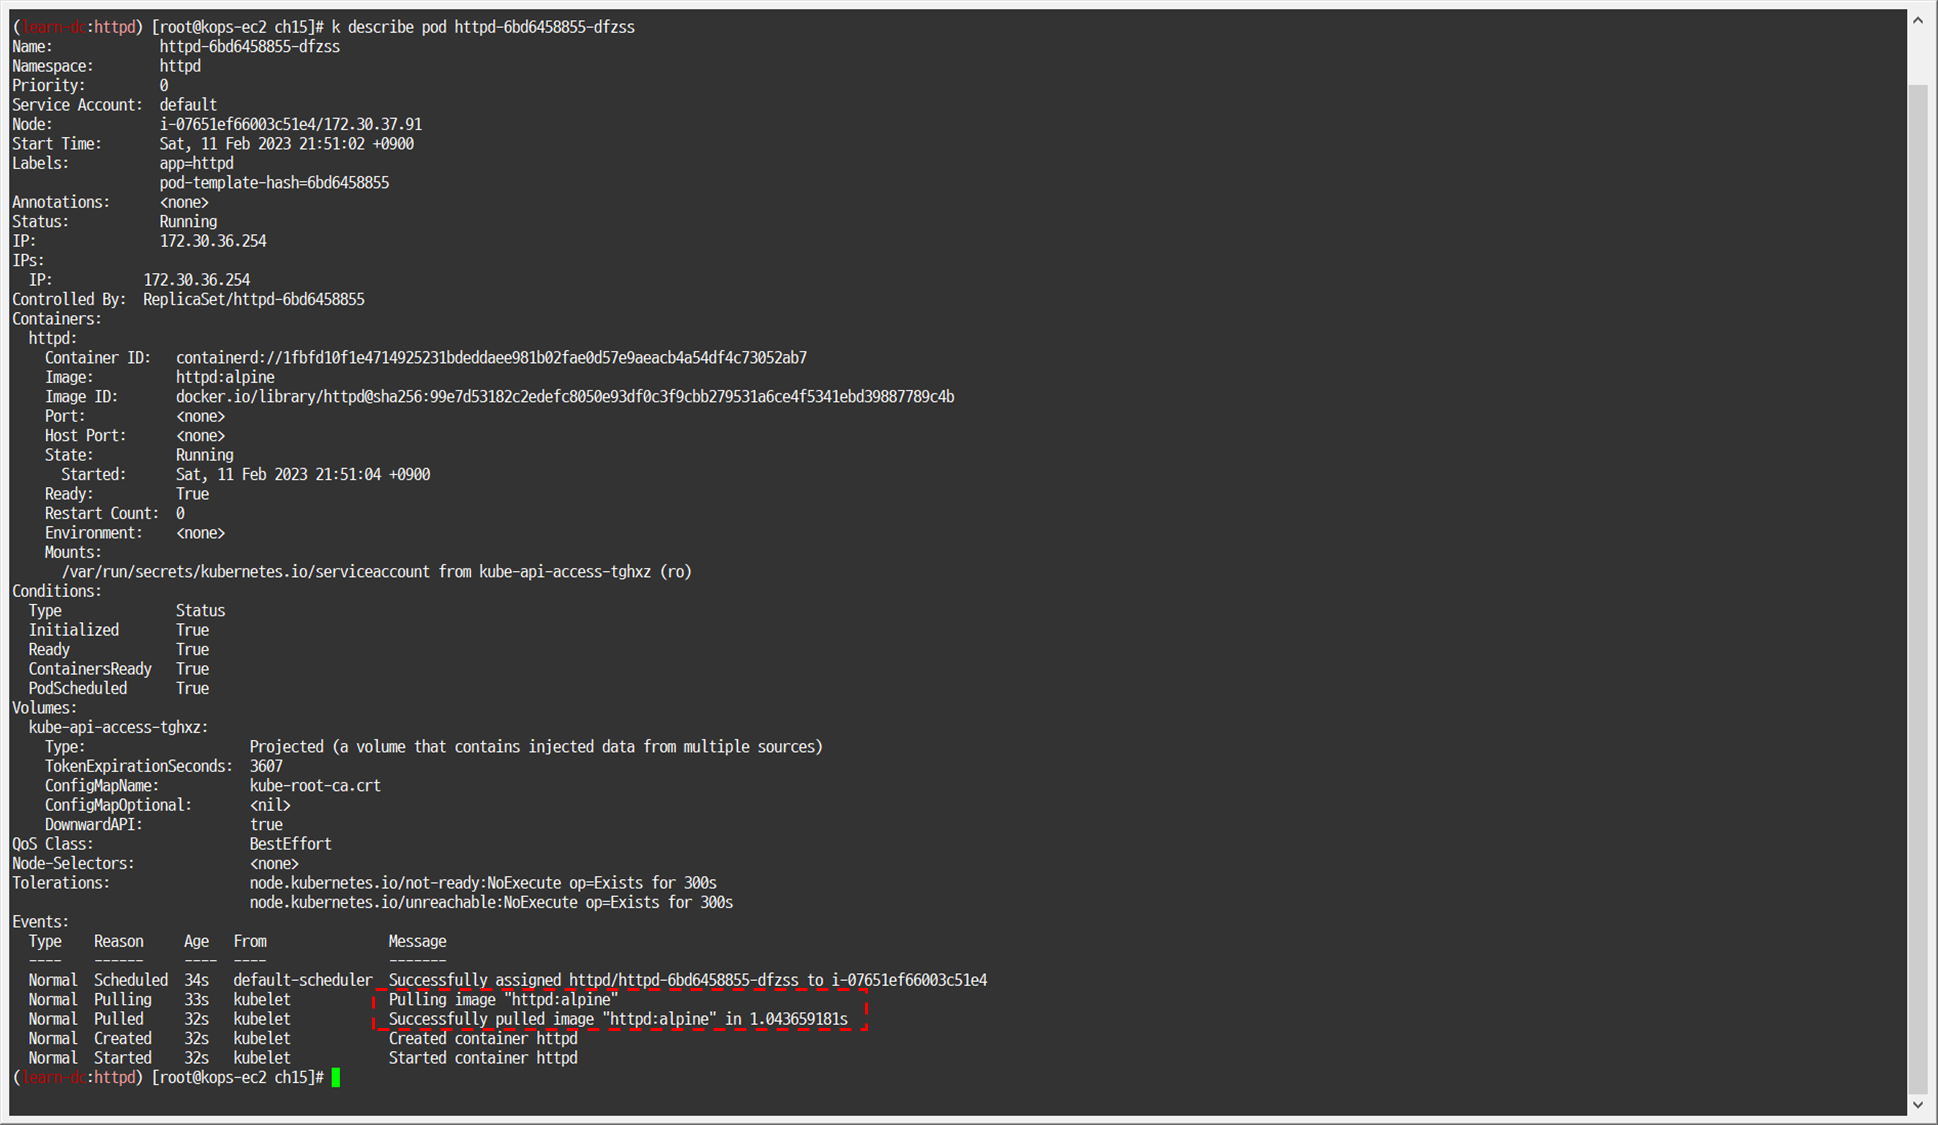
1k describe pod httpd-6bd6458855-dfzss
-
-
아르고시디 상태 확인
-
1k get applications -n argocd
-
-
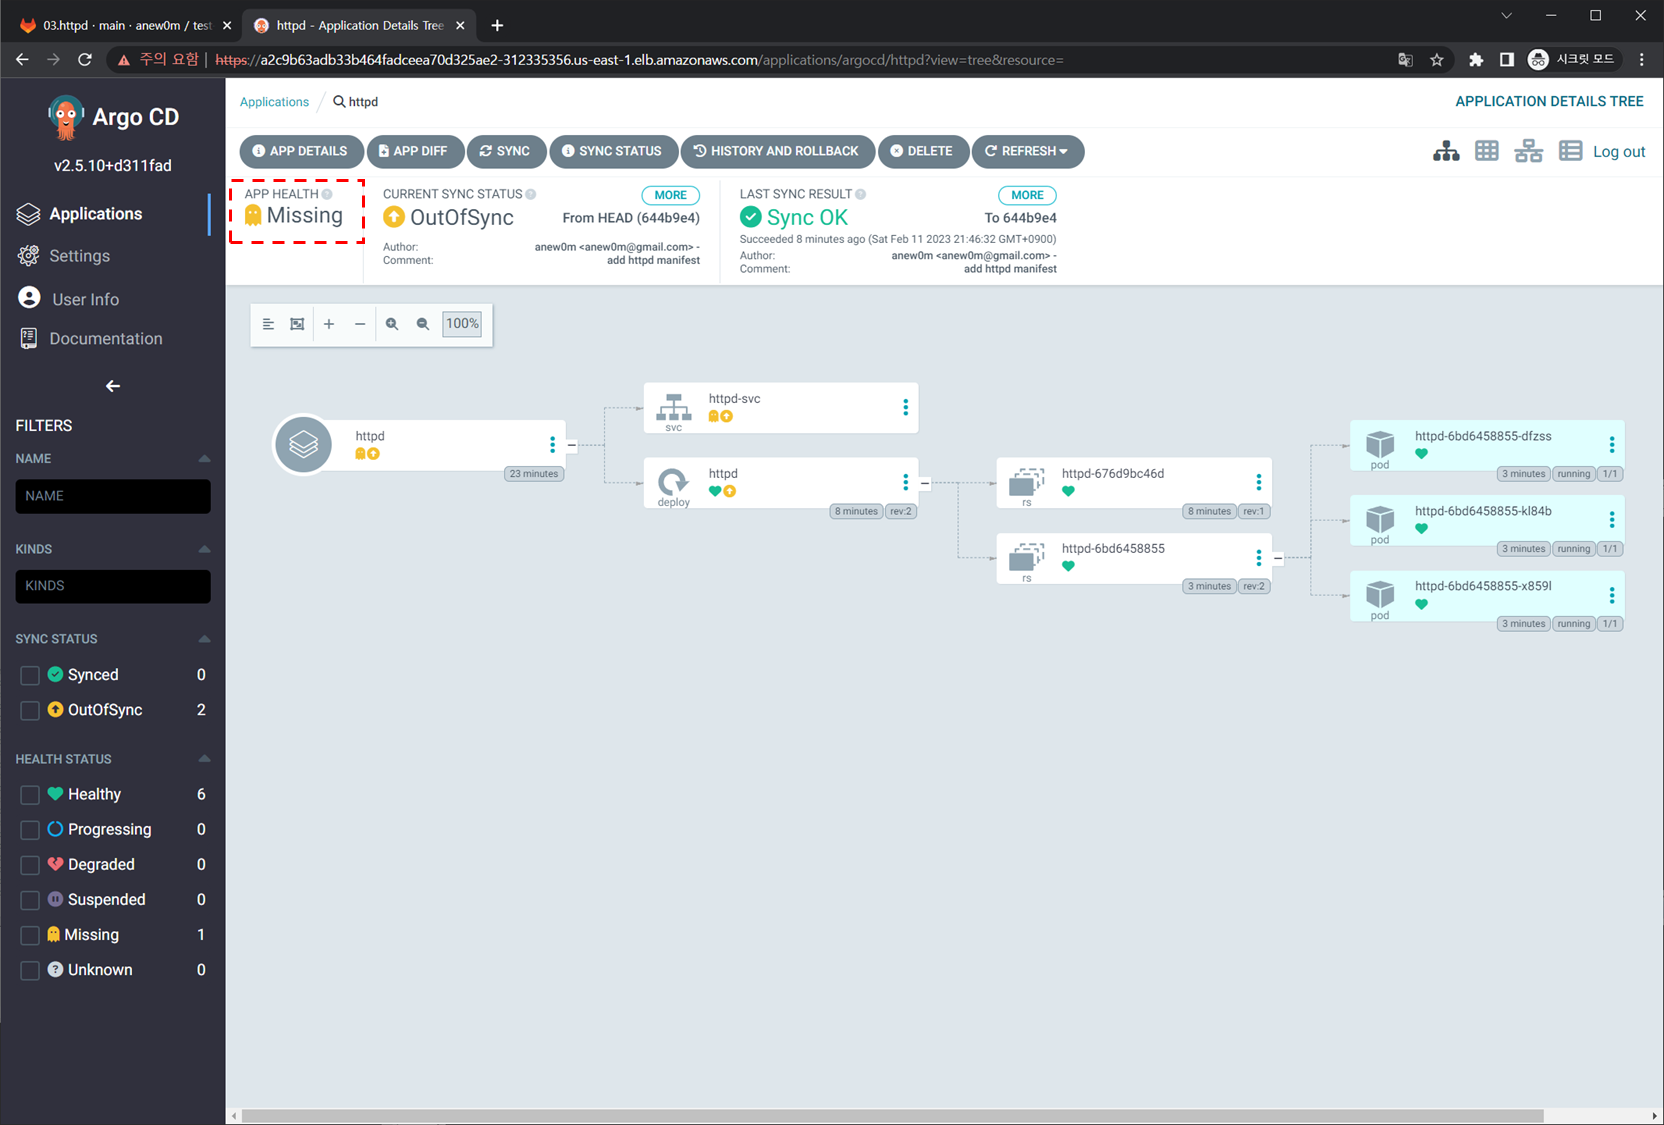
오브젝트 삭제
-
1
2
k get svc k delete svc httpd-svc
-
-
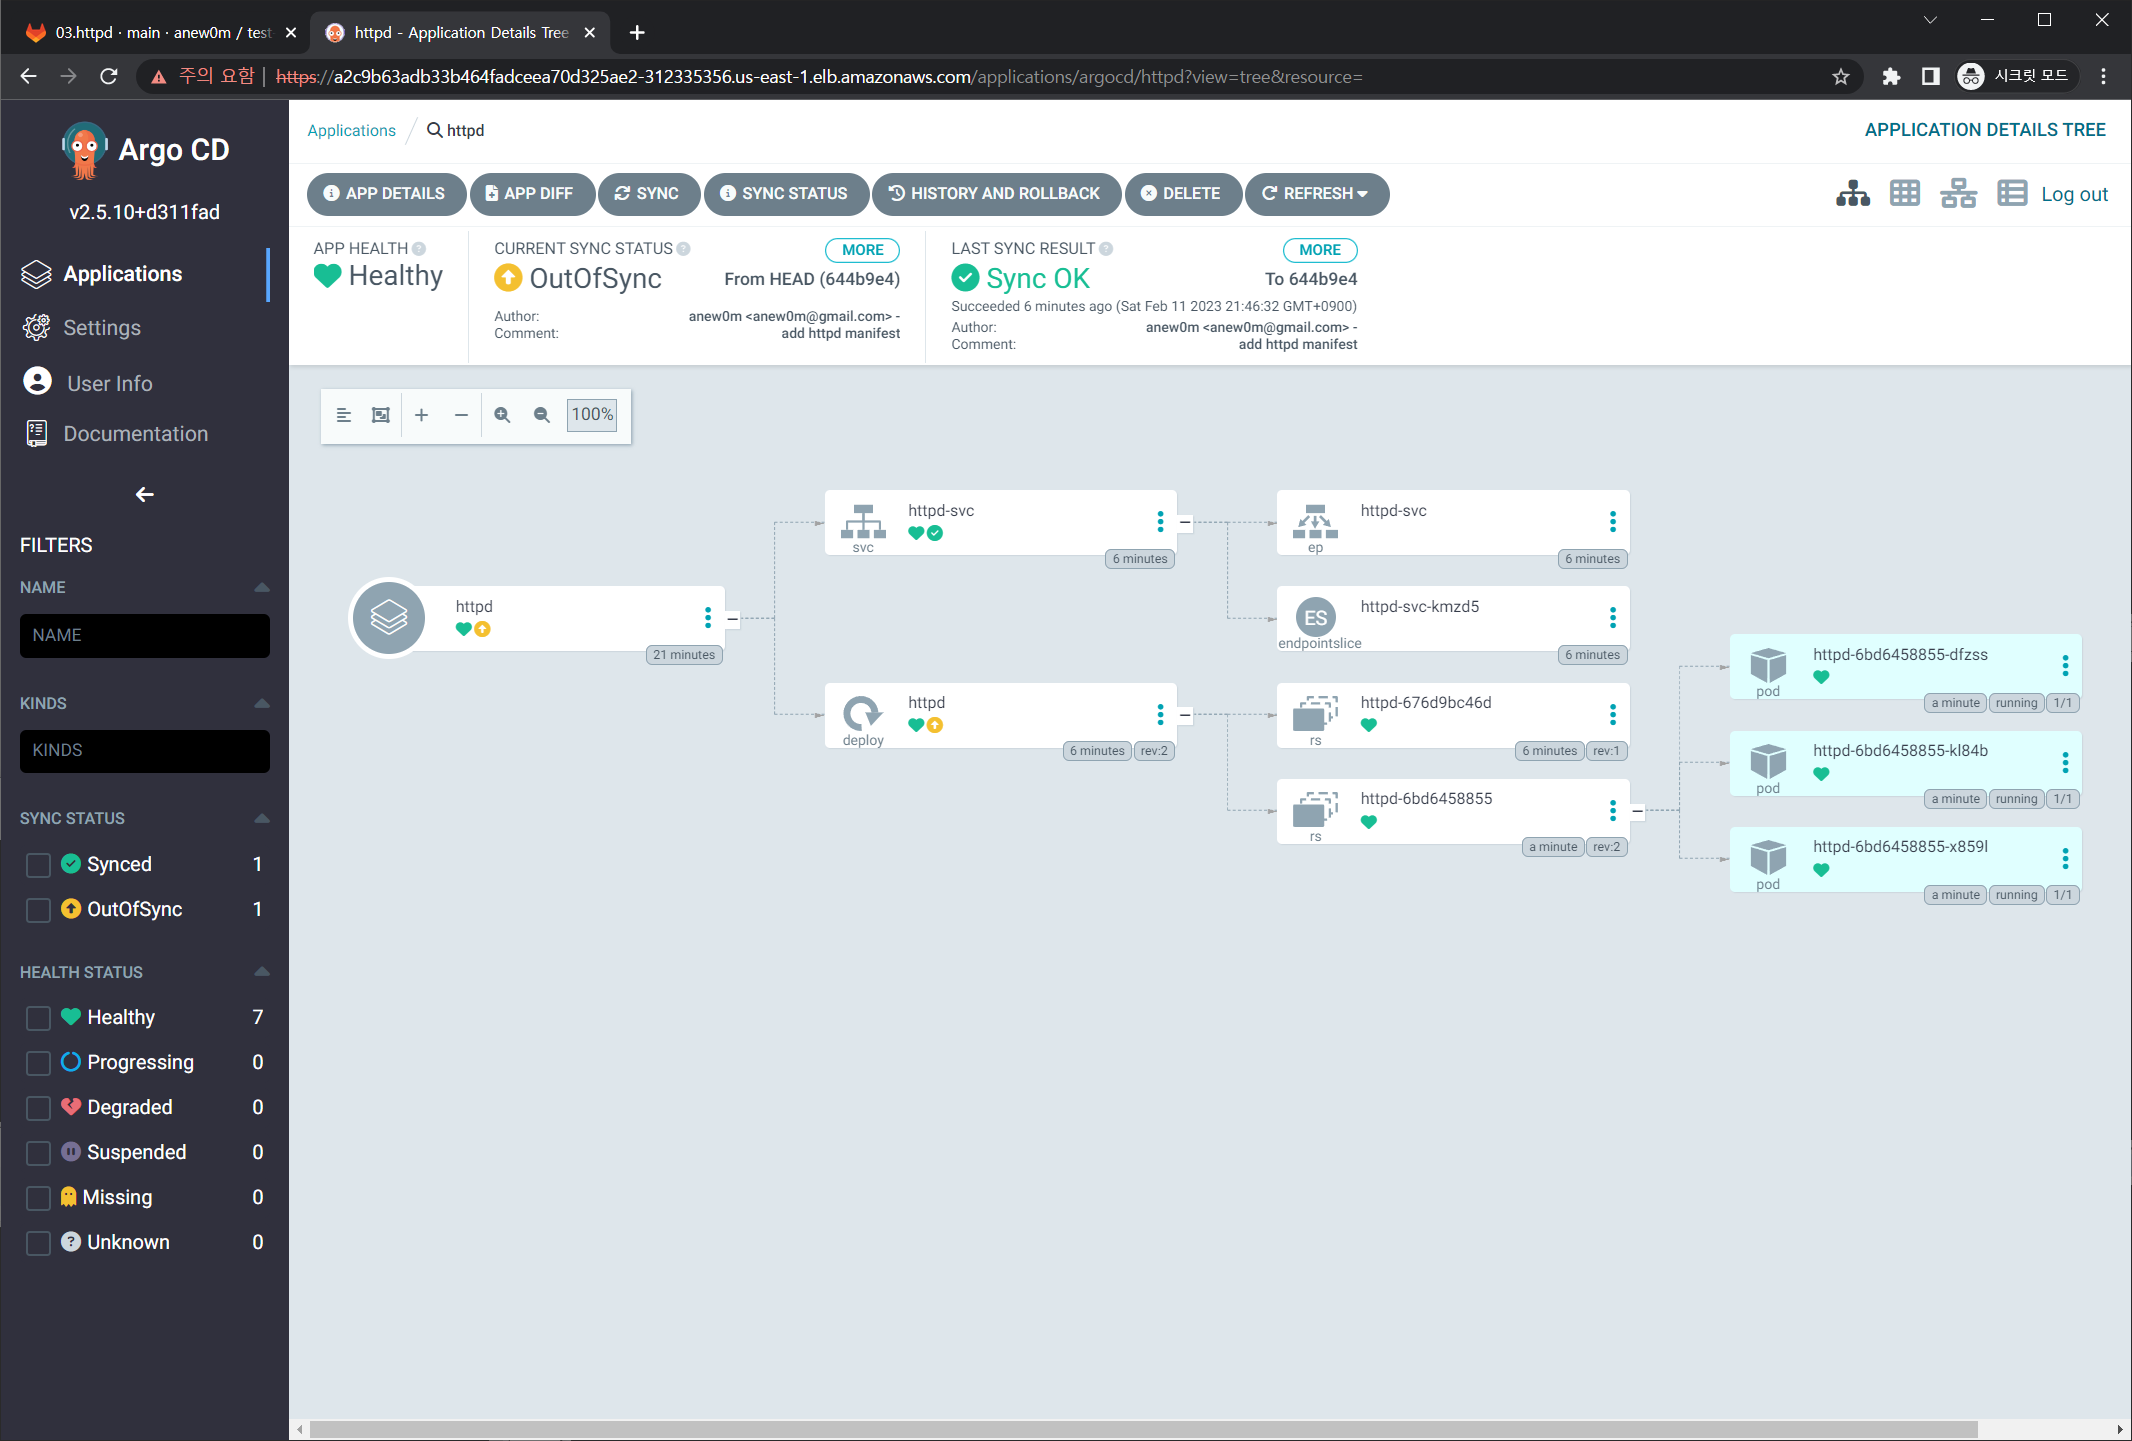
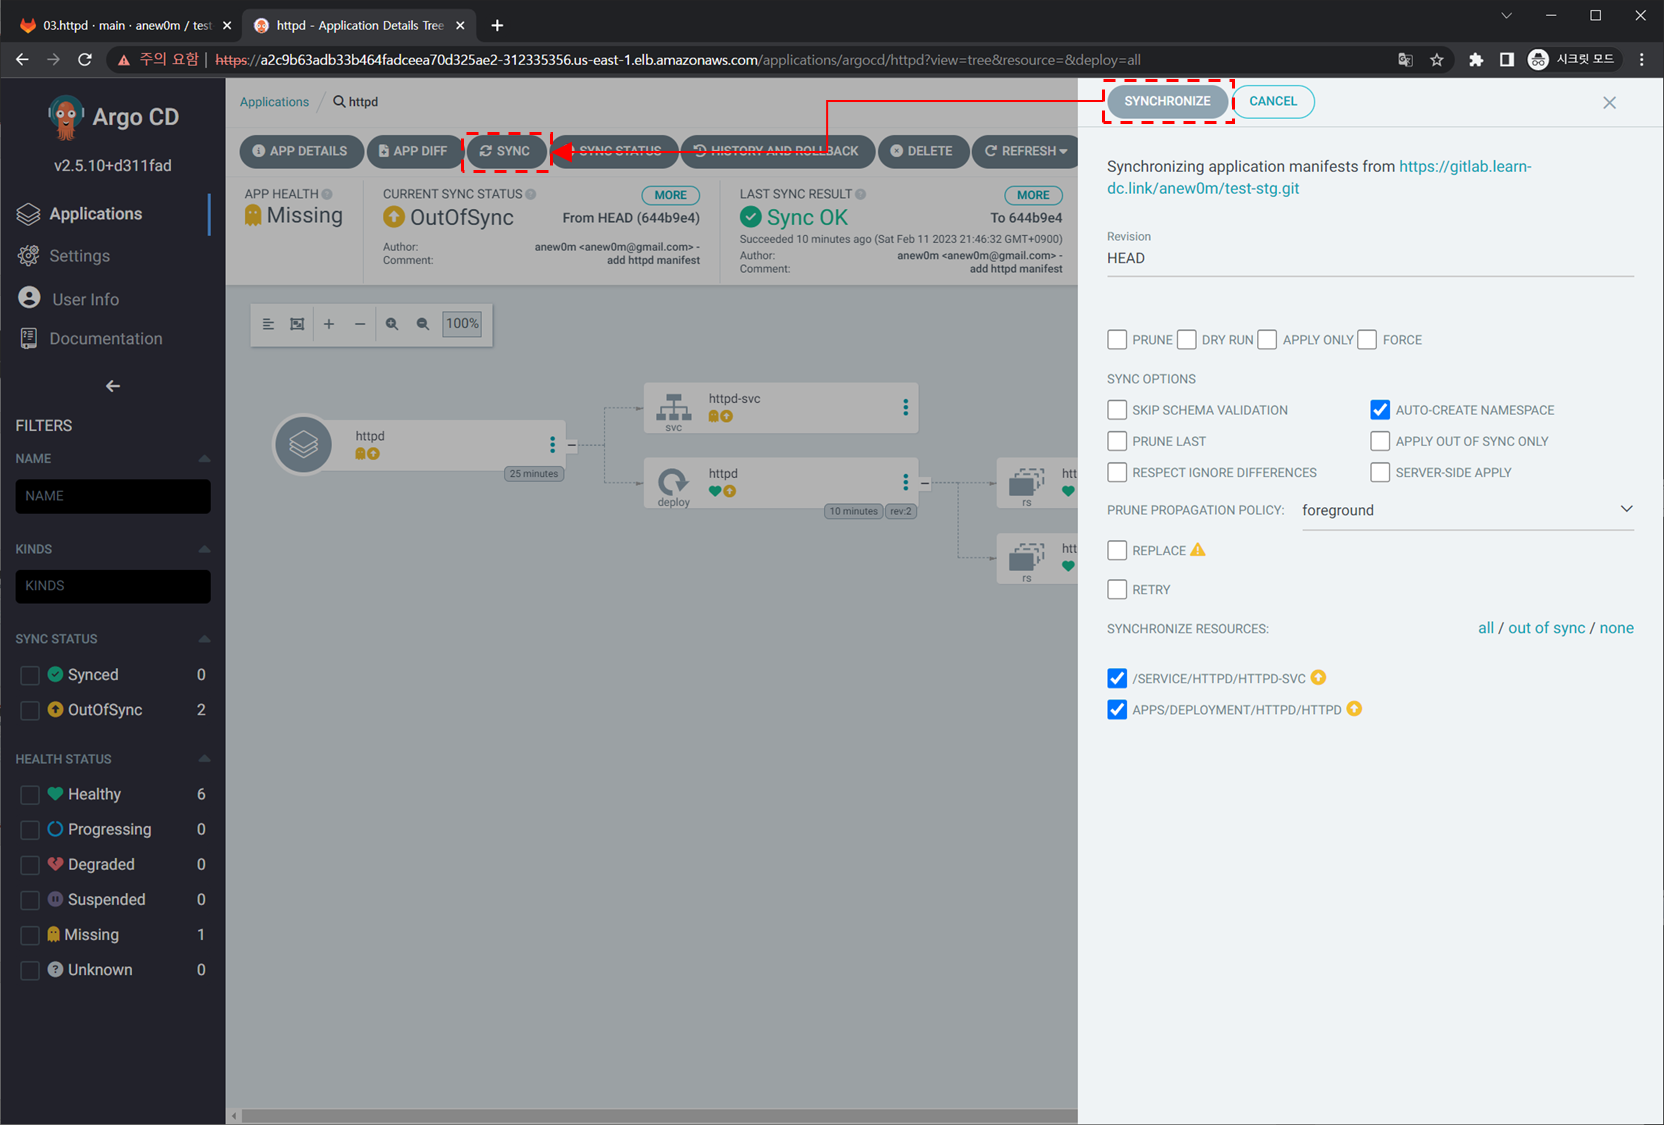
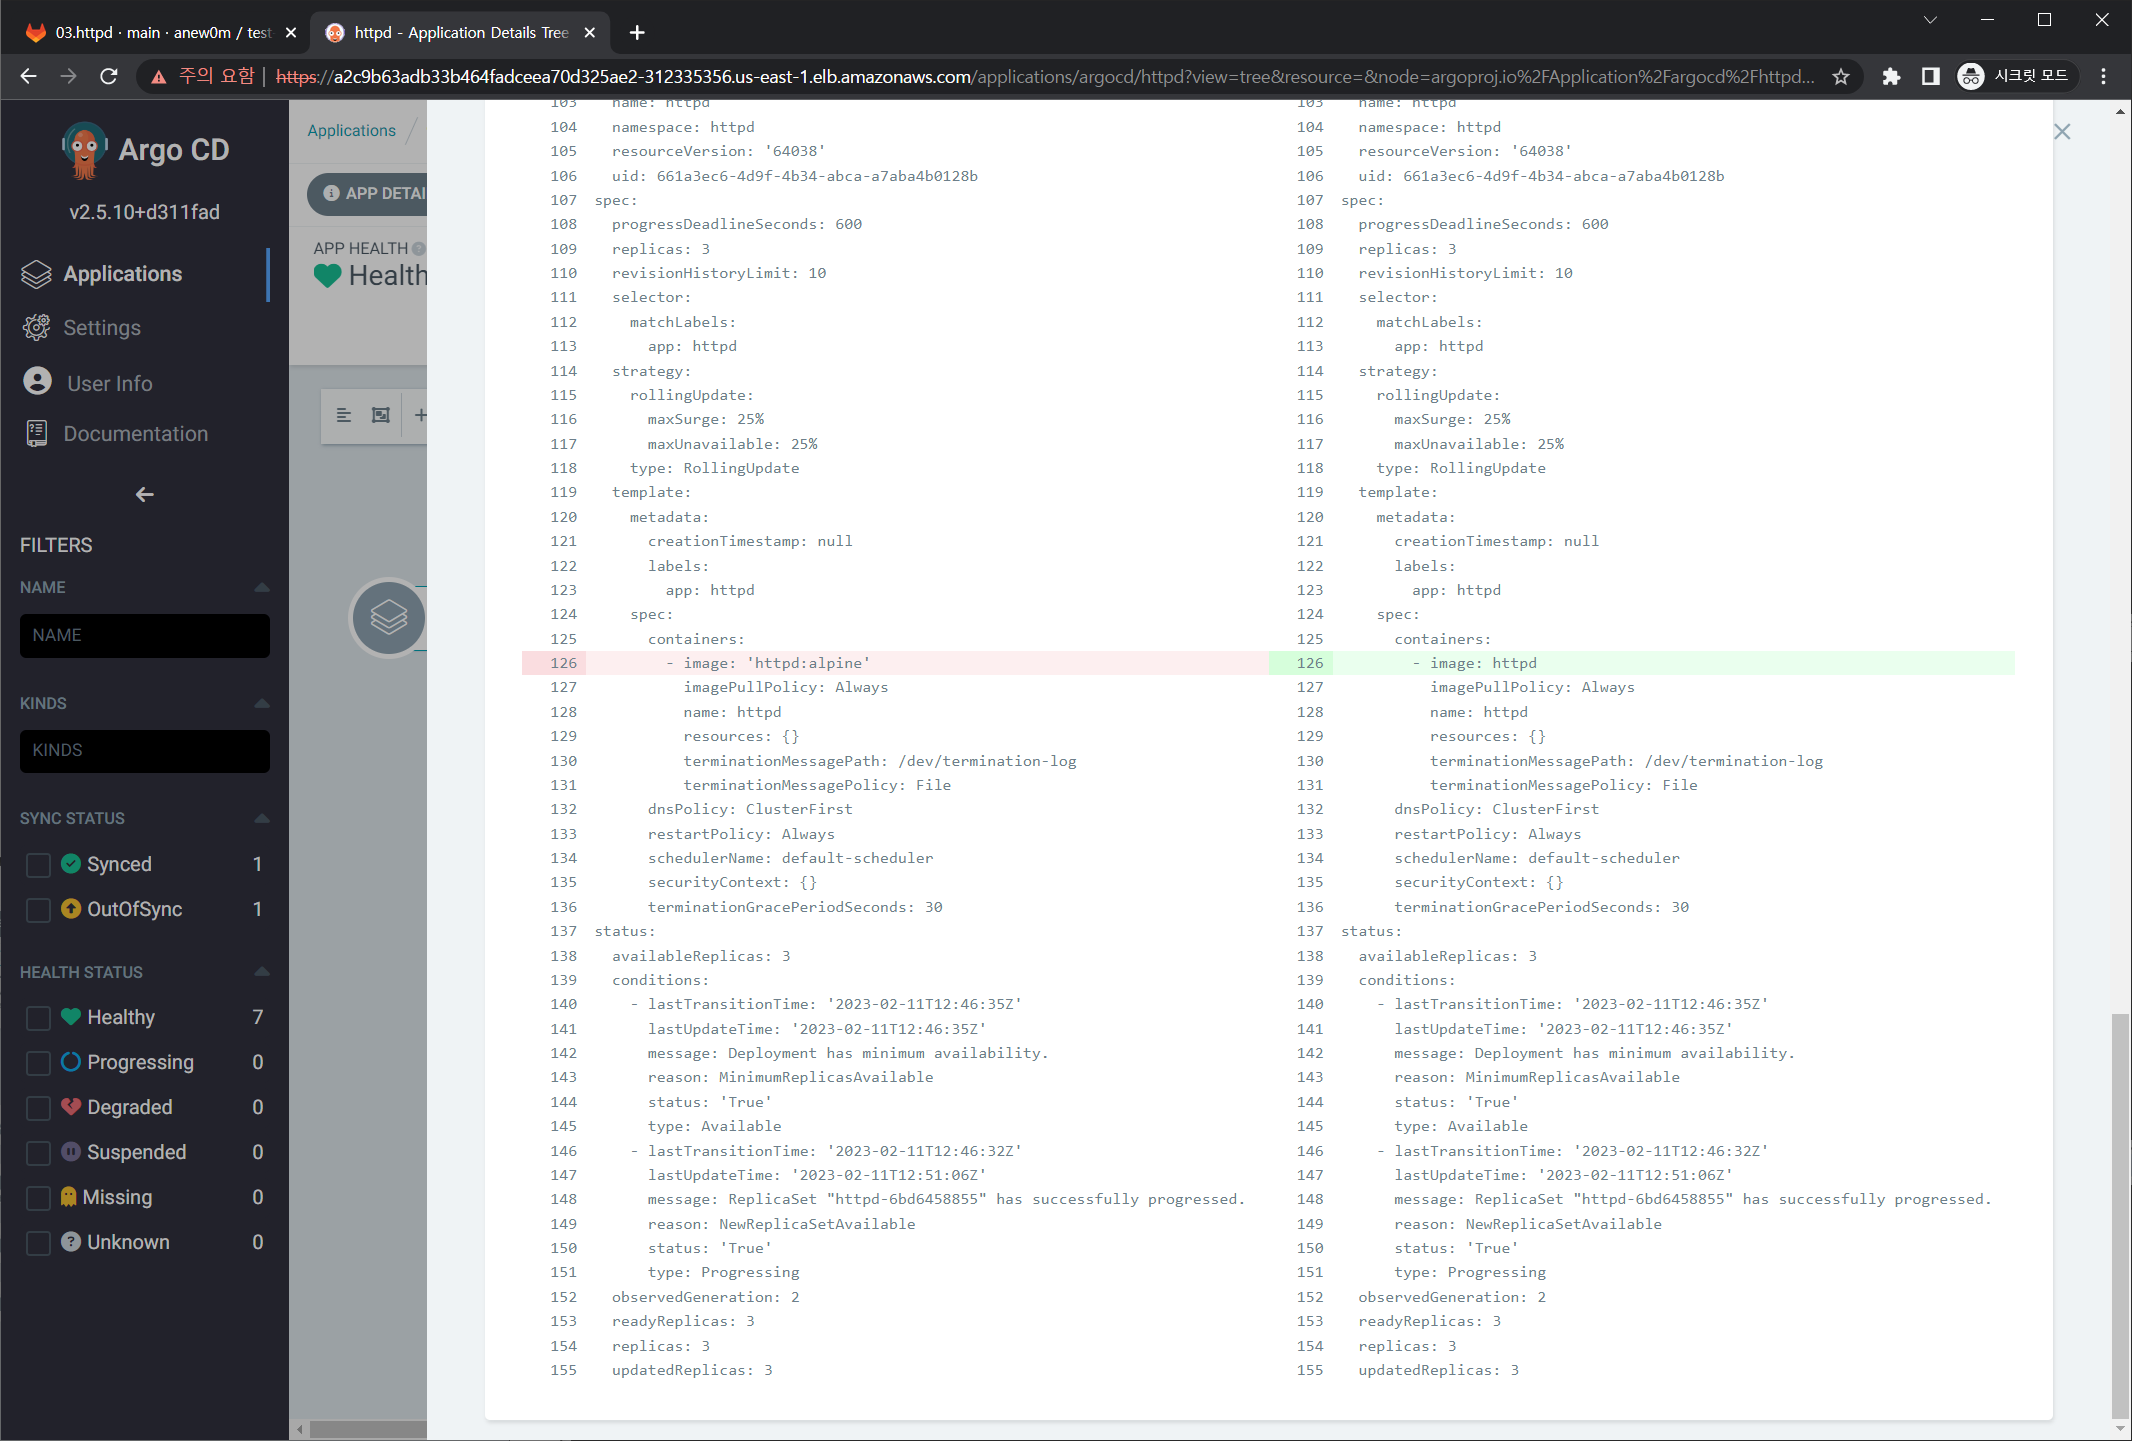
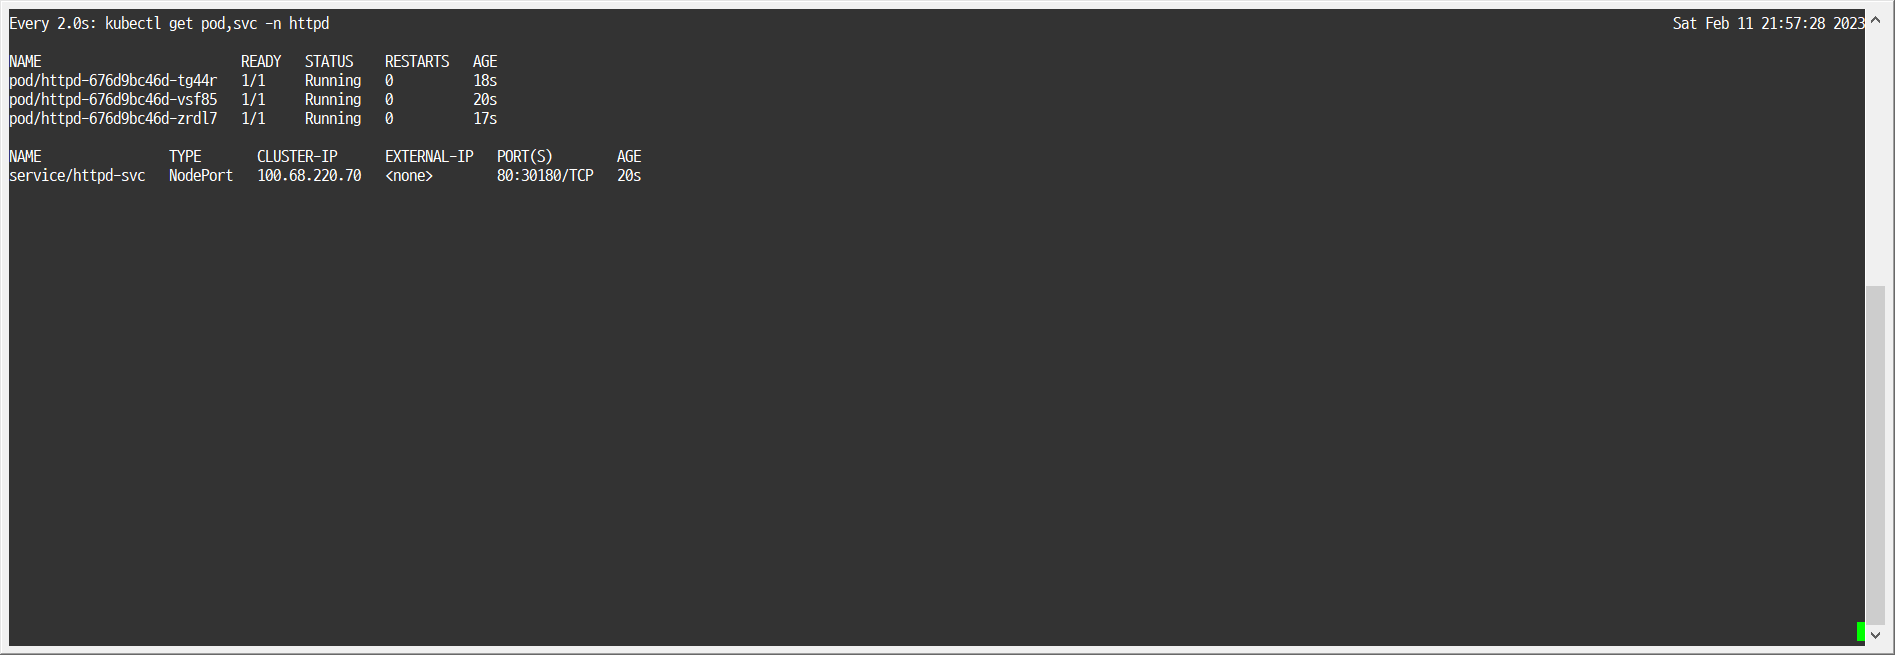
아르고시디 애플리케이션 상태를 깃 저장소와 동기화
-
httpd-svc가 다시 생성됨
-
1k get svc
-
-
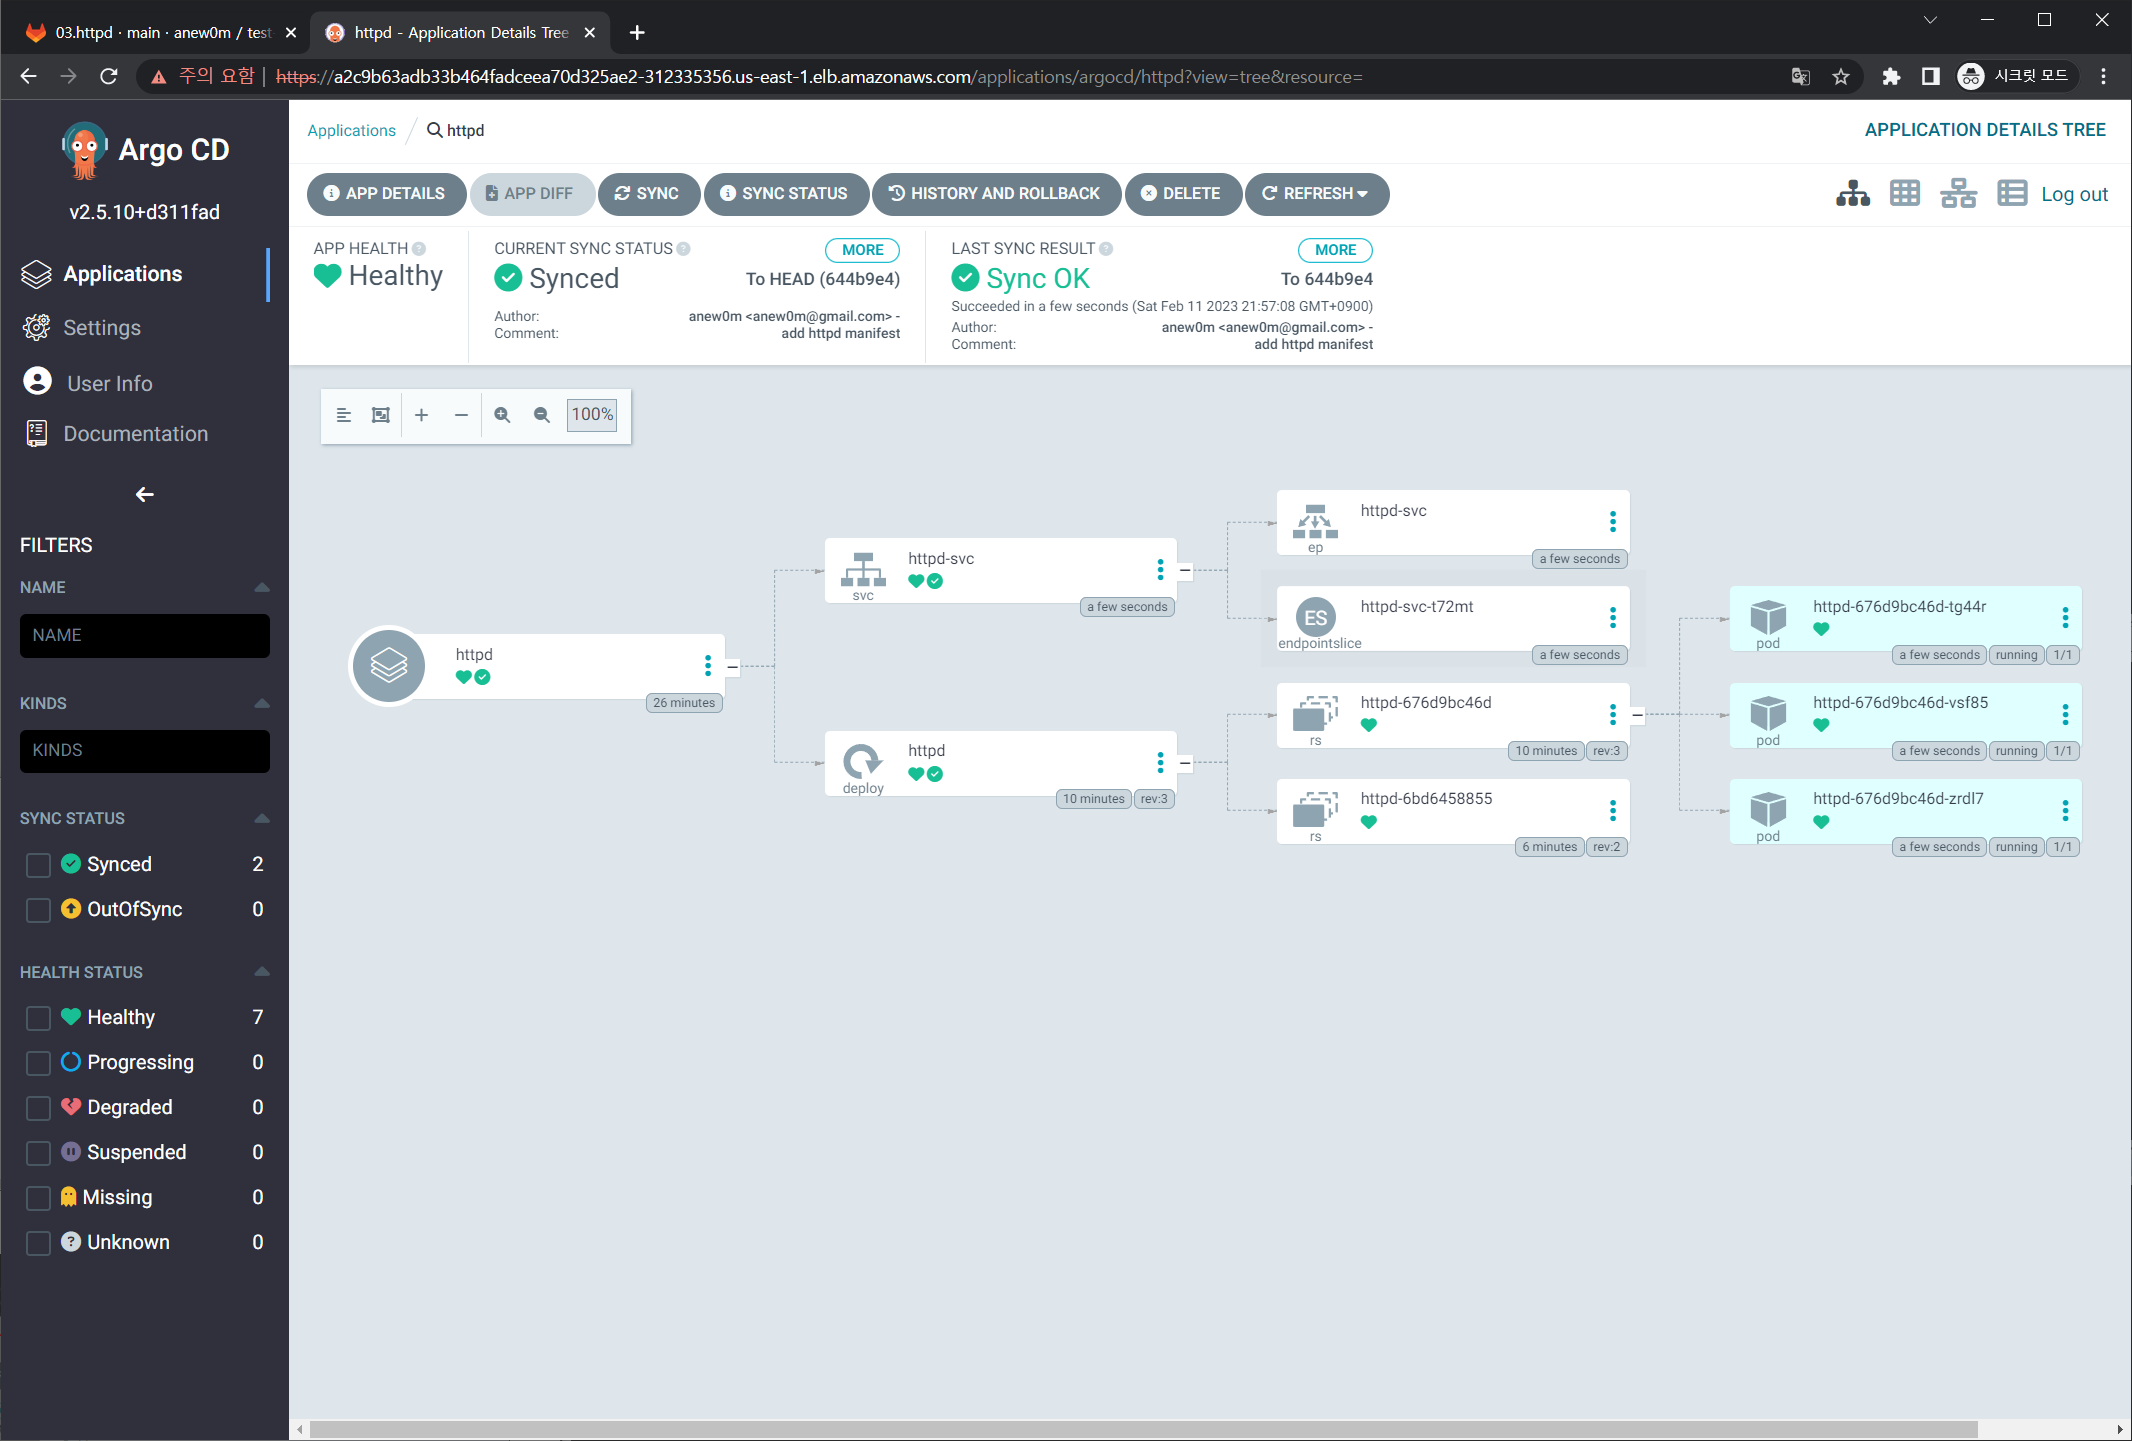
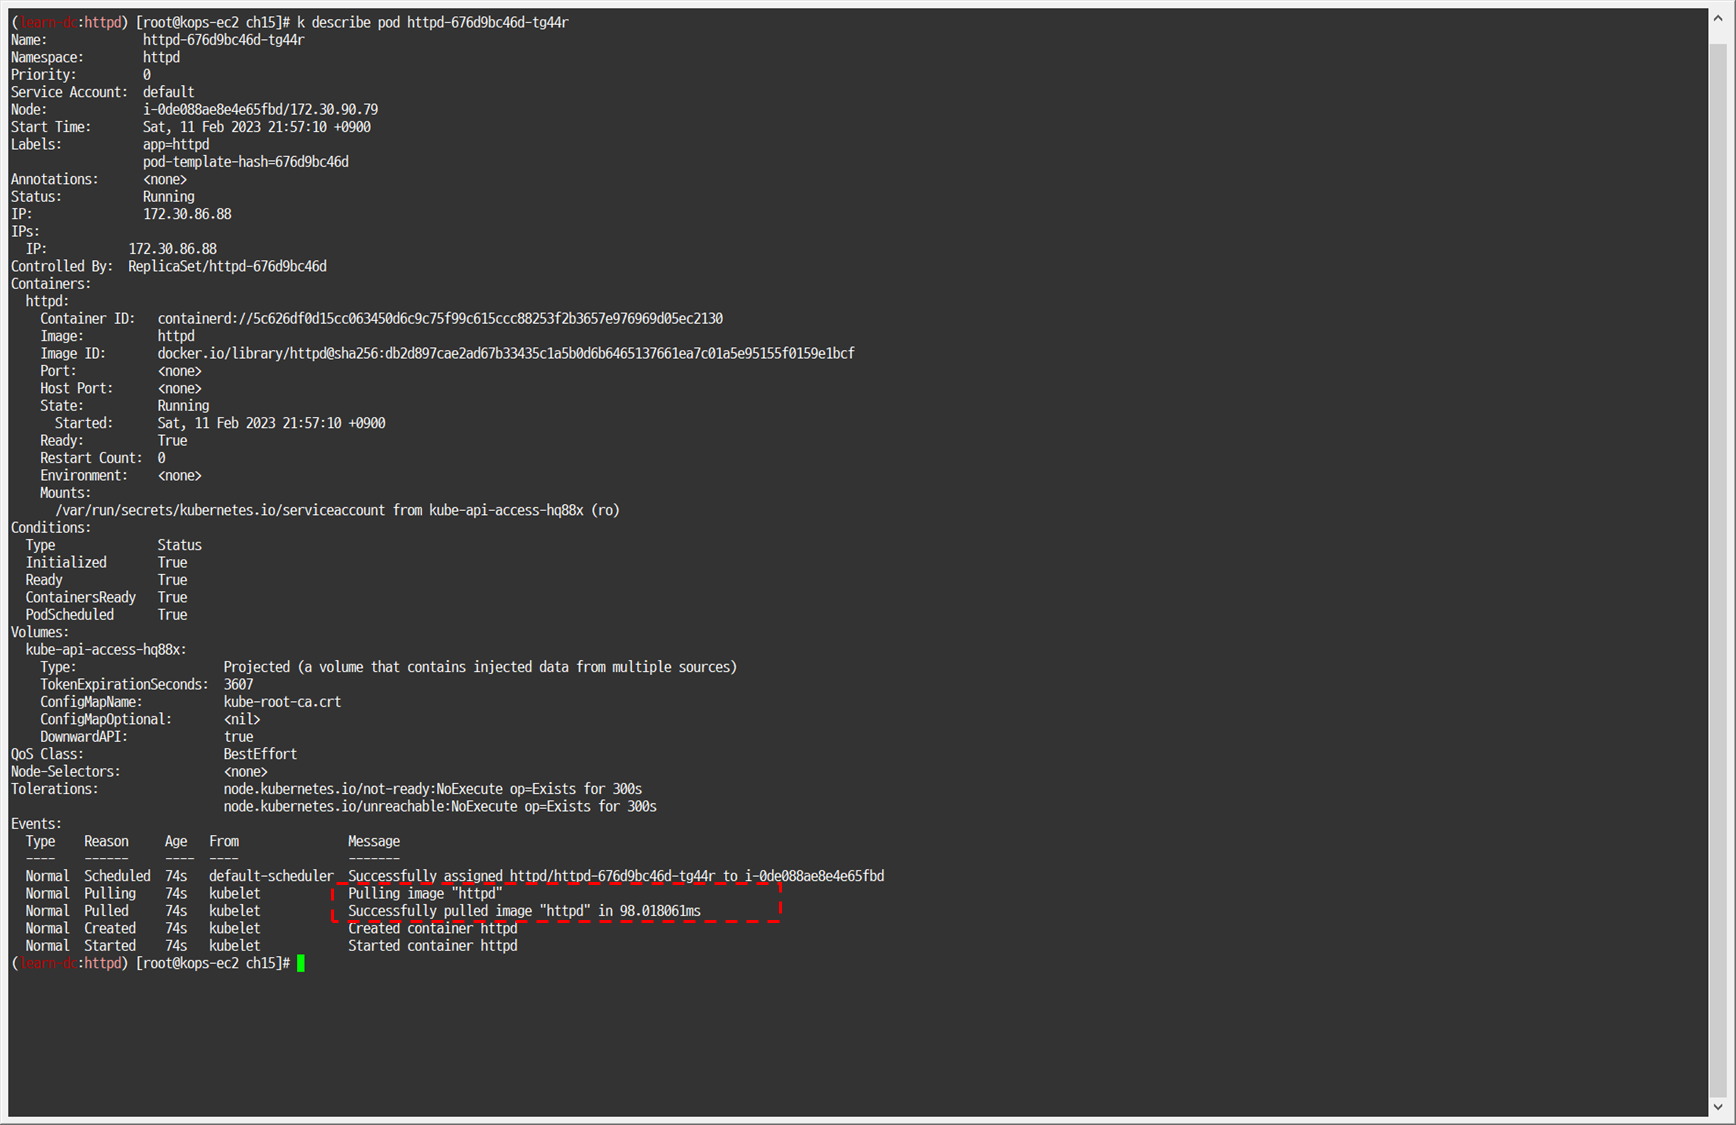
이미지 버전이 httpd-alpine에서 httpd로 변경됨
-
1k describe pod httpd-676d9bc46d-tg44r
-
-
헬름 차트 설정의 서비스 타입
-
1
2
k ns rabbitmq k get svc
-
-
레빗엠큐 헬름 차트는 깃랩 저장소 디렉터리에 존재
-
1
2
3
4
5
6
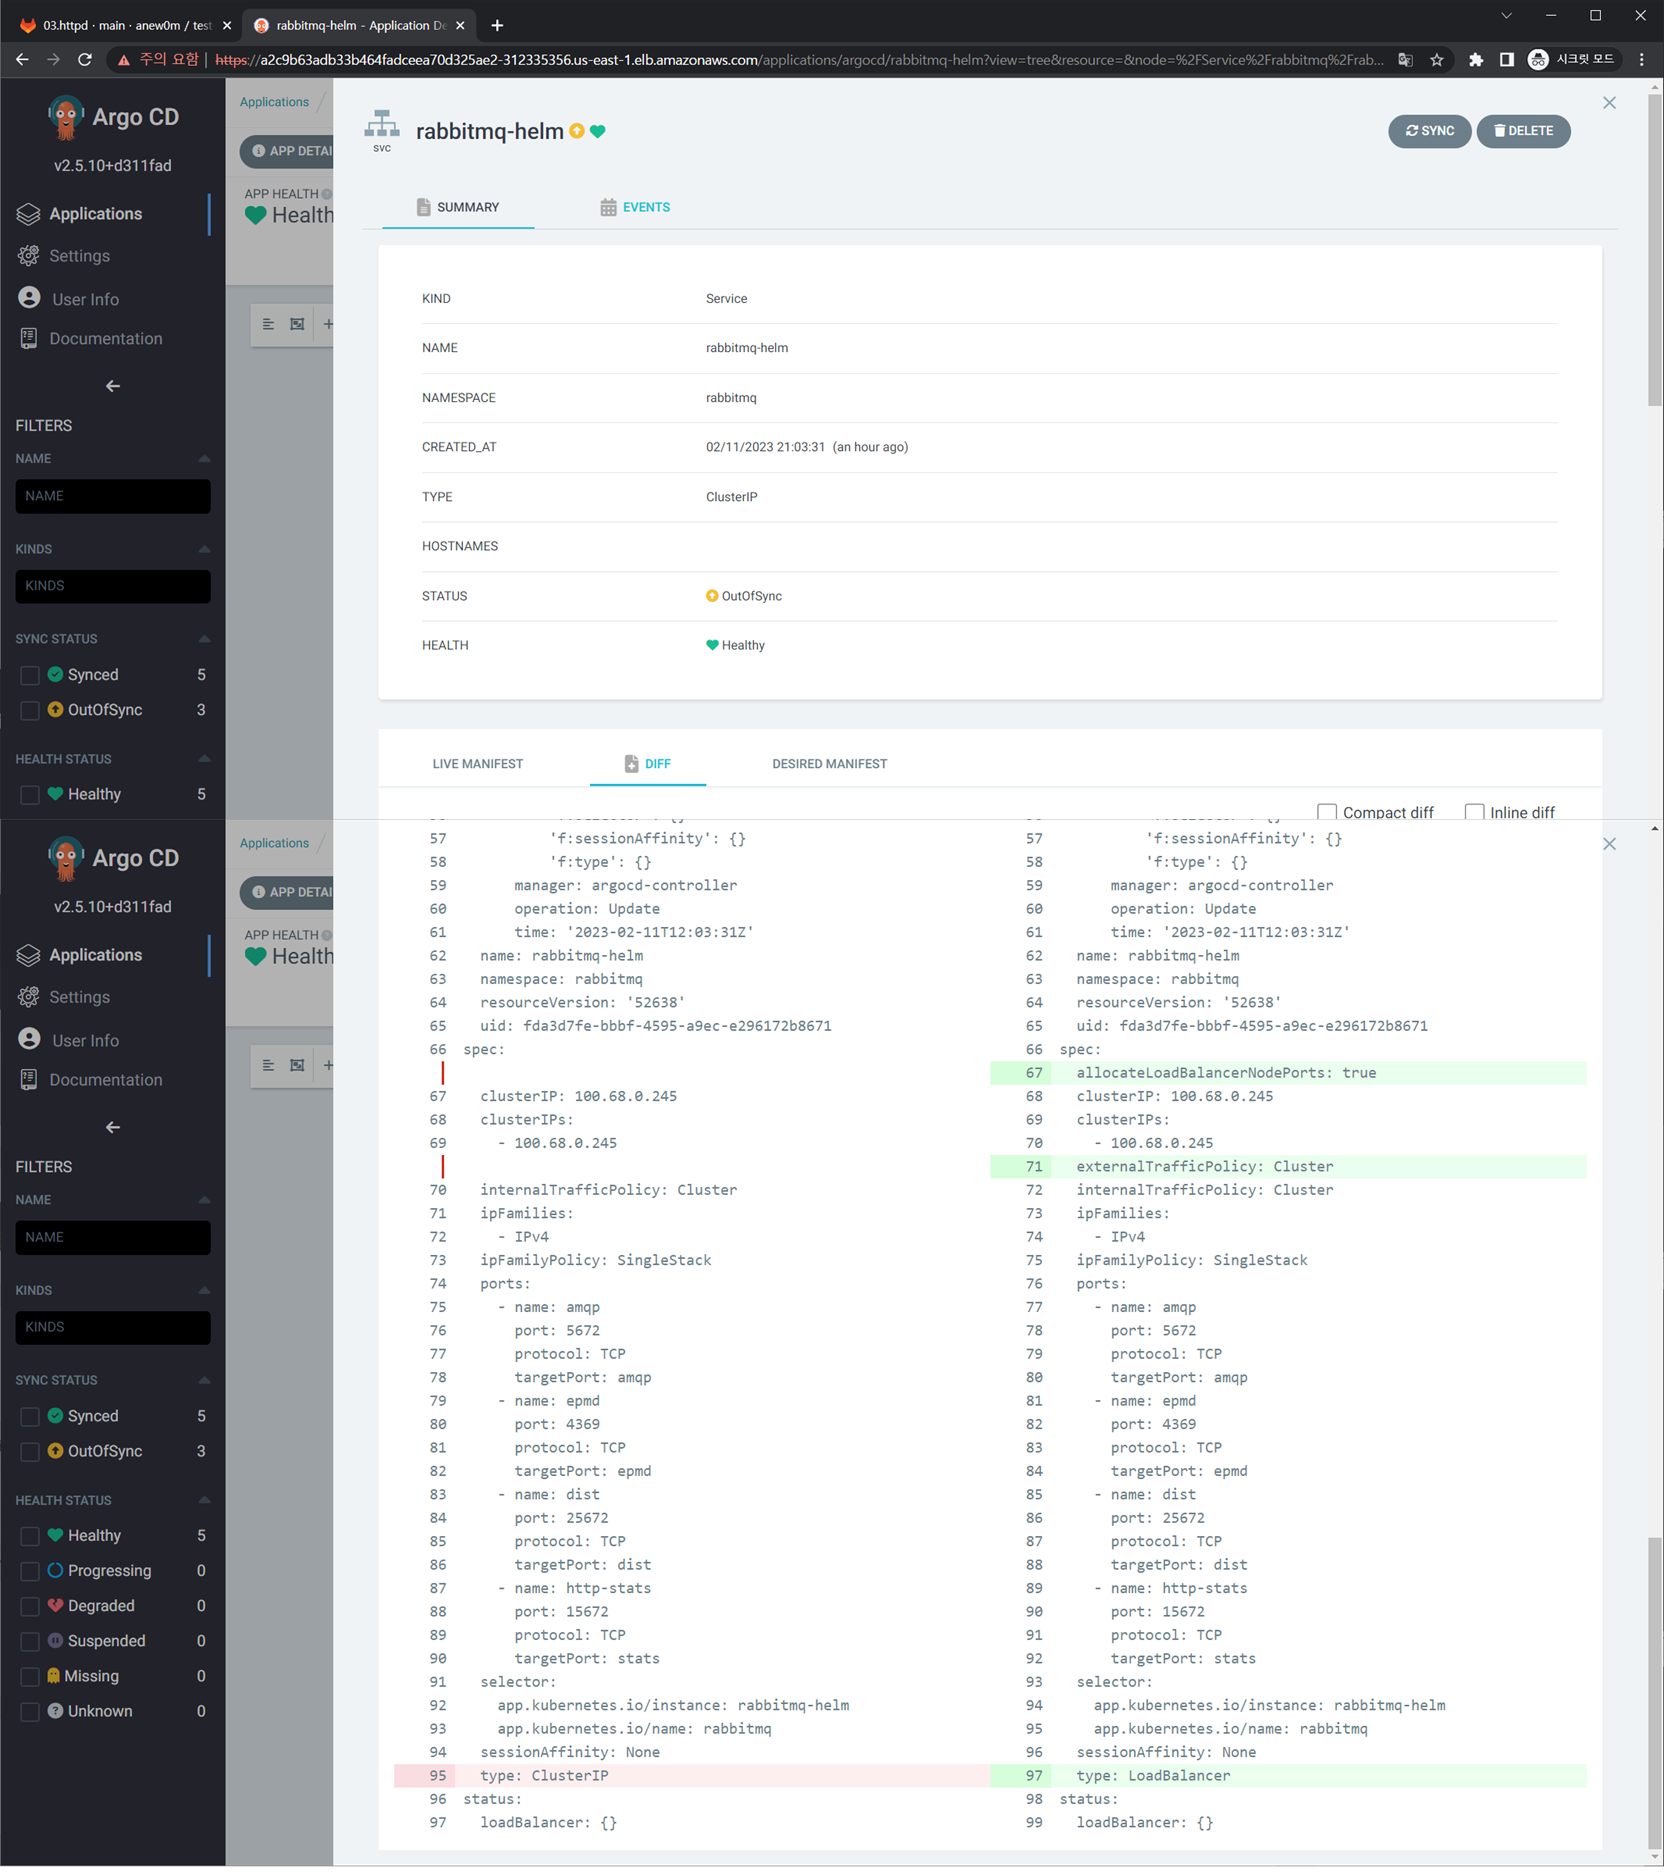
cd ~/gitlab-test/test-stg/rabbitmq/ vim my-values.yaml # ... # service: # type: LoadBalancer # 939줄 # ...
-
-
파일 수정 후 이전에 생성한 깃랩 저장소에 업로드
-
1
2
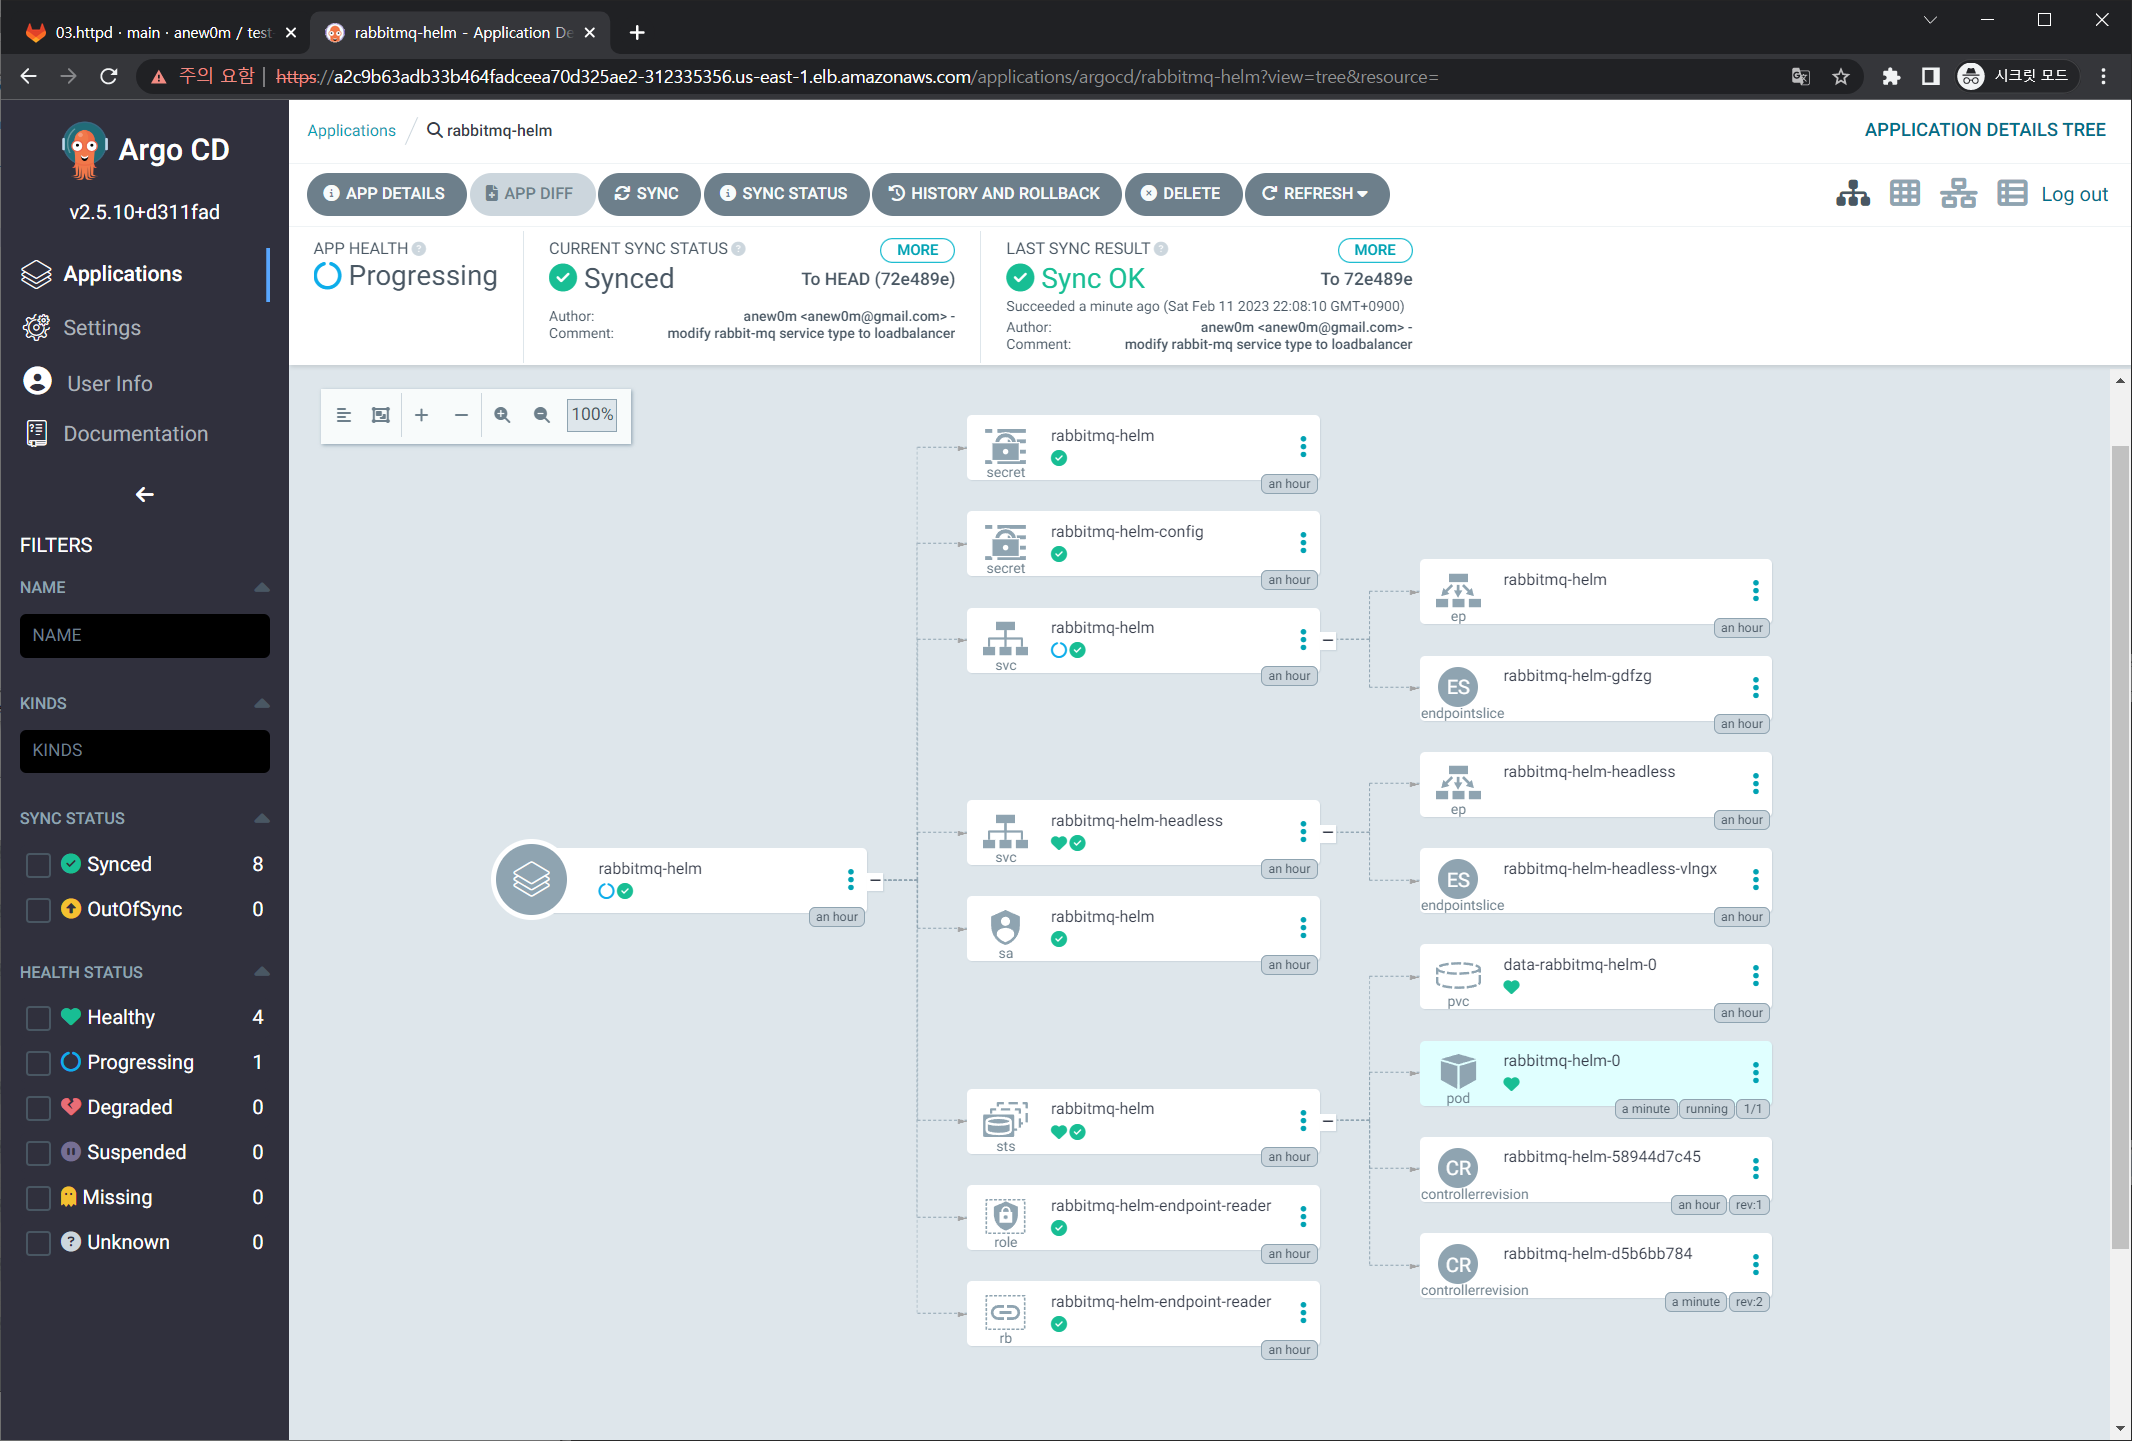
git add . && git commit -m "modify rabbit-mq service type to loadbalancer" git push
-
-
서비스 타입 확인
-
1k get svc
-
-
5. (실습 완료 후) 자원 삭제
5.1 헬름 차트 삭제
-
argocd 삭제
-
1
2
3
kubectl delete application.argoproj.io -n argocd rabbitmq-helm helm uninstall -n argocd argocd kubectl delete ns argocd
-
-
gitlab 삭제
-
1
2
3
helm uninstall -n gitlab gitlab kubectl delete pvc --all -n gitlab kubectl delete ns gitlab
-
-
harbor 삭제
-
1
2
3
helm uninstall -n harbor harbor kubectl delete pvc --all -n harbor kubectl delete ns harbor
-
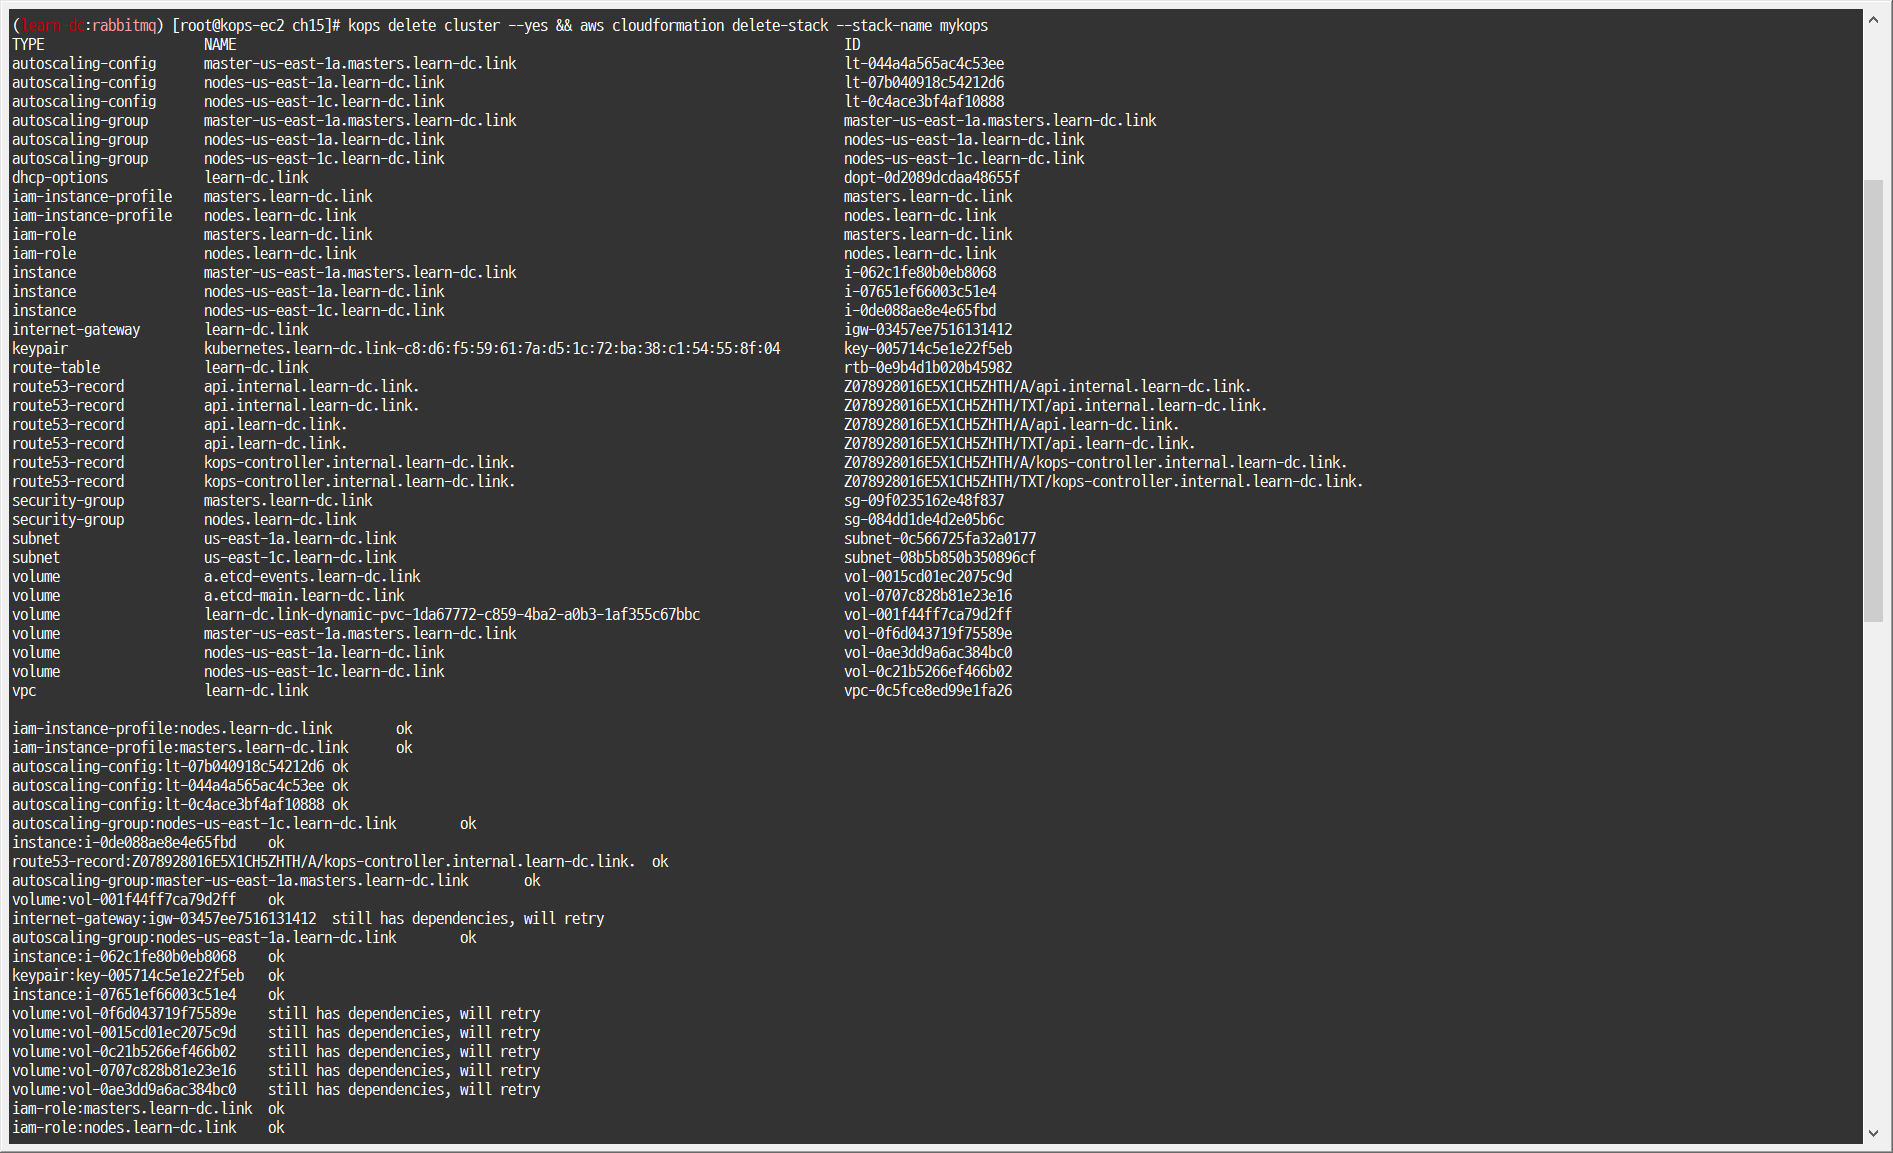
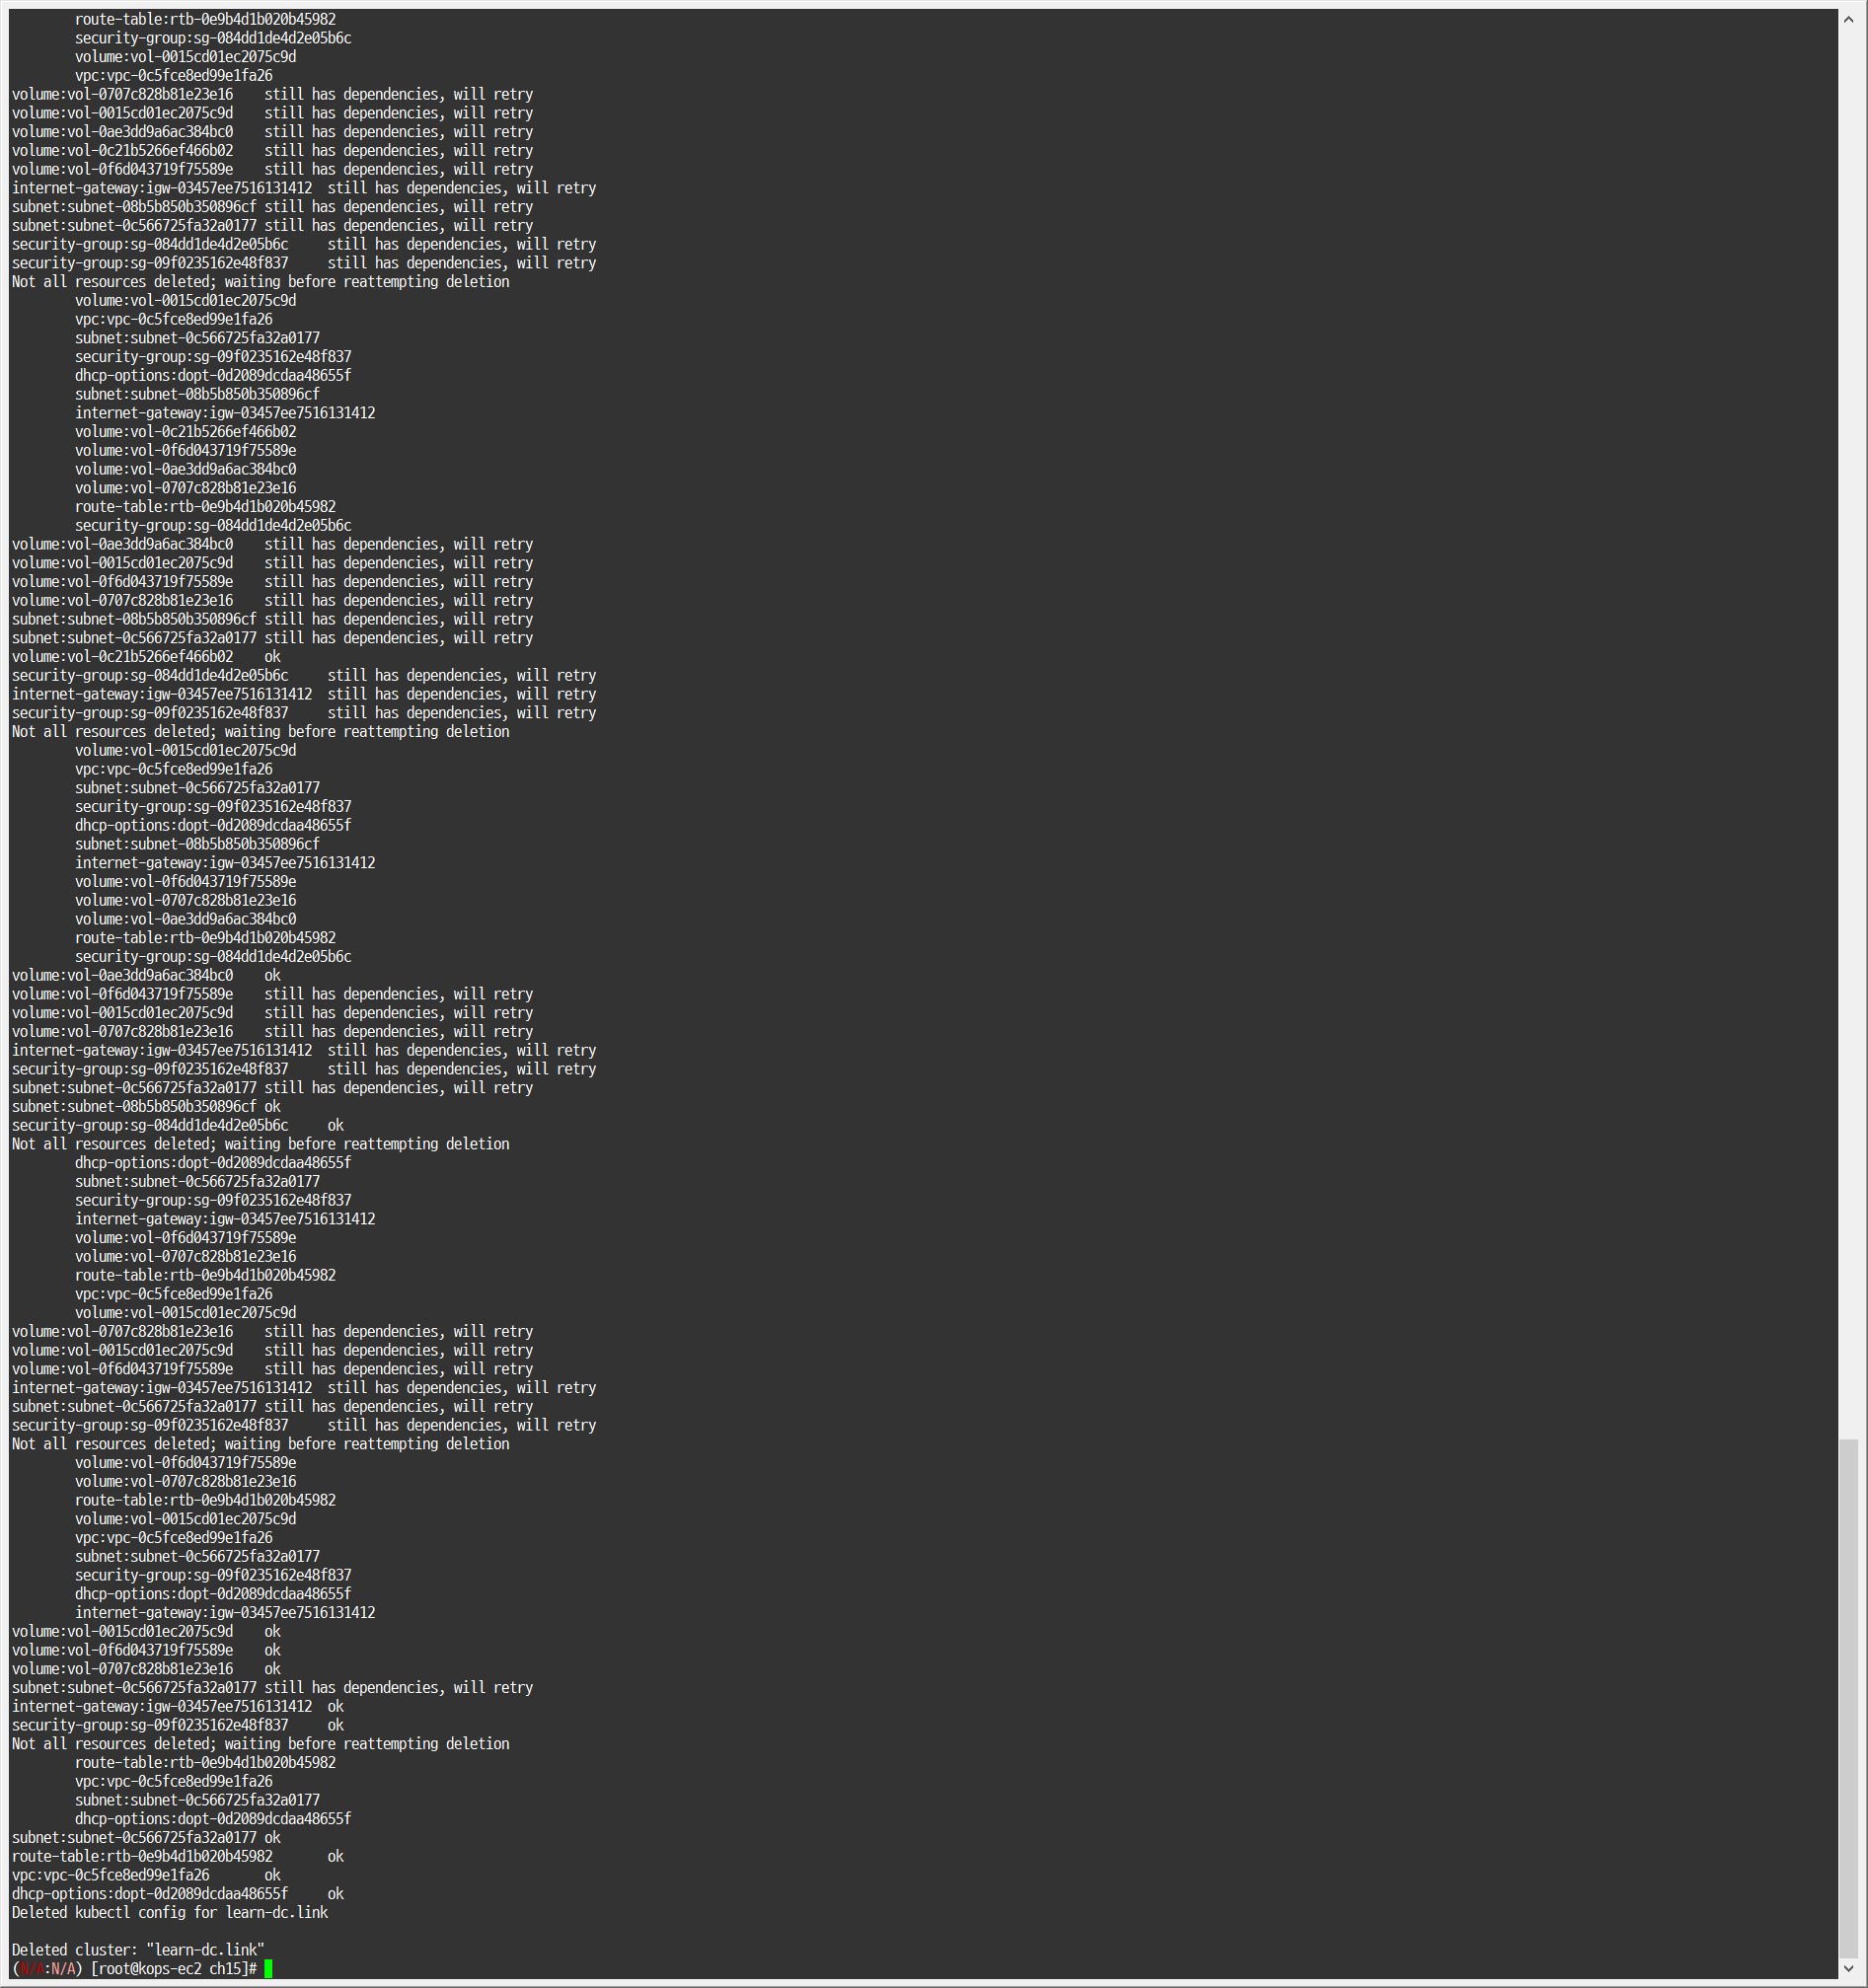
5.2 kOps 클러스터 삭제 & AWS CloudFormation 스택 삭제
-
1kops delete cluster --yes && aws cloudformation delete-stack --stack-name mykops
